Learning to reverse a sample in Ableton is a quick and easy way to spice up your productions.
It has several creative applications, but it is most commonly used to help create seamless transitions between various sections of your song.
With that said, let’s get straight to it.
You Will Need
- A copy of Ableton Live (I am demonstrating this in Live 10 Suite, but the reverse function is the same in Ableton 11)
- An audio file to use as your “sample.”
How To Reverse A Sample In Ableton
Step 1: Select Ableton’s Arrangement View
To get started, you will need to ensure you are working in Ableton’s arrangement view.
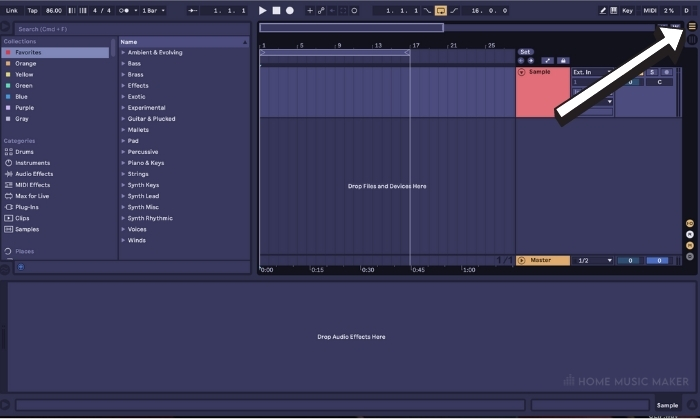

You can toggle between session and arrangement view by clicking either of the two icons at the top right corner of your screen (The icon with three horizontal lines selects the arrangement view).
Step 2: Create An Audio Track
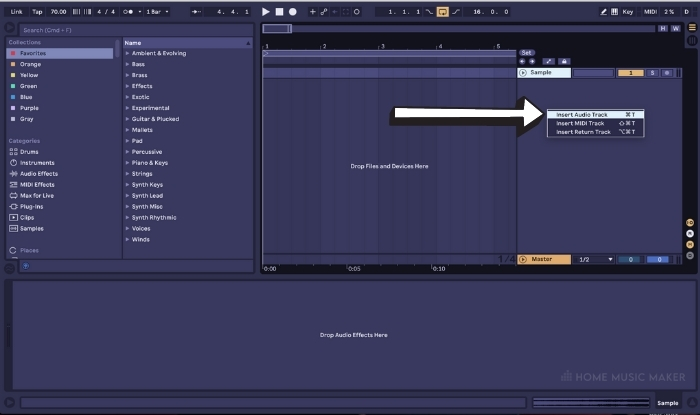
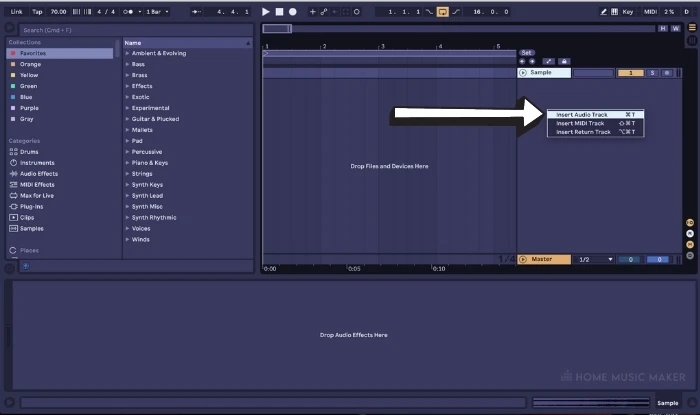
Once you are in arrangement view, you will need to load a sample into an audio track.
If there are no audio tracks in your current project, you can create one by either right-clicking underneath the name of an existing channel on the right side of your screen.
Step 3: Import Your Sample
Now that you have created a fresh audio track, you can import the sample you wish to reverse by simply dragging and dropping it into the channel strip.
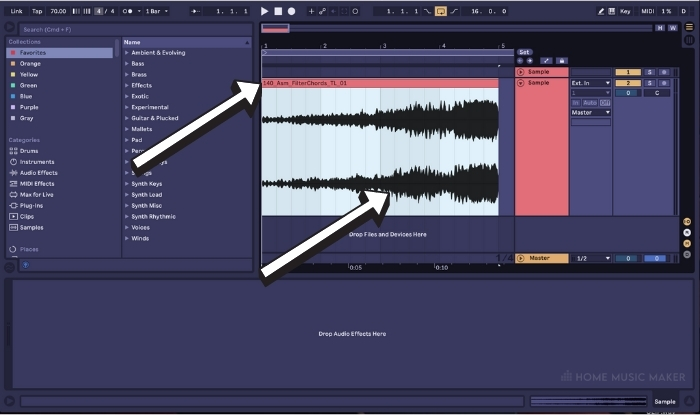
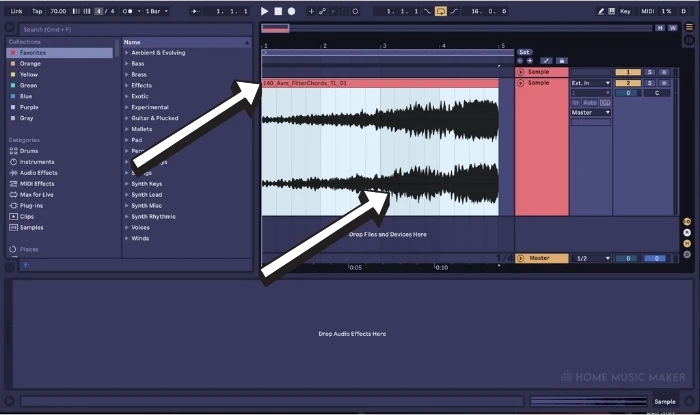
You will see both the name and waveform of the newly imported audio file appear once it has finished loading in.
Step 4: Warping The Sample
To begin warping it, you will need to double-click the top bar where the name of the audio file appears.
This will open a whole new window that allows you to control Ableton’s audio clip warping parameters, including tempo, pitch (transposition), volume, detune, warp mode, and reverse.

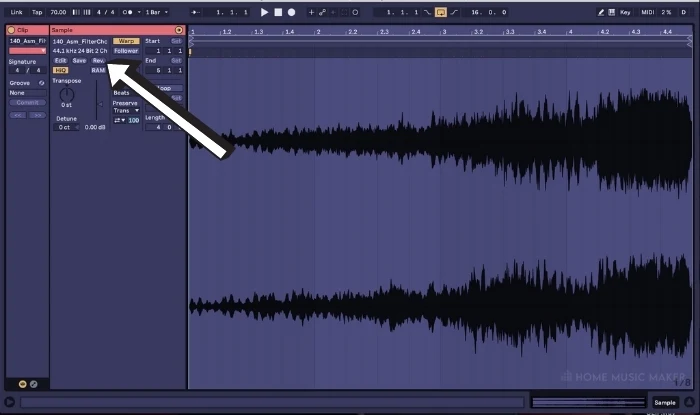
The reverse (Rev.) function is located on the left-hand side of this window, just above the “RAM” button and volume slider control.
Step 5: Reversing The Sample
All you need to do is click the button entitled “Rev.”
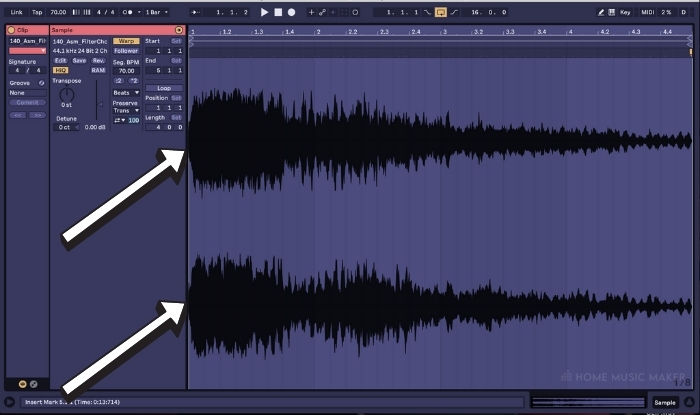

You will be able to see and hear that the sample is now in reverse!
Now that you have successfully reversed the audio, it is ready to be used in whatever creative way you desire.
Arrange it in different ways, transpose it, experiment with varying warp modes, and have fun implementing this cool effect into your next tune!
Practical Reversing Applications
Personally, I love using this technique in three main ways.
Reversing A Hat Sample
Reversing a hat sample and arrange it so it “swooshes” into the snare of my track (this gives the snare more impact and can also contribute to the overall groove of my drums.)
Reversing The Reverb Tail Of A Vocal Sample
This is perfect for introducing the vocals to the listener a few bars early, which builds some subtle anticipation that a change in the tune is coming without feeling too forced or abrupt.
Reversed Impact Effect
Reversed impact effect to help fill out a build-up or important transition within my tune.
The slow-drawn-out release of the impact sample works excellent when it’s reversed to flow into the next bars of your new section!.
Related Questions
Can You Reverse A Sample Without Warping It?
Yes, a sample can be reversed without being warped or tempo matched to the master tempo of your Ableton project. In many cases, it can be advantageous to warp it to fit better, but that can ultimately be a creative choice you can make depending on what kind of sample it is.
Can you reverse a sampler in Ableton’s Sampler?
Yes, a reverse function built into Ableton’s sampler allows you to achieve the same effect.
How do you achieve a reverse reverb effect in Ableton?
You will need to apply a reverb of your choice to an audio or midi sample. A new audio track needs to be created (shortcut – command T on mac / Ctrl T on PC) and armed to record the signal coming from the channel on which you are using the reverb. Once you have recorded the sample with the reverb on it, you must manually chop the reverb tail (the sustained portion created by using the reverb with a high decay time). When you have chopped off your reverb tail, you can consolidate it (highlight it and press command J / Ctrl J) and reverse it the same way you would with any sample.
Can you reverse a MIDI clip?
You cannot reverse a MIDI clip, but any MIDI track within your project can be recorded into an audio track and reversed as an audio clip.
Ableton shortcuts guide?
This is something worth familiarizing yourself with, even if you aren’t a relatively new Ableton user. Keyboard shortcuts help you work faster, which allows you to get ideas down more efficiently.
How do you get stereo spread or widening on specific frequencies?
My preferred way to do this these days is by using Ableton’s stock Delay plug-in. You can create an exact stereo width by using the correct delay setting (typically a very short/tight ping pong delay with little feedback). There is a built-in filter that allows you to affect whatever specific frequency range you want.
Can you add audio effects to only one layer?
You definitely can as long as that layer has its own dedicated audio channel when processing it.