Creating an octave effect in Ableton after recording requires you to duplicate the track and pitch the duplicate audio clip down or up by 12 semitones. You can also use a free third-party plugin like Pitchproof to get this effect in real-time.
Octave Effect In Ableton
So, you want an octave effect in Ableton?
Maybe you want that classic White Stripes sound or the roaring bass guitar effect used by Royal Blood.
Whatever your desired application, this article will answer any questions you have.
We’ll explore how to create the octave sound in real time and after recording. I’ll also recommend an excellent free third-party plugin to help with this.
How To Create An Octave Effect In Ableton
There are a couple of ways to go about this. The cleanest and best sounding way in Ableton would be to do the effect after recording.
Create An Octave Effect After Recording
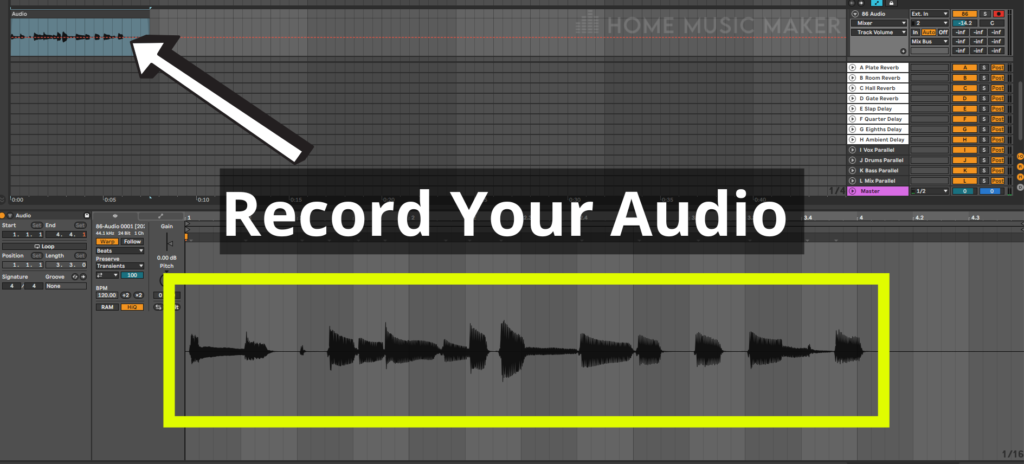
Step 1: Record your audio signal. I am using a bass guitar to record with through an amplification audio effect rack.

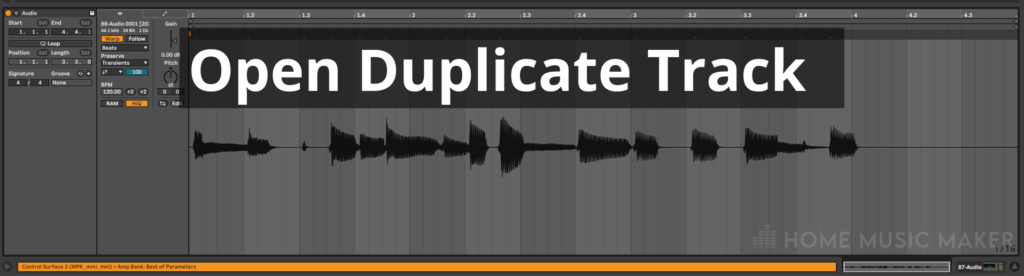
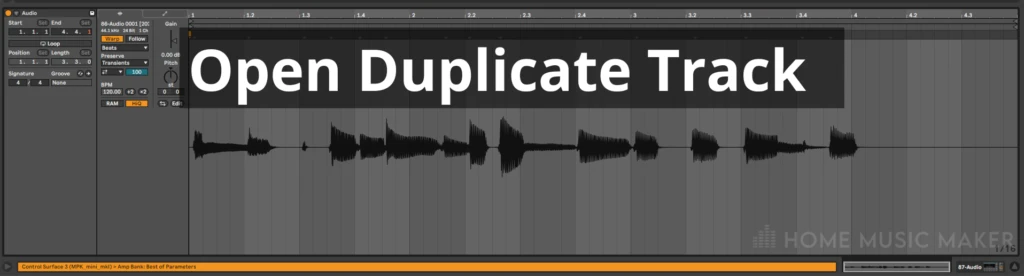
Step 2: Duplicate the track by pressing Ctrl+D while selecting the track head.


Step 3: Double-click on your duplicate audio clip to bring up the clip view.
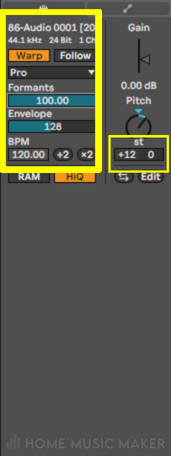
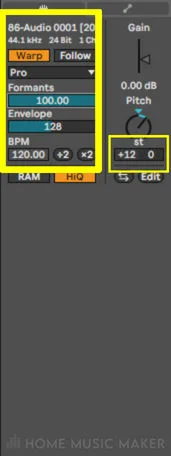
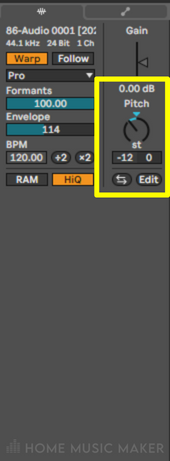
Step 4: Now for the pitch change.
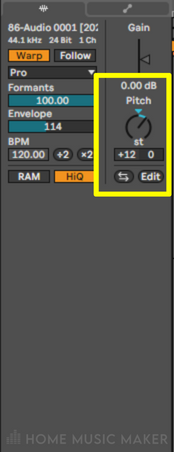
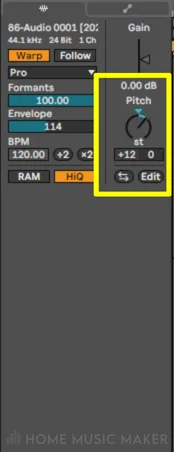
Make sure that Warp mode is selected. I recommend using the Complex Pro Warp mode, as this has the most options for sound design.
Since I recorded bass, I want to get the octave above. So I pitched up my duplicate track by 12 semitones.
You can play about with the formants and envelope values to find what suits your bass audio better—for mine, keeping the formants at 100 and taking the envelope down to 114 suited the sound and style best.
You can blend the original and duplicate tracks to create the desired sound.
Step 5 (Optional): This step can be skipped, as you now have an octave sound, but you can further shape the sound of the octave up using EQ Three or EQ Eight.
I prefer EQ Eight, as it has a graph, and I can be more specific.
I have removed some low frequencies on the duplicate track, as the main bass sound provides this.
I also noticed some unpleasant sounds around 516Hz, so I notched out a wide bell of -5.83dB. This just made the duplicate signal blend better with the original.
Of course, you don’t have to stop there. You can apply different effects to both audio clips and get very experimental!
That’s part of the excitement in music production.
Using A Free Third-Party Plugin To Create An Octave Effect
The free third-party plugin I am recommending is Pitchproof, and Aegean Music makes it.
You can download this here.
Once you have installed this, it’s straightforward to use.
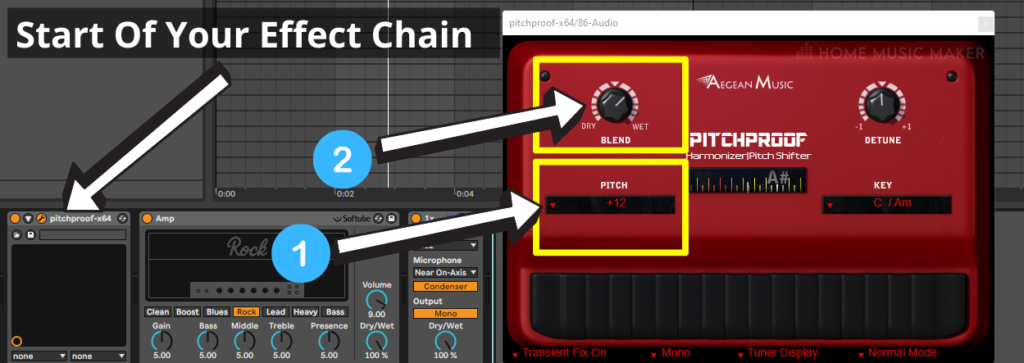
On the track where you have recorded your instrument, in my case, bass guitar, drag Pitchproof onto the track.
I recommend putting Pitchproof at the start of your audio effect chain.
It tends to sound better with both the original and pitched signals being processed together this way.
Open up the Pitchproof plugin, and you can adjust the settings. For my octave bass effect, I will set the pitch to +12 and adjust the blend until I am happy with how it sounds.
You can leave the key and detune settings as they are unless you want some obscure octave effect. In which case, go crazy with the detune value.

You can hear the octave effect as you play along instead of adding it after the fact. You can do more than change the octave; you can also add harmony to your audio signal, whether it’s a synth, a vocal, or anything else.
Have fun with it!
How To Make A MIDI Octave Sweeper In Ableton
Step 1: You can start this with a blank MIDI track; however, I recommend loading up an instrument on the track to check it’s working.
I loaded up one of the Ableton instruments.

Step 2: Go into MIDI effects in the left-hand sidebar.
Find the MIDI effect called pitch and drag it into your MIDI track.
Now duplicate this MIDI effect six times (Ctrl+D), so you have seven-pitch effects. The reason it’s 7 is that we are going to create a MIDI octave sweeper that can go 3 octaves up and 3 octaves down.


Step 3: Group these pitches by selecting them all and pressing Ctrl+G.
To view the macro knobs, press the small macro icon underneath the on/off button.


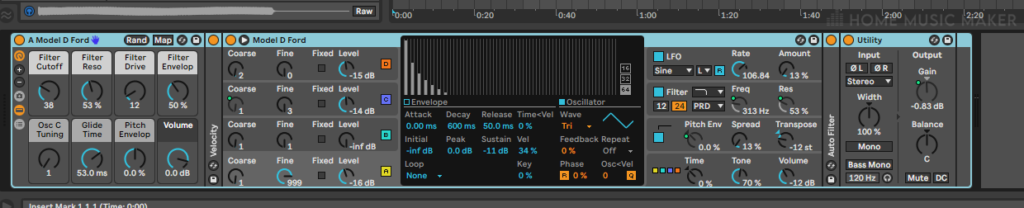
Step 4: We shall now set each pitch effect to different octaves.
I have set them from -36 semitones (-3 octaves) to +36 semitones (+3 octaves), with intervals of 12 semitones (1 octave).


Step 5: Click on the map button to activate micro mappings.


Set the on/off buttons on each pitch effect to Macro 1.


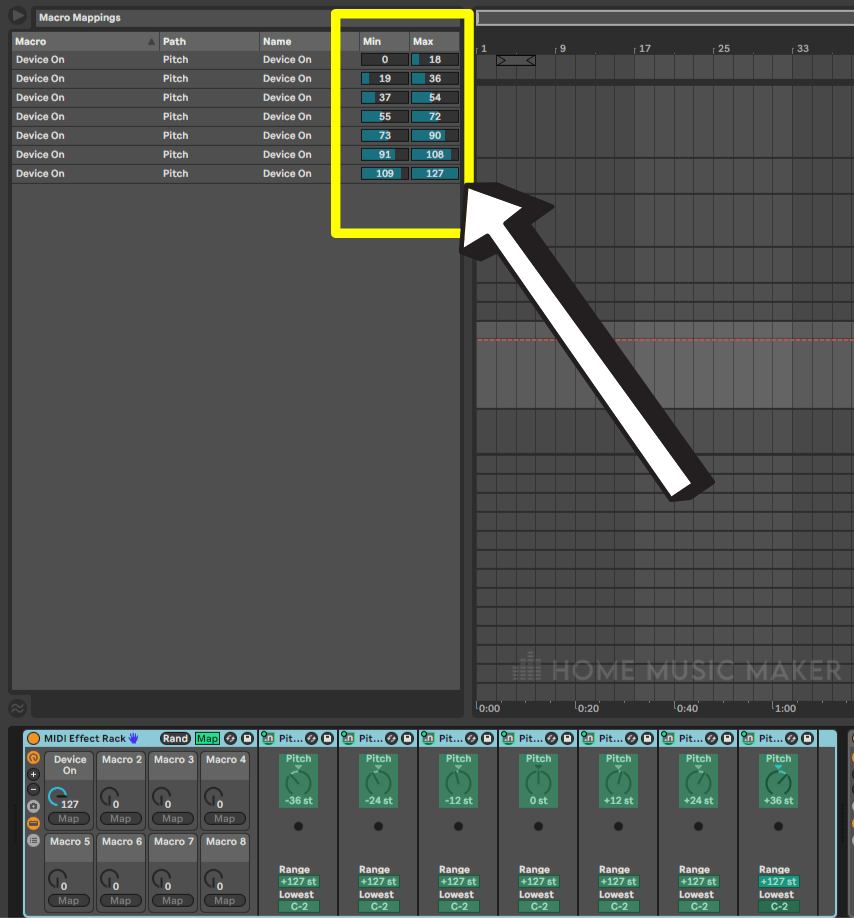
Step 6: If you look at the macro mappings, there are minimum and maximum values for each. We need to change these so that as we go through the values of the macro, we turn on different pitch effects.
We have seven-pitch effects and a range of values of 128. Therefore, we must divide 128 by 7 to find out how to share the values across the pitch instances.
This rounds down to 18.
So we shall adjust the minimum and maximum values in intervals of 18, as shown below.
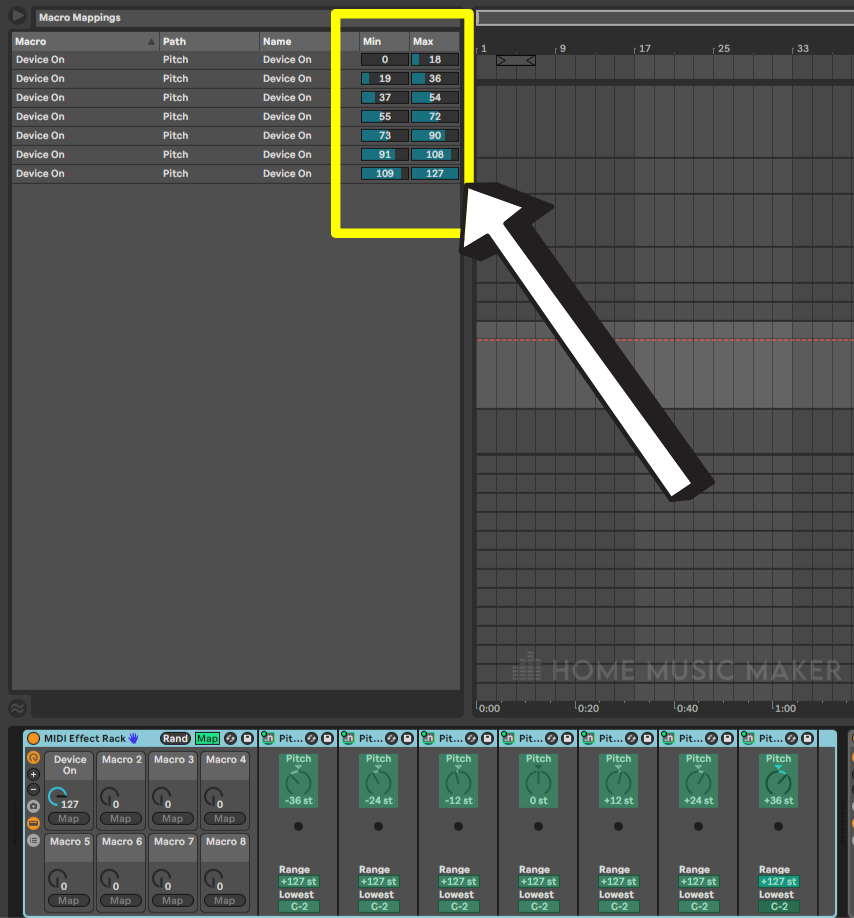
Step 7: Come out of macro mapping by clicking the map button.
The effect will now work, so test it out.
As you increase the macro value, the octave shall increase, and vice versa.
Let’s clean it up a little.
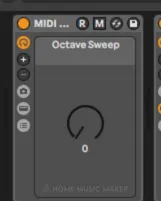
First, click on the macro and give it a name. I’ve chosen “Octave Sweep.”

Next, let’s eliminate the macros we don’t need by using the minus button on the left.
Finally, save the MIDI effect rack by clicking the floppy disk icon in the top right corner of the MIDI effect rack.
How Do I Change An Octave In Ableton
This is very simple. For MIDI, double-click on the MIDI clip to bring you to the piano roll.
You can then highlight every MIDI note and drag them up or down an octave.
You can also use your arrow keys to move it by semitones, so you can change the octave by pressing the up or down arrow 12 times while each note is highlighted.
For audio, double-click on the audio clip to bring up the clip view.
Make sure that Warp mode is on by having the Warp button yellow.
Choose your warp mode. I recommend either Complex or Complex Pro for this application.
Check the following article for an in-depth comparison of Complex Vs. Complex Pro.
How To Go Up An Octave In Ableton
To move your audio clip pitch up an octave, increase the pitch by 12 semitones. For higher octaves, continue increasing by 12 semitones.
How To Go Down An Octave In Ableton
To move your audio clip pitch down an octave, decrease the pitch by 12 semitones. For lower octaves, continue decreasing by 12 semitones.

Is There An Octave Plugin In Ableton?
Unfortunately not. You can get more options by using Max for Live and even creating an octave plugin from scratch.
But as a stock plugin, there is no option.
The closest thing to it would be the Frequency Shifter. This allows you to change the pitch of your audio signal but by frequency rather than semitones.
It doesn’t behave in the same way as a pitch shifter, so you won’t be able to get a clean octave effect. But it can be a powerful tool in general music production, for example, by using it to change the tone of a drum.
Related Questions
How Many Semitones Does An Octave Have?
There are 12 semitones in an octave.
What Is Pitch Shifting In Music?
Pitch shifting is where you change the pitch of a note. For example, if you play a C note on the piano, then increase the pitch to a C#. This is also called transposing.
How Do You Quantize In Ableton?
This is done the same way for MIDI clips as for audio clips. Double-click on the clip to open up the clip view. From here, press Ctrl+U/Cmd+U. This will quantize the MIDI or audio. To change the amount of quantizing, press Ctrl+Shift+U/Cmd+Shift+U to bring up the quantization settings.
Does Ableton Have A Pitch Shifter?
Yes and no. It doesn’t have a plugin that does it in real time. However, once you’ve recorded something, you can view the audio clip in clip view and change the pitch there. This feature’s flexibility in Ableton is by far the best out of the other DAWs.
Why Should You Use Templates?
Templates are a great time saver. I have multiple ones for different scenarios. If you find yourself reaching for the same plugins and structure in your Ableton projects, then creating a template based on this means you’re not wasting time repeating yourself.
For another excellent guide, check out this next Pitch Shifting in Ableton article.