In this article, I explain how to change the pitch of a sample in Ableton Live in a few simple steps.
Step 1: Transpose
To see the transpose and detune functions, it helps to click on an audio sample on an audio track.
I left-click on the sample twice in the arrangement view and notice in the clip view below that there is a transpose (1) and detune (2) option for the clip.
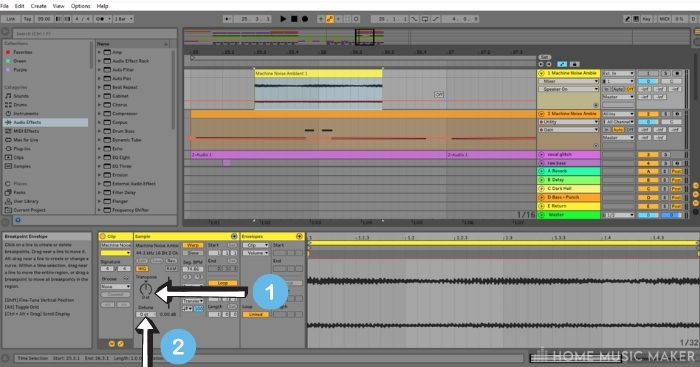

The transpose knob allows for pitch shifting an audio clip up to forty-eight semitones above or beneath the original audio sample’s pitch.
The detune function allows you to tune the sample between semitones by 50 degrees (called ‘cents‘).
So if you set the detune dial to 25ct, your sample will be tuned halfway between the current semitone and the next higher semitone.
You can use the transpose and detune dials to tune an element (say, a kick drum sample), although there are many ways to use these functions.
Step 2: Use The Warp Functions
For this example, I have transposed my sample up by 12 semitones. However, when you change the pitch of a sample, sometimes this results in unwanted tempo changes.
To fix this, you need to transpose the sample with the warp mode set to on and then cycle through the warp algorithms to find one that naturally pitch shifts the sample.
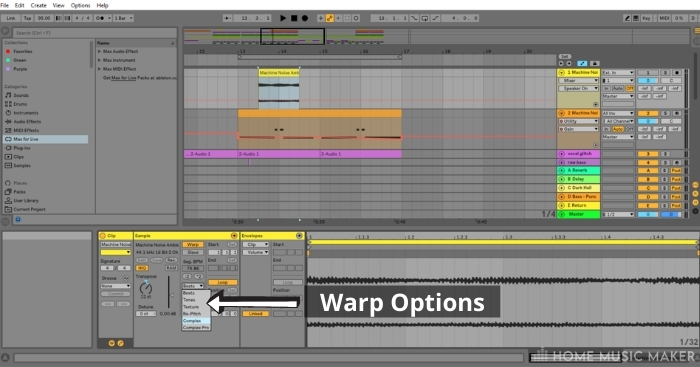
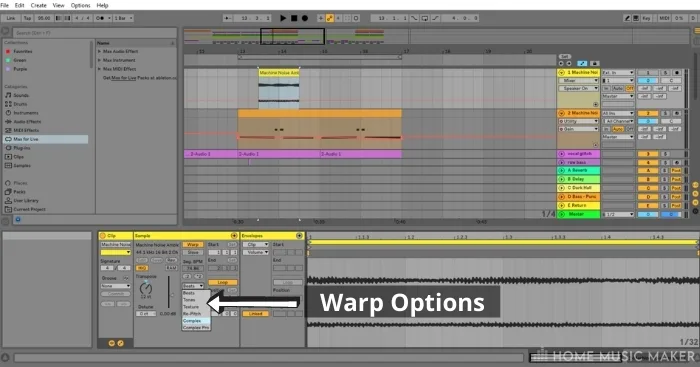
Depending on the type of sample, the algorithmic choice may differ.
For example, beat samples tend to be pitched and warped more successfully with the beat algorithm. Ambient and tonal samples pair well with the tones algorithm, whereas harsher/noisier sounds pair better with the textures algorithm.
The complex and complex pro algorithms are best used for a vocal sample.
It is best to cycle through these algorithms and listen to the repitched sample to see which warp algorithm produces the desired result within your expected tempo.
Step 3: Check The Pitch
Apply Ableton’s Tuner Effect to the track with the sample that you have just transposed.
Then playback the sample and check the pitch using the Tuner.
As you can see in the screenshot, my sample is too sharp.
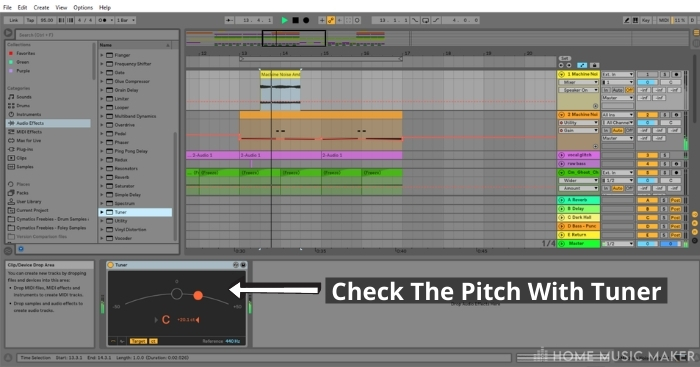

I want to make sure that the sample sits at C.
Step 4: Adjust The Pitch Using The Detune Function
To adjust the sample, double-left-click on the sample to see the clip view.
Using my sample as an example, I know that the sample’s pitch is in the vicinity of C. Therefore, I do not want to transpose it to any semitone above or beneath.
Instead, I want to slightly pitch shift the audio sample to make it flatter to get closer to C.
To do this, I left-click and hold down on the mouse button on the Detune Screen and pull down on the mouse to lower the sample’s pitch by a matter of cents instead of whole semitones.
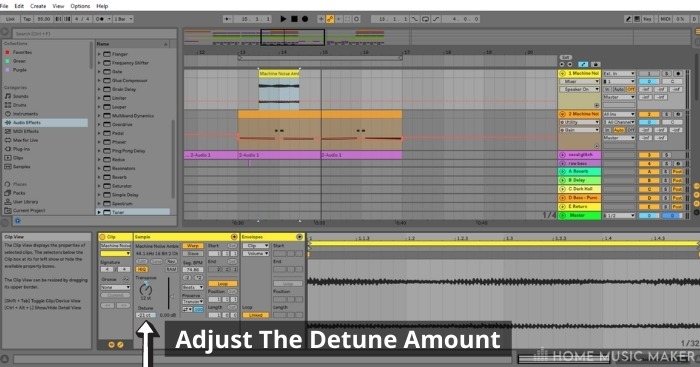
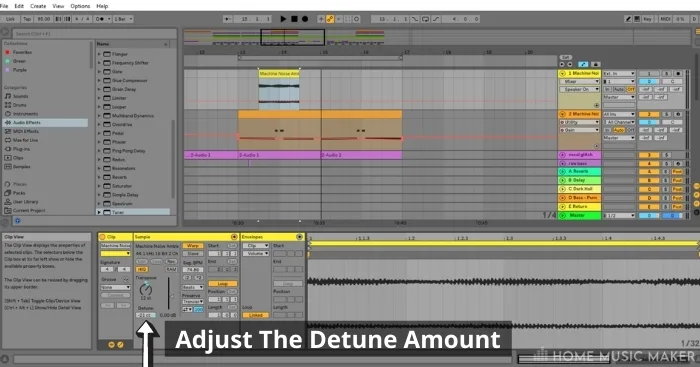
In this instance, I needed to go quite low to reach my desired pitch.
As you will see, I detuned the sample by minus 21 cents.
To check the sample’s pitch, left-click on the Device Viewer Selector down the bottom right of the screen to see the track’s effects.
There we find the tuner effect that I loaded up.
Go ahead and playback the sample to check its pitch by playing back the sound.
It may take a few rounds of adjusting, using the detune option on the sample clip, but you will get there. See… Much better.


FAQ – How To Change The Pitch Of A Sample In Ableton
How do you change the octave of a sample in Ableton?
To change the octave of a sample in Ableton, transpose the sample up by 12 semitones like I have done here in this example.
How do you change the key of a song in Ableton?
If you want to change the overall key of a song in Ableton, you can upload the whole song as a WAV file into Ableton and then transpose it. For example, if the music is in the key of C, transposing it up two semitones will change the key to D. This sounds easy, but it does not work all the time. Depending on the scales of the song, it may be hard to accurately change the key of the song just by transposing it. To change the song’s key properly, you may need to rework the song’s central musical theme. The key is based on (such as the bassline or chord progression) and rebuild everything around it (including drum samples, which depending on your style of music, may also need to be repatched and tuned using the steps given here).
Which sampling instrument is your sample in now?
None, I am just adjusting the raw sample. Sometimes I find it helps to repitch a sample to the desired pitch and then consolidate it (by clicking on the clip and pressing Ctrl-J) before loading the sample into a sample instrument like Ableton’s Simpler.
How do you change the pitch of a sample but not the time?
Ah, see – this is the issue many of us face when we transpose or detune a sample. To ensure that the sample’s time (e.g., tempo) does not change, you must make sure that you transpose the sample with the warp function. Then you choose the warping algorithm that best suits the type of sample. You will notice that some warping functions keep the repitched sample in a much closer tempo than others.
How do you modulate pitch in Ableton?
Select the clip that you want to modulate. In the envelopes box on the Clip View, select the drop-down menu from the Control Chooser and select Transposition Modulation. Set your automation points. This, in a nutshell, is how you modulate pitch in Ableton.
How do you go down an octave in Ableton?
Similar to the last point, but transpose your sample down 12 semitones instead.