KEY TAKEAWAYS:
For backing tracks only, an audio interface with one output is needed. You will also want a MIDI controller to use Ableton as a virtual instrument. You will need more inputs in your audio interface to use Ableton as an audio effects processor. It would be best if you had a separate output on the interface to have an in-ear monitoring system.
Performing Live With Ableton
Are you considering introducing your favorite digital audio workstation, Ableton Live, into your live performance setup?
Do you need help figuring out where to integrate this into your live performance setup?
While it can seem daunting, you’ll elevate your performances to another level once you’ve got the hang of it.
In this article, I will discuss why even use Ableton for live performances, the most basic way of using Ableton, and more scenarios of how to use Ableton for this. On top of that, I’ll list the hardware required for each method.

Why Use Ableton For Live Performance?
Ableton is a unique digital audio workstation designed with both creating and performing music in mind. This is why there is a session view and an arrangement view.
The session view is created with live performance as the template; however, you can use the arrangement view if you’re more comfortable. You can have straightforward setups for performing to a complicated and more involved live performance set.
Using Ableton for live performances will allow you to perform in any way you can imagine; it is super reliable and has fantastic built-in effects.
Plus, if you’re like me and produce music in Ableton, performing live with it is an effortless transition.
READ NEXT:
Of course, Ableton isn’t the only software for live performances. Check out our article on Ableton Live versus Mainstage to make up your mind.
Using Ableton For Backing Tracks
Playing backing tracks is the simplest way to use Ableton for live performance. It only requires one track and minimal setting up.
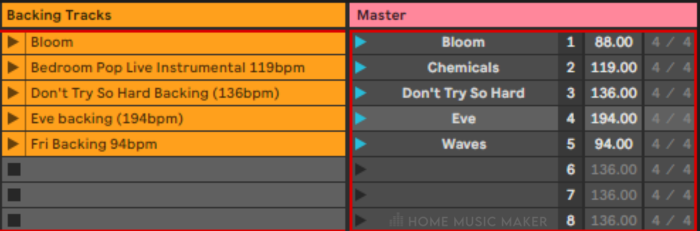
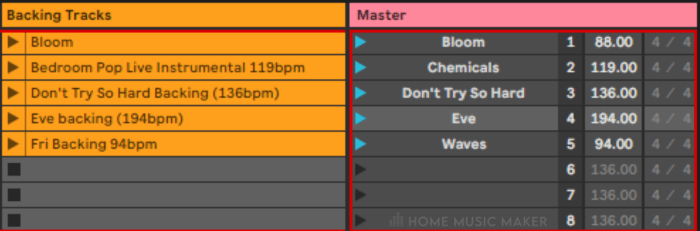
Go to session view, and ensure there is an empty audio track. Here we will load our backing tracks into empty clip slots.
Let’s create enough scenes for the number of songs we want to perform. You can add a new scene by pressing CTRL + I/CMD + I. These rows allow us to set each song’s time signature and tempo without automating them in the arrangement view.
To organize your scenes, you can rename the scene on the master track by pressing CTRL + R/CMD + R while the master track is selected.
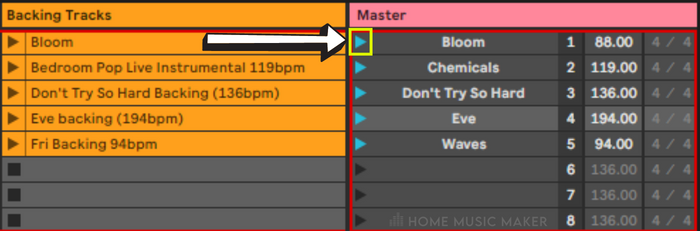
To play these, you have to press the play button on the master track next to the name of the scene or press Enter while that scene is selected.

Of course, I have a single audio track for one audio clip per song: the backing track. However, you can have multiple clips per song on different tracks in the same scene.
Hardware Required
An audio interface is required, at the very least. To actually play the output of Ableton through the PA system, you will need a minimum of one output, such as the Behringer U-Phoria UMC22.
However, before you decide on the interface, read the rest of this article to see if you need something more for your desired performance style.
A More Involved Live Performance With Ableton
Using Ableton to play a single backing track per song barely scratches the surface of what you can do with this incredible software in a live performance setting.
Firstly, you can have multiple clips per song. For example, having a clip for all the drums, another for bass, etc. This way, you can treat each clip differently or even mute certain parts spontaneously in the middle of a performance.
On top of that, you can record loops live to go along with the track. These can then be stopped and played at any point in the song. You can make loops with live instruments or virtual instruments.
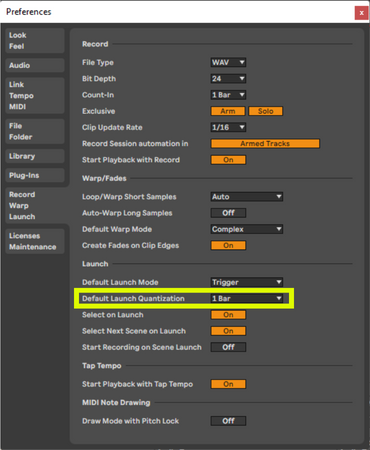

Just make sure to set your “Default Launch Quantization” in the “Record/Warp/Launch” section of preferences (CTRL + ,/CMD+) to 1 bar. This means the recording will stop at the end of the bar when you stop recording the loop.
Hardware Required
You will need an audio interface, just as before, but possibly with more inputs. If you want to loop live instruments, you will need to be able to plug the output of your instrument into the interface.
An excellent interface with one stereo output and two XLR/jack combo inputs is the Focusrite Scarlett 2i2.
Something that could be very fun for you to perform with, too, would be a Launchpad. The Novation Launchpad Mini is my choice, as it’s very inexpensive for what it is, and it allows me to perform with clips in session view more tactilely.
READ NEXT:
Every time you set up a song in Ableton for a live performance, you don’t have to start from scratch each time. Read our article on Ableton templates to learn how to set up one for this scenario.
Using Virtual Instruments Live
Another advantage of using Ableton in your live performances, or any DAW, is having extensive virtual instruments at your disposal to play live.
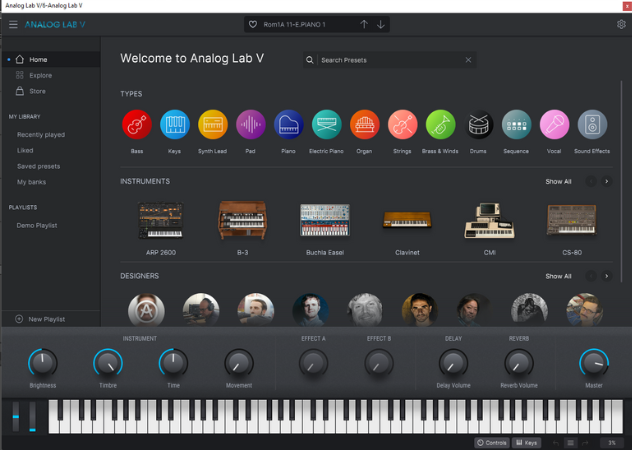
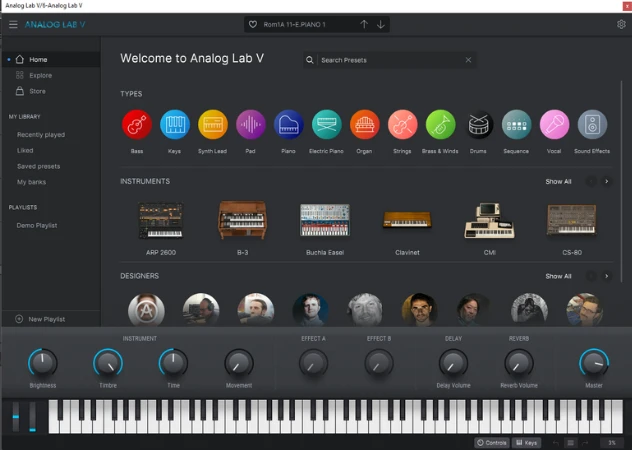
Ableton has a great selection of virtual instruments, with my personal favorites being Wavetable and Analog. But you can also use third-party plug-ins to perform live.
This means you can have almost unlimited synths, drums, and more without carrying around a tonne of instruments.
important
Make sure to see how many virtual instruments your computer can handle. You don’t want too many loaded up, and then Ableton crashes mid-performance (trust me, I’ve lived the nightmare).
Hardware Required
Once again, you’ll need an audio interface with at least one output.
You can use a computer keyboard (much more limiting and less fun) or a MIDI controller/MIDI keyboard to play these virtual instruments. Luckily, MIDI controllers are pretty inexpensive.
I’ll list a few MIDI controllers and MIDI keyboards below that can suit anyone’s needs and budget.
Processing Live Instruments With Ableton Live
You can use Ableton as an effects processor too. Ableton has many different audio effects that can enhance your performance. It can also be a space saver because you don’t have to bring amps or audio effects units to a show.
For guitar, there is a guitar amp and cab simulator. On top of that, for every other instrument, there is saturation, reverb, delay, modulation effects, and so much more.
You can enhance your sonic palette when using effects on your live instruments. Think of it like a pedalboard but on your computer.
Also, it means that you are running your live instruments through Ableton, where your other audio elements come from. It can achieve a more cohesive sound.
Hardware Required
You will need an audio interface with at least one output and as many inputs as you have live instruments. Check the types of output cables used by your instrument to get the correct type of input ports.
Setting Up A Basic In-Ear Monitoring System In Ableton
Suppose you’re using Ableton to perform live. In that case, it will be much easier to do so with a basic in-ear monitoring system. This way, you can clearly hear the performance, but more importantly, you can listen to the click and stay in time easier.
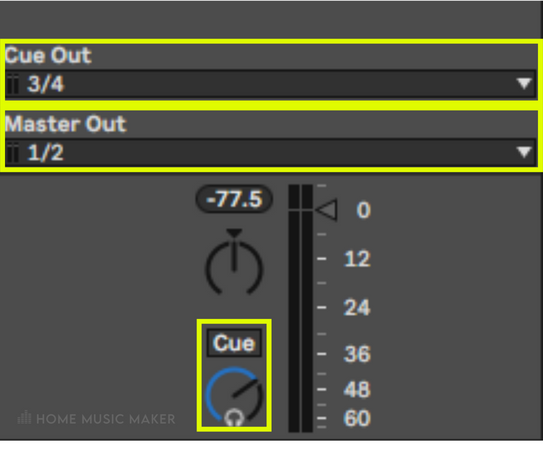
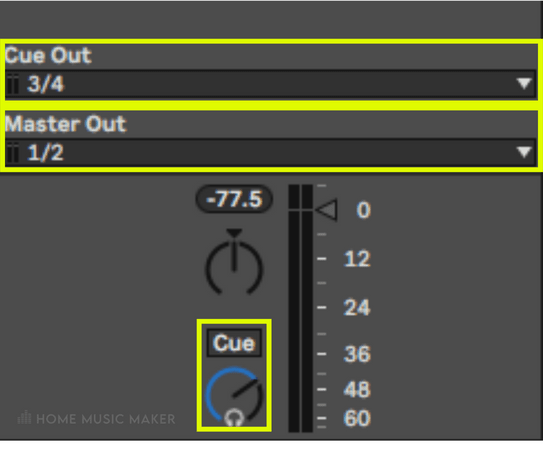
To set this up within Ableton, go to the master track. You will see an option for the “Cue Out” and “Master Out.”
Set the “Cue Out” to the output you will plug your listening device into. Above the cue volume parameter is a button that says “Cue” or “Solo.” “Cue” will allow you to hear the click, and the main output, “Solo,” will only be the click.
Hardware Required
As for all of these ways to perform live with Ableton, you will need an audio interface. However, this time we must consider the number of outputs and inputs.
You will need at least two stereo outputs to have Ableton play through the PA speakers in stereo and have an in-ear monitoring system. This way, you can route the click only to be played on your listening device.
Regarding inputs, it depends on whether you want your vocals and live instruments to be in your monitor mix.
You can always send the main output and monitor mix to the mixer at the show. Then you can send the monitor mix, plus all your instruments and vocals, through an aux/monitor output plugged into your in-ear monitors.
However, I find this messy, and you must rely on a sound engineer for your monitor mix.
The other option is to have enough input ports for your instruments and vocals. This way, you can control not only your monitor mix but the overall mix of the performance. This isn’t your option if you’re less experienced mixing live performances.
A fantastic audio interface for this that I swear by is the Focusrite Scarlett 18i20. This has enough inputs and outputs to play all your live instruments into Ableton, plus vocals and a basic in-ear monitor system.
Of course, you will also need in-ear monitors to listen to your monitor mix. You can use any headphones or earphones, but specific earbuds are designed for this scenario. They are more discrete and provide sound isolation with clear sound.
My choice for in-ear monitors is the excellent Shure SE215 Pro wired earbuds. They stay in my ears regardless of how much I move about. I can always hear everything clearly, and they are super comfortable.
Related Questions
What Hardware Do I Need To Use Ableton Live In A Live Performance?
Technically, you only need an audio interface with one output. However, depending on your setup, you may need more. But a one-output audio interface is enough to play Ableton through the PA.
Can I Perform Live With Ableton Live Lite?
Absolutely you can. You get an 8-track limit on Ableton Live Lite; however, you can perform a great set with just eight tracks. There are also fewer audio effects, but it has everything you need.
What Are Some Tips For Using Ableton Live In A Band Or Ensemble Setting?
– Have one of the members in control of the laptop and hardware. For my band, our drummer does it all.
– Use a DI box and/or an audio signal splitter to send the audio outputs of everything to the sound engineer and your in-ear monitoring rig.
– Practice with a click and Ableton thoroughly.
– Have a fail-safe if Ableton crashes. For example, we have all the tracks on our phones and a memory stick.
How Do I Prepare For A Live Performance With Ableton Live?
Practice as much as possible. You should feel as comfortable performing with Ableton Live as you do on your instruments.
Start simple. Performing live with any new aspect is tricky enough, so start with the most basic setup and work your way up.
What Computer Specifications Do I Need To Perform Live With Ableton?
According to Ableton, the minimum processor required is an Intel Core i5 or an AMD multi-core processor. It also states that 8GB of RAM is required.
Of course, this is the bare minimum needed. The more complicated your live sessions are, the more CPU power and RAM you’ll need. I have an AMD Ryzen 7 8-core processor (roughly equivalent to Intel Core i9-10900K) and 16GB of RAM, which is more than enough.
READ NEXT:
Now you know how to set up Ableton for live performances, read our article on using an audio interface in a live performance.