KEY TAKEAWAYS:
You can connect your audio interface to a mixer for a live performance via the output ports on the back of your audio interface. Then ask the sound engineer at the gig which input ports on the mixer you need to go into.
Audio Interfaces and Live Performances
It can be very daunting to bring an audio interface into the mix of your live performances.
Rest assured, it is a relatively simple process, and I am here to guide you through it.
By the end of this article, you should be able to set up your audio interface to integrate into your live performance rig with ease.
I’ve listed out every possible scenario and even suggested some audio interfaces for you based on different complexities and price points.

How To Setup An Audio Interface For A Live Performance (Step-By-Step)
This will depend on how many input and output ports your audio interface has. Also, it will depend on what you’re using it for in the live performance.
Using Only A Backing Track
This is the simplest case. Suppose you’re using a backing track without a click track and not recording anything. In that case, you don’t have to adjust any settings for your audio interface. The main output of your USB audio interface will be all you need.
Pro Tip
Make sure that the backing tracks are at similar volumes so that the sound engineer doesn’t have to change the levels continuously.
Using A Click Track And Backing Track
Suppose your audio interface only has one pair of output ports, such as a Focusrite Scarlett 2i2. In that case, you can only use those outputs. The workaround is to split your backing tracks and click tracks in the stereo field.
By panning the backing track to one side, say the left, and the click track and backing track to the right, you can send the backing tracks to the audio mixer without the click. Then you can send the backing tracks with the click tracks to your in-ear monitoring system.
The only downside is that you’re forced to have mono backing tracks, so check your backing tracks before performing. Mixes sound very different in mono than they do in stereo.
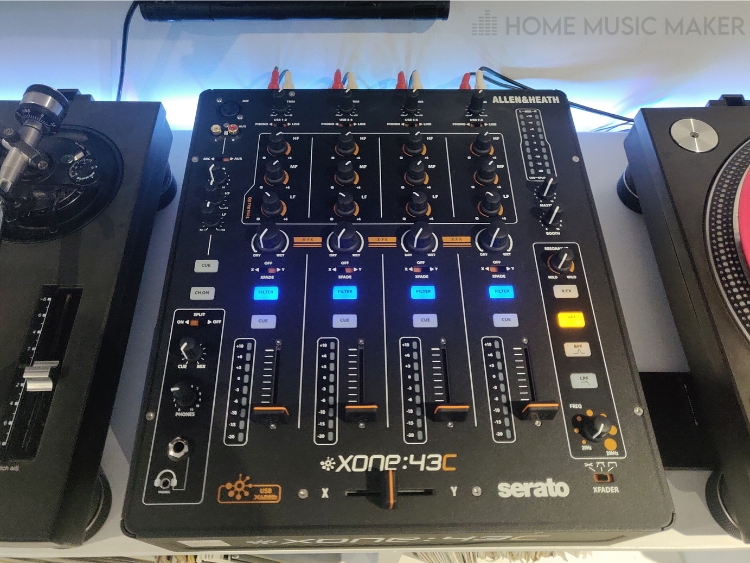
How To Route An Audio Interface To A Mixer
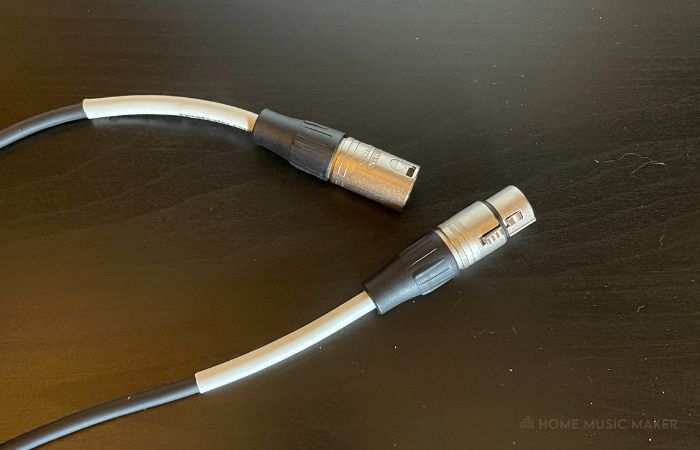
The quick and simple answer is to connect the two output ports you have on the audio interface to two input ports on the mixing desk via a balanced cable. This cable can either be a quarter-inch to quarter-inch balanced cable or a quarter-inch to XLR balanced cable, depending on the mixer’s audio input ports.
These are the same output ports used to connect to a studio monitor setup.

Typically a venue will give you access to these input ports on stage by using a snake, XLR extension box, or a DI box.
What About Different Venues And Stage Setups?
Typically a venue will have a box on the stage linked to the mixing desk input ports, allowing you to plug into that. Ask the sound engineer which input ports to put your audio interface output ports into.
In a smaller venue, you may plug straight into the mixing desk. However, where this is the case, the mixing desk is typically close to, if not on, the stage.
Why Use An Audio Interface For A Live Performance?
An audio interface allows you to send your backing tracks easily to the mixer at a live performance. It will be a much higher audio quality than just using your headphone output.
Also, if you’re using a click track, having an interface with multiple outputs will make this much more manageable.
Do You Need An Audio Interface For A Live Performance?
If you’re not using backing tracks or click tracks, then definitely not. If you’re using backing tracks, you could get away with using a portable audio device and sending that to the mixer.
Still, it won’t give you as much control or flexibility.
If you’re using a backing track and a click track, you can use the same technique described previously of splitting your backing track, and clicking track left and right. You would then use an aux to a quarter-inch splitter to send the left and right audio to different places.
Another option is you have some sample pads already.
I recommend buying these over an interface if you have both, as it’s a lot more expensive, but I use these to gig with. Some of them, usually the more expensive ones, have multiple stereo outputs.
You can send one output with the backing track to the mixer and one with the backing track and the click track to your in-ear monitoring system.
However, I recommend using some audio interface. It gives you the flexibility of having more control of your backing tracks. The audio quality is so much higher. The added benefit is that you can also use your interface at home to record.
Is There A Difference Between A Live And Studio Audio Interface?
Most of the time, no, there isn’t. Audio Interfaces aren’t specifically made for one or the other, apart from a select few. What you really should focus on is the specific requirements that you’ll need for a live situation.
Obviously, for both situations, audio quality is essential. But beyond that, you want as little latency as possible for a live situation. This is still important in a studio setting, but during a live performance, it’s a must.
I recommend having an interface with multiple stereo outputs. This will allow you to send different mixes out without sacrificing being in stereo. You worked hard on these mixes. Let’s not diminish them by playing them mono.
What About Live Musicians Using Analog?
If you are using analog synthesizers and playing them as a keyboard, plug them into the mixer. Any backing tracks can be played in the same ways described above.
However, suppose you are using analog synthesizers with sequencers that must be on time with everything. In that case, you’ll need an audio interface with MIDI ports. This will allow you to control parameters, such as tempo, via MIDI.
This will eliminate the human error of playing the sequencer too late or too early. Having everything locked into one tempo source will keep all of the moving parts of your live performance as tight as possible.
What About Electronic Music Artists?
This entirely depends on how they choose to perform. I will outline the typical ways an electronic musician will perform and how to achieve this setup.
For all of the following scenarios, I recommend using a click track apart from using DJ equipment. Electronic music is mostly quantized and perfect timing-wise. It will stick out massively if you’re out of time, more so than in a band. So make it easier for yourself and use a click track.
Using DJ Equipment
If you’re only using DJ equipment, either a controller with a laptop or CDJs and a mixer, you already have what you need. DJ equipment comes with the necessary outputs so that you can hear a separate mix in your headphones, and the audience hears what you want them to hear.

Suppose you’re using a cheaper DJ controller with a laptop. Using an audio interface for better sound quality could be a good idea. This is dependent on what equipment you have, though.
Also, check what kind of outputs are on the back of your DJ mixer or DJ controller, as you may need to buy an adapter cable to connect it to the live mixer.
Using Only A Laptop and MIDI Controller
For this application, you will need an audio interface. Using a laptop and a MIDI controller to perform will create a lot of latency without an audio interface. This will mean constant delays in using your MIDI controller and possibly even some crackling.
Multiple CPU-intensive plugins can heighten the latency in your setup, such as using several Native Instruments Komplete Audio plugins.
Once you have the audio interface, plug it into the liver mixer using the techniques described previously in this article.
Pro Tip
Ensure you are not pushing your laptop with the virtual synth or instrument selection you are using. Some plugins, such as Native Instruments, sound amazing but can be CPU intensive. Find the balance between sound and latency in your setup.
Using A Laptop with Analog Gear
You will also need an audio interface if you’re using a laptop to do the bulk of the work and some analog gear to play on top. Suppose you’re using analog equipment with sequencers. In that case, you will need an interface with MIDI ports, as described previously in the analog section of this article.
I recommend experimenting with sending the output of your analog gear into the audio interface. This way, you’re only sending one output to the live mixer, and you have complete control over the mix of your music.
You can even use effects from your digital audio workstation, such as Pro Tools, to give your analog gear different colors. Depending on how powerful your laptop is, it could create a lot of latency with one too many plugins.
Using Only Analog Gear
When performing entirely with analog gear and no computer, you can either send all of your equipment’s outputs to the live mixer or invest in your mixer and have complete control. I suggest the latter.
Sending the outputs individually to a live mixer will not sacrifice audio quality. Still, you’re relying on the sound engineer to get the balance right for your music. Now they may be a great sound engineer, but no one knows your sound like you.
By having your analog mixer or digital mixer at hand, you can also use it as another performance tool. If it has built-in effects, they are at your fingertips. You may want to drop out specific parts for effect. You can be very hands-on with your performance in a way you can’t do without your mixer.
From this point, you can send the stereo output of your mixer to the live mixer, and you’re good to go.
If you’re using analog gear, make sure you have a device that can control the tempo of all the other analog gear. Having equipment in sync is a must for this performance style.
Audio Interface For Live Performance Buyers Guide
There are several factors to consider when looking for an external audio interface for live performance. Here are the main ones to look out for.
Portability: You only want to carry around a massive audio interface if you have to. There are so many options that are small but powerful.
Latency: You need an interface with low latency, or your live show will be very chaotic.
Audio Quality: It’s an apparent specification that should be noticed. You want the cleanest audio signal possible for live sound and recording.
The number of Input Ports: Decide what you want going into the interface versus what’s going straight into the live mixer. Depending on the number of input ports and your setup, you could even begin live-streaming your shows to reach a wider audience.
The number of Output Ports: I recommend at least two stereo outputs. One for the live mixer and one for your in-ear monitoring system. However, you can have more outputs for different mixes for each performance member.
How It Connects To Your Laptop: Ensure you’re buying an interface compatible with your laptop. If you don’t have Thunderbolt 3 ports on your computer, don’t get an interface with Thunderbolt 3 connectivity only, like some Universal Audio devices.
Top Three Audio Interfaces For Live Performance
The best audio interface for you will ultimately depend on your budget, requirements, and current laptop. I’ve decided on three different audio interfaces at three different price points.
Focusrite Scarlett 4i4 (3rd Gen)
- This audio interface has four input ports, two stereo output ports, and MIDI ports.
- This is a great starting point for a fantastic price.
- The latency is low enough for live situations, and the audio quality is superb.
- Connects via USB
- It doesn’t require additional power.
- Portable
- Also great for recording
- Phantom power for a condenser mic or a guitar amp load box
- A clean set of preamps in both the input ports and output ports

- I use this one live with my band
- It’s super compact for the amount you get
- It connects to your laptop or an IOS device wirelessly, allowing for remote control.
- It has 16 input ports, one main output port, and 6 AUX/monitor sends (for in-ears)
- Low latency and excellent audio quality
- Has MIDI ports
- Can fit in a rackmount
- Great for recording, especially where you have an extensive microphone setup
- Could record the entire gig for a live stream with this many inputs.
- Phantom power for a condenser mic or guitar amp load box
- A clean set of preamps in both the input ports and output ports

- Four analog input ports and output ports, two of which are XLR input ports, two headphone output ports, and a MIDI port
- Outstanding audio quality and low latency
- Connects via USB
- It comes with free software for remote mixing and fx
- Very portable
- Amazing for recording
- Phantom power for a condenser mic or a guitar amp load box
- Fantastic mic preamps and headphone preamps

How Do You Mic A Live Performance?
This depends on what the setup is. If you’re a live band, you’ll need many more microphones than a solo singer-songwriter. Any MIDI-controlled sounds will be coming from the DAW directly.
I will list some instruments and examples of how to mic them.
Drums
If the venue is small, placing mics on the kick and snare drum could be enough, as the cymbals and toms will cut through. The larger the venue, the more detailed the mic selection will get.
A general safe bet is a kick drum mic, one or two snare mics (top and bottom), and one or two overhead mics. The kick drum and snare mics are typically dynamic, and the overhead mics generally are condenser microphones.
Bass
Most bass amps these days have a DI output, so you can directly plug this into the mixer. If not, you can either plug the bass into a DI box or mic an amp with a dynamic mic.
Guitar
If an acoustic guitar has a jack output, then use that. If not, then mix it with a dynamic microphone.
If an electric guitar uses an amplifier without a load box or doesn’t have an output, then mic it with a dynamic mic. If using a modeling amp, profiling amp, or a load box setup, you can plug that directly into the live mixer.
Keyboard
Keyboards that aren’t MIDI will have either a mono or stereo output. Plug this into the live mixer.
Vocals
You will want to use a dynamic mic. Either with a cardioid pattern or a hyper-cardioid pattern.
Woodwind, Brass, and String Instruments
There are specific microphones for different instruments. However, an excellent dynamic mic in the correct place for that instrument will work wonders.
Related Questions
How Do You Use An Audio Interface For A Live Performance?
Typically an audio interface would be used to play any backing tracks and hear any sounds being played through a MIDI controller into the computer.
You can also use it to record your set. It can also be used for a click track.
Do You Need An Audio Interface For A Live Performance?
The only time you’d need an audio interface is if you perform with a click, perform with a backing track, and/or use MIDI controllers to perform with. You don’t need one if you don’t perform using any of these setups.
Can You Use An Audio Interface As A Live Mixer?
Absolutely. Of course, it will have to have enough input for the performance. You will also need a computer that can handle that amount of inputs and any effects you’re using in real-time.
You would plug into the inputs of the interface. Then on the computer, do the live mixing and use effects. Finally, take the outputs of the audio interface and plug them into a stereo input on the mixer in the venue. Or you can plug directly into the speakers.
How Do You Set Gain On An Audio Interface?
Most audio interfaces have knobs on the physical device that allow you to control each input’s gain. If this isn’t the case, you can change the gain using the software that controls your audio interface.
Final Words
Using an audio interface for live performances is my favorite way to perform with a click track and a backing track. It’s made my gig life so much easier.
READ NEXT:
Check out this article for a more in-depth look at how to use a mixer with an audio interface.
Full Spectrum
Wednesday 14th of June 2023
Great information! Thank you so much for the help.
Matt
Wednesday 14th of June 2023
No problem. I'm glad it helped!