KEY TAKEAWAYS:
Creating templates involves creating an empty Ableton session with all the elements you want to appear in the template, then clicking “Save Live Set As Template”. My three main template categories are for recording, producing, and mixing. The recording template has the least effects (to reduce latency), and the mixing template has the most.
The Importance Of Templates
Templates in any DAW are a fantastic way to increase your efficiency. It’s a quicker way to start creating while not sacrificing quality.
They allow you to have everything set up within your software so that all you need to do is plug in and play.
Templates in Ableton are easily set up, and you can have as many as you want for different applications.
In this article, we shall guide you through making templates in Ableton for different situations, such as mixing and recording.
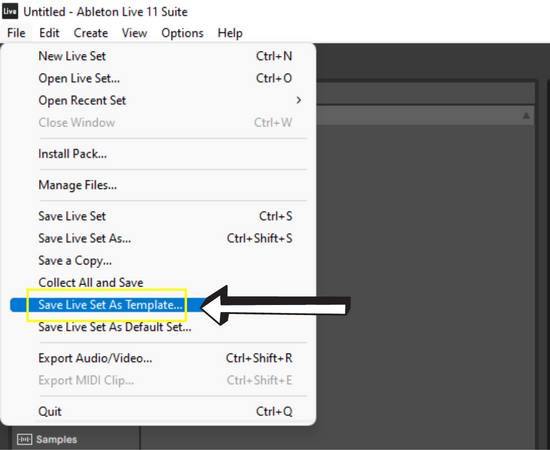
How To Save A Template
Step 1:
Click on file and then click “Save Live Set As Template.” This will bring up the templates folder in the user library section of the left-hand sidebar.

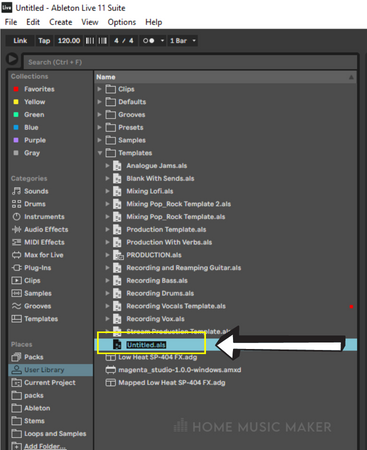
Step 2:
Now you can name your template. Click enter to save it, and that’s it!
How To Open A Template
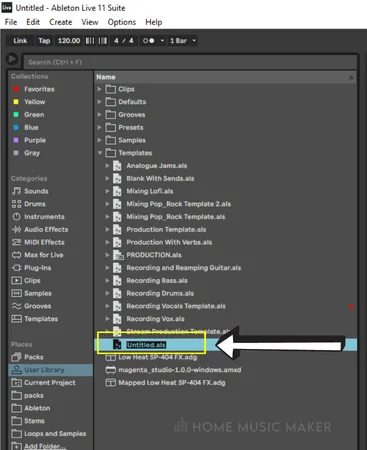
This is very simple. First, navigate to the user library section of the left-hand sidebar. Then open the templates folder within this.
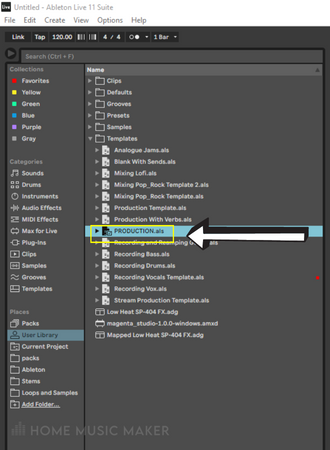
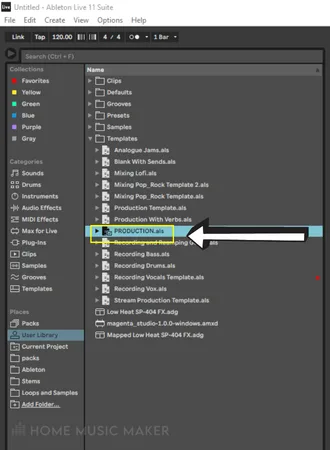
Double-click on the template you want to open and wait for it to load. Once you’ve set up your templates, it’s such an easy process to open them.
Creating Templates For Production
Creating a template for when you’re producing is the most crucial scenario. Focus on the creativity and moment when producing; not being set up correctly can take you out of that.

What Tracks Do You Need?
Think about the type of music that you make. I have different templates for different genres, but my main go-to template is the one for producing pop/alternative.
Look at this from two different ways. You can be minimalistic and have the bare essentials, or you can have everything you need and delete tracks. I chose the latter. This option is more for your computer to load, so it also depends on your system’s capabilities.
Look at your Ableton projects and pick out the things that commonly appear. This will give you perspective as to what you need and want.
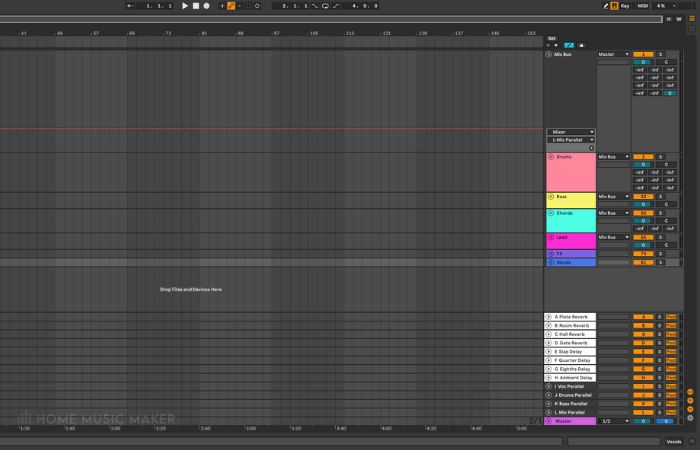
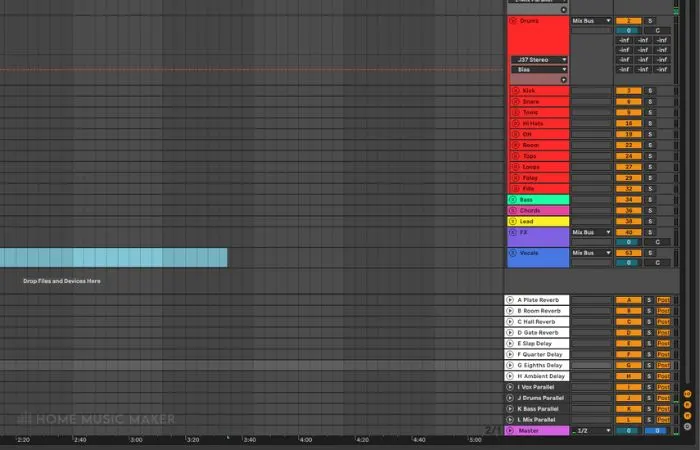
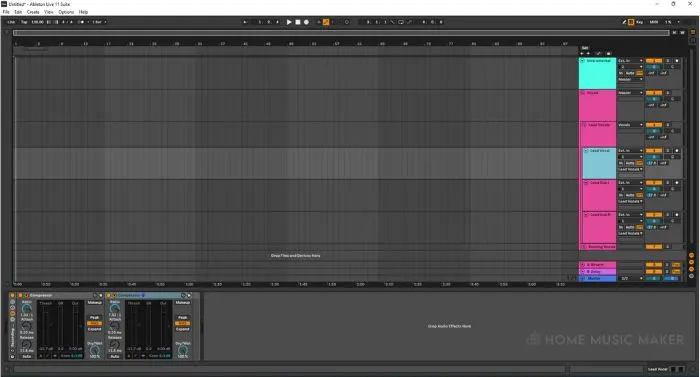
For my general production template, I break it down into groups. These groups are the drum elements, bass elements, chord elements, lead elements, fx elements, and vocal elements.
Within each group, there are several tracks and even sub-groups. I have everything I can add to a song in these groups to remove a barrier to my creativity.
What Effects And Plugins Do You Need?
Now that you have your tracks set up, it’s time to consider the effects on each track and each group. Remember, we want to use effects that help the creativity to keep flowing, and do so sparingly as if you’re recording any audio (even in a demo sense), then the latency will be unusable.
I make sure that my guitar and bass tracks have amp simulators ready, my vocal chain is present, some EQ in certain tracks to clean up the sound, and any virtual instruments and samplers I use.
Since I’ve used this template for so long, if I have a musical idea, I find it quicker to get it roughly down in Ableton than writing it on paper. That’s the beauty of having everything ready.
Pro Tip
Treat your studio space as a template too. Ensure that everything you use to make music is within reach and ready to be used.
What Sends Do You Need?
Finally, we need to decide on the sends. I have as many sends as you can have on Ableton, which is twelve. I tend to go from producing straight to mixing, so having all the sends I would use for mixing in my production template allows me to avoid exporting stems and creating a new session.
My sends are 4 for reverb, 4 for delay, and 4 for parallel processing. This allows me to set the space correctly while producing, and I don’t have to recreate anything in a new session.
For reverb I have a plate reverb, room reverb, hall reverb and a gated reverb.
For delay, I have a slap delay, a quarter-note delay, an eighth-note delay, and an ambient delay.
Finally, I have a parallel vox send, parallel bass send, parallel drum send, and a parallel mix send for the parallel processing sends.
READ NEXT:
A crucial part of my production process within Ableton is copying parts from different projects to the current one. To look at this in-depth, read our article on copying between Ableton projects.
Creating Templates For Mixing
As I mentioned, typically, I go straight from production to mixing, so I don’t bounce the stems into a specific mixing template. However, sometimes I mix for other people, so I have a mixing playlist ready to load in stems and my go-to plugins.

Of course, when mixing, I rarely stick to this template strictly. It’s a solid starting point to get going.
I won’t be talking about the number of tracks or the sends needed, as it will be the same as in the production section of this article. I will discuss the effects, as that’s where it differs.
What Effects Do You Need?
Of course, this will differ for different genres, but we can look at this from a general point of view.
Unless I mention a specific effect, then the following plugins will be my personal choices for the different effects mentioned:
- Fabfilter Pro Q 3 for EQ
- CLA-76 for compression
- Fabfilter MB for multiband compression
- A combination of the stock saturation plugin in Ableton and Decapitator by Sound Toys for saturation
- Ableton’s stock chorus plugin for chorus
- Virtual Tape Machine by Slate Digital for tape emulation
- Fabfilter G for gate
- Fabfilter DS for a deesser
Let’s break it into the main groups of the template.
Drums
Here I have subgroups for the kick, snare, toms, cymbals, room, loops, percussion, fills, and hi-hats.
I will have an EQ, compressor, and tape emulation for my kick drum subgroup.
I’ll have EQ, compression, and saturation for the snare, tom, and room groups.
Finally, I have EQ and compression for the loops, percussion, cymbals, hi-hats, and fill groups.
I’ll have a gate on tracks for acoustic drums that I recorded, and for each subgroup, I have a certain amount of each send on there.
Bass
I have an EQ, multiband compression, and two compressors for this group. I want a consistent bass level, and I can achieve that with these plugins. Will I add more? Probably, but I can get by with these.
Chords
My chords group has an EQ and compressor. I typically process these less than the others. There will be more plugins than just these two, but there won’t be much more. The send levels are also set in a way that sounds good for these elements.
Leads
I have EQ, compression, and another compressor just for side chaining. I like to have a level of sidechaining on my leads which is triggered by a lead vocal track. I don’t want the lead melody to overpower the vocals, so it saves me from automating it. The sends will also be set.
FX
The only effect present on the FX group in my template is EQ. The send levels are low, but the EQ is the only plugin.
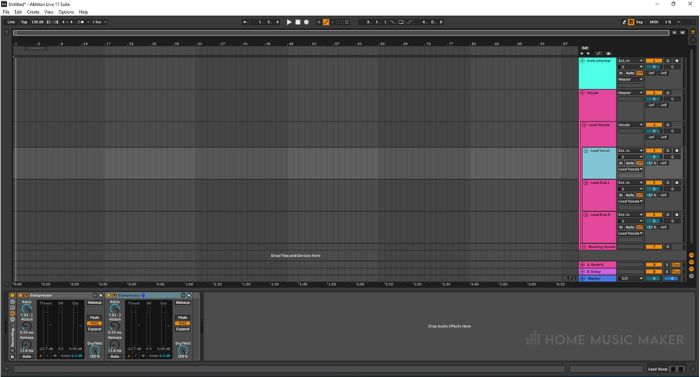
Vocals
I have an EQ, de-esser, and compression on the vocal group. I’ll then have an EQ, compressor, and multiband compressor for the lead vocal and backing vocal subgroups.
For the individual tracks, I have a go-to vocal chain. This is on all of the vocal tracks.
Of course, the send levels are all set.
READ NEXT:
Using lots of plugins can slow down your computer. To minimize this, check out our article on how to make Ableton run faster.
Creating Templates For Recording
I have different recording templates for various instruments. I exclusively use these templates when recording the final parts of a song to reduce latency and increase efficiency.
No matter what the instrument is, one feature each template has is an empty track for the guide track. Whatever the performer is playing along to, that goes here.
The recording template with the most effects is definitely for recording vocals. I will have a reverb and delay send. Then I’ll have a couple of compressors on the track. This makes the vocalist sound more natural to themselves, aiding their performance.
For other templates, the main difference is just the number of tracks required.
Related Questions
Can You Send Ableton Templates?
Absolutely. It’s an Ableton Live Set file, so you can copy and paste it wherever you want to send it.
Where Are The Ableton Templates Stored?
This is located in the templates folder within the user library folder.
This is in the file path C:/Users/[username]/Documents/Ableton/User Library/Templates on Windows.
On Mac, it is Macintosh HD/Users/[username]/Music/Ableton/User Library/Templates.
Can I Download Ableton Templates?
Yes, as it is just an Ableton Live Set file. I recommend checking out Ableton Templates to get good-quality templates.
What Happens If I Open A Template Which Has Plugins I Don’t Own?
The plugins in the template that you don’t own will show in the effects chain. However, they will not affect the audio, nor can you open them.
Will My Old Ableton Templates Work In An Updated Version?
Ableton Live is backward compatible. This means Ableton can open any set from previous versions, including templates. However, this is different for opening a set from a newer version of Ableton to an older version of Ableton. This will not work.
READ NEXT:
Another key aspect of understanding Ableton is knowing the different views. Check out our session versus arrangement view article to further optimize your Ableton workflow.