As Ableton Live Suite users, you discover there are two views to work in, the Session View and the Arrangement View.
But, how do you know which one to use, and when do you use these views? Also, why would you use one as opposed to the other?
This tutorial will provide you with a comparison between the Session View and Arrangement View, along with some information, tips-and-tricks to help you get the best out of both options.
Let’s jump in!
pro tip
The best way to learn is to experiment, by completing the same task in Session View and then Arrangement View, and deciding accordingly.
Ableton Session View
When you open an Ableton Live set, the first view you see is the Session View.
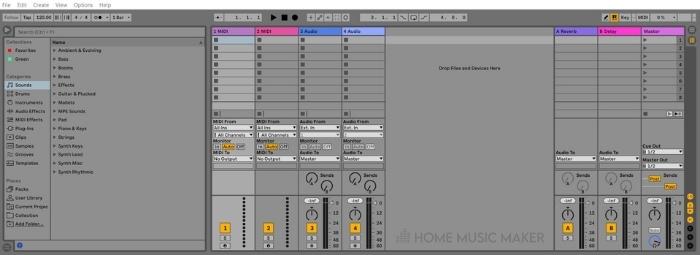

What Is The Session View In Ableton?
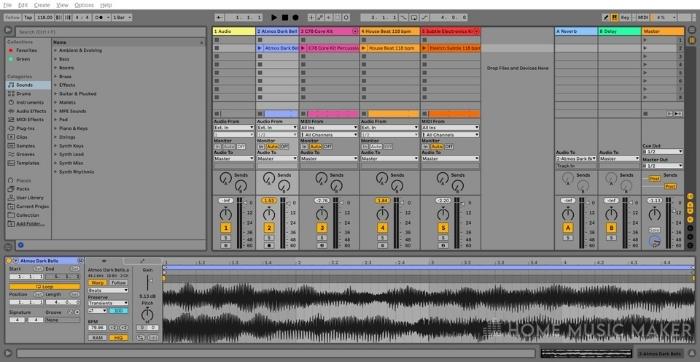
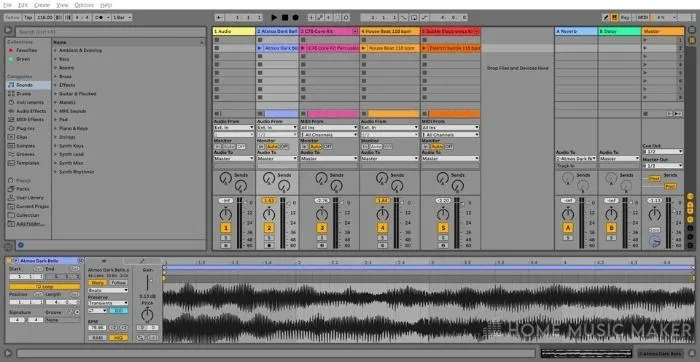
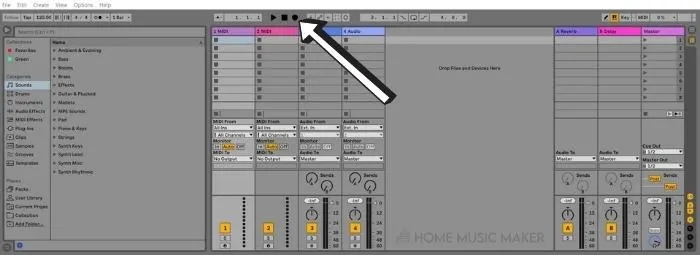
The Session View comprises vertical columns (tracks) aligned from left to right.
It looks a little like a spreadsheet. Within each of these columns, there is a clip slot for each MIDI and Audio track, and side by side, these can be launched together in the Master track as a scene.
Session View clips are placed in clip slots. They are composed of musical material, whether an audio file or MIDI clip.
This could mean a melody, a bassline, a drum rack, or any instrument available in Ableton.
You can record and change clips and fashion them into songs or any musical structure using Session View. Clips within a scene can constitute an entire song, or different scenes can make up other parts of a song.


You can articulate the structure of your songs, including the introduction, verse, chorus, bridge, etc., from the Session View and add MIDI and audio effects, clips, and loops of any lengths, without a defined start or endpoint.
Each clip has its own Play button for launch at any time or in any order, allowing you to experiment with the sounds and instruments you are using in your tracks.


To play a scene in Session View, you need to click the Play button. You can use scenes to organize song parts in live performances.
Session View is a real time-oriented musical sketchpad rather than being based on a timeline.
It is excellent for running in a live performance setting. You can launch a MIDI clip or audio clip whenever you choose. You can live loop clips on the fly, play clips in different combinations, and play around with musical ideas when you are unsure of your track’s direction.
In other words, its strength lies in live performances, especially electronic music live performances.
The detail view displays in the bottom half of the screen.
Ableton Arrangement View
To navigate from Session View to Arrangement View, press the Tab key.
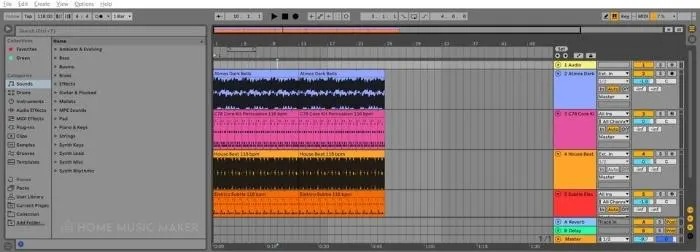
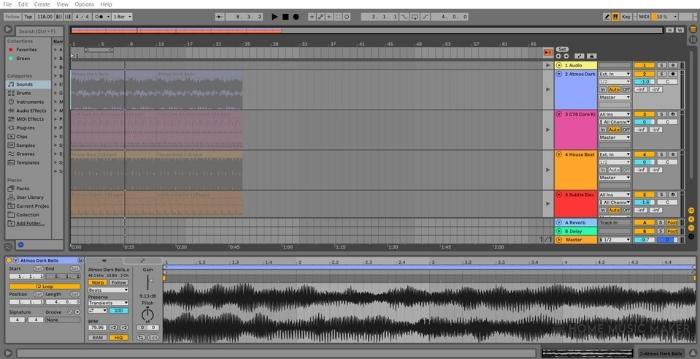
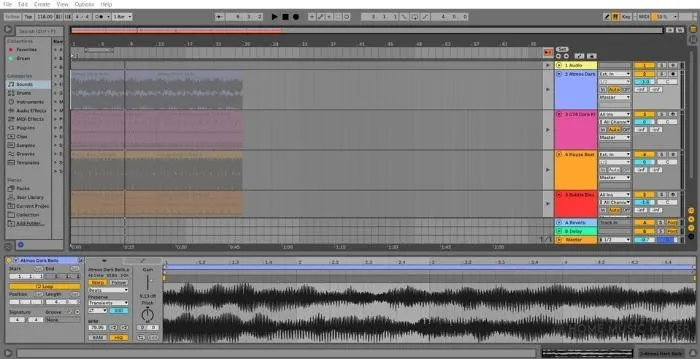
In contrast to Session View, the Arrangement View has tracks stacked vertically and aligned horizontally. Instruments play in a timeline reading from left to right, starting at bar 1 and 0 seconds and ending at the end of your track.
It has a set beginning and end. This resembles the more traditional view of a digital audio workstation, DAWs such as FL Studio, Studio One, or Pro Tools.
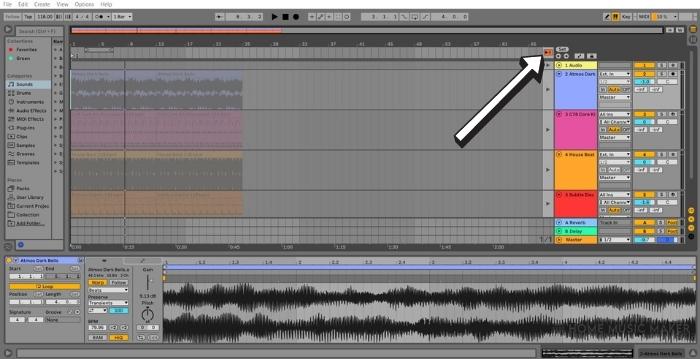
If you have used the tab key to navigate from Session to Arrangement View, you will notice all the Session view tracks down the right side of the screen in the Arrangement View.
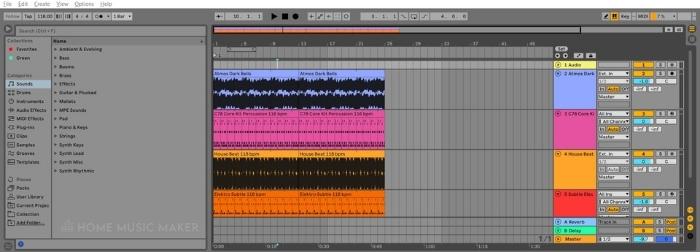
You can plug in, play, and record instruments from this view (audio) or compose a MIDI track using the piano roll view, which is impossible in Session View.
This is the most common view for composing, multi-track recording, and audio and MIDI editing and mastering.
In contrast to the Session View, the Arrangement View is great for music production and arrangement.
While both of these views have different uses, when you toggle between them, this changes the appearance of the Live Set but does not switch modes or change what you hear or what is stored in Ableton.
One thing that is important to note is that a track can only play one clip at a time.
The Session and Arrangement views interact through tracks shared between the two views.
You can improvise or jam in Session View, record this into Arrangement View and then edit and refine the song arrangement later.
One of the significant advantages of using the Arrangement view is that you can add and edit automation and easily add fade-ins and outs.
Explore related articles on Automating tempo in Ableton for more information.
To record from Session To Arrangement View
You’ll need to have several clips set up in multiple tracks in the Session view of Ableton.
Step One: Start Recording In Session View
In Session view, click the Record button in the Transport area of the screen. This launches clips and scenes from the Session view.

Step Two: Move To Arrangement View
Press the Tab key on your computer keyboard to toggle to the Arrangement View during the recording.
The tracks from the Session view are recorded into their respective tracks in the Arrangement View.
Here you will notice that the tracks are all grayed out in the Arrangement View.
If you hit the Play button here, Ableton continues to play the tracks in Session View. This is because tracks playing from the Session View prioritize playing those in the Arrangement View.
Step Three: Play Tracks From The Arrangement View
To play the tracks from the Arrangement View, click the small orange Back to Arrangement button, found both in Session and Arrangement views.

Step Four: Edit Your Track From The Arrangement View
Press the spacebar to play the arrangement back as you performed it.
From Arrangement View, you can now add, delete or move tracks and sounds as required, add effects, filters, etc.
For example, if you launch several clips from Session View, then toggle to Arrangement View, you will see that any track with a clip playing is grayed out, indicating that this is a clip playing from Session View.
You will need to repeat steps two and three above to change this.
There is no end to the kinds of things that you can do in both Session and Arrangement views as Ableton Live users.
It caters to all types and styles of creativity.
Related Questions
What is CliyphX?
CliyphX is a scripting software that allows music producers and performers to program and control almost any aspect of a live set in Ableton by using simple words or phrases called actions. You can launch actions to suit your workflow. E.g., you can manipulate Session View clips or program Arrangement View locators. Note that there are many more to alter.
How Do I Create Locators in My Track?


To divide your track into sections, highlight the section from beginning to end in the Arrangement View and click the Set button.
A small triangle is displayed above the section. Right-click the triangle and select Rename from the drop-down list.
Type the name of the section in the space beside the triangle.
You have created a locator for the section of your track.
How Do I Copy Track Sections from Arrangement to Session View?
In the Arrangement View, highlight and copy (Ctrl + C for Win, CMD + C for Mac) all tracks of the section to be copied back to the Session View.
Press the tab key on your computer keyboard to return to the Session View.
Place the cursor in a new clip and paste the clip / s. (Ctrl + V for Win, CMD + V for Mac). The copied tracks display as a new scene in Session view.
Place the cursor in the corresponding Master track on the right side of the screen: Right-click and select Rename from the drop-down list.
Rename the scene.
You can repeat this to create as many scenes as your composition requires in Session view.
Check this following article to find out how to open Piano Roll in Ableton.