KEY TAKEAWAYS:
FL Studio can transpose MIDI, samples, vocals, melody loops, and MIDI keyboards. It offers various ways to transpose, such as adjusting pitch in the Piano Roll for MIDI parts, using the Sampler window for samples and vocals, and using the Patcher effect for MIDI keyboards.
Transposing In FL Studio
FL Studio’s transposing tool allows users to change the key of their tracks and make them more versatile.
You can use this to fit a sample into the song’s key, change the sound’s sonics for stylistic reasons, or even completely change a part for exciting variations.
This article will show you how to transpose anything you can think of in FL Studio, whether it’s vocals, samples, loops, MIDI, or more.
I have laid out each scenario in simple steps to follow along with and visuals to complement this for a complete understanding of this function.
How To Transpose MIDI In FL Studio
If you want to change the pitch of a MIDI chord, melody, or bass part in FL Studio, you can use the Transpose function in the Piano Roll.
Step 1: Double-click the pattern you want to transpose with the Draw tool to open it up in the Piano Roll.
Step 2: Click on the arrowhead icon pointing right in the top-left corner of the Piano Roll. From here, select Edit, and in the second section of the menu that appears, you will see some transposition options.
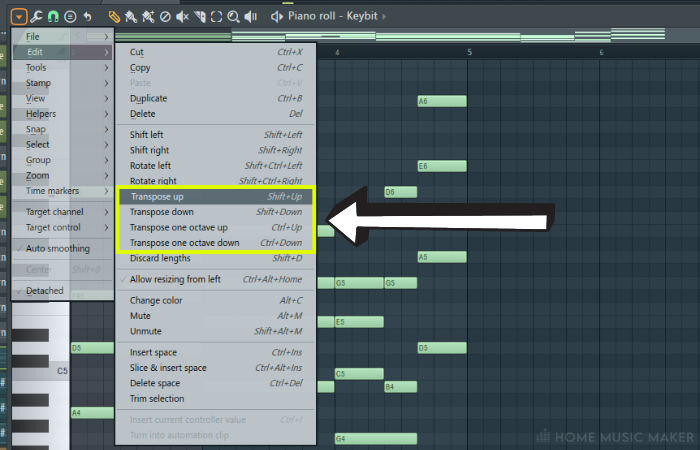

Step 3: Choose from the options based on how much you want to transpose your MIDI part. You can transpose up or down an octave or in semitone increments using the Transpose Up and Transpose Down options.
How To Transpose Samples In FL Studio
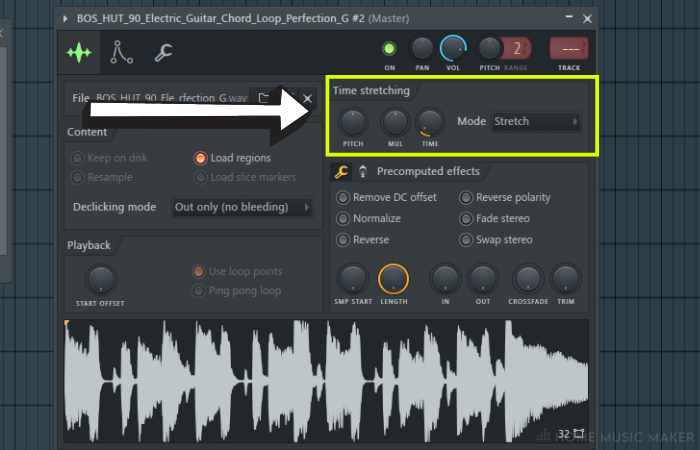
If you want to change the pitch of a sample in FL Studio, you can transpose it using the Pitch parameter in the Sampler window.
Step 1: With the Draw tool, double-click on the sample you want to transpose to open up the Sampler window.
Step 2: In the Sampler window, locate the Pitch knob in the Time Stretching section.
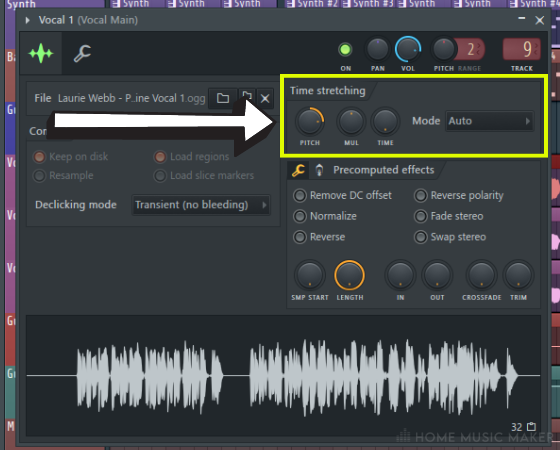
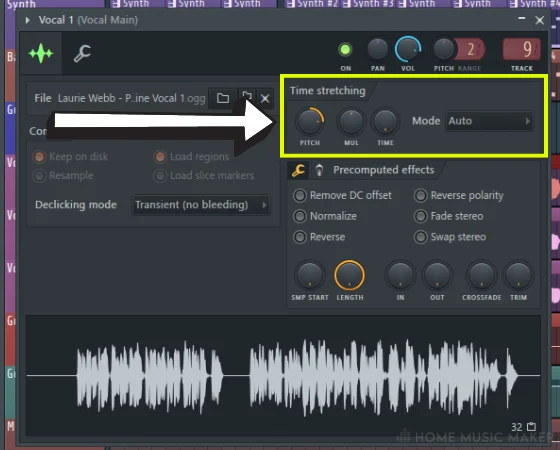
Step 3: Drag the Pitch knob up or down to transpose the sample in cents. Every 100 cents is a semitone, and the knob does stop at each semitone. A semitone represents the distance of one key on a piano.
Step 4: Use the Mode drop-down menu to choose how FL Studio manipulates the pitch and time of the audio clip. FL Studio has a page on its site about the modes.
READ NEXT:
Have you ever tried making your own samples to transpose in FL Studio? If not, read our guide on how to sample in FL Studio.
How To Transpose All Tracks Simultaneously
Transposing all the tracks in the entire project is easy in FL Studio. There is a Master Pitch knob underneath the Master Volume, next to the Help button, in the top-left corner of the FL Studio window.
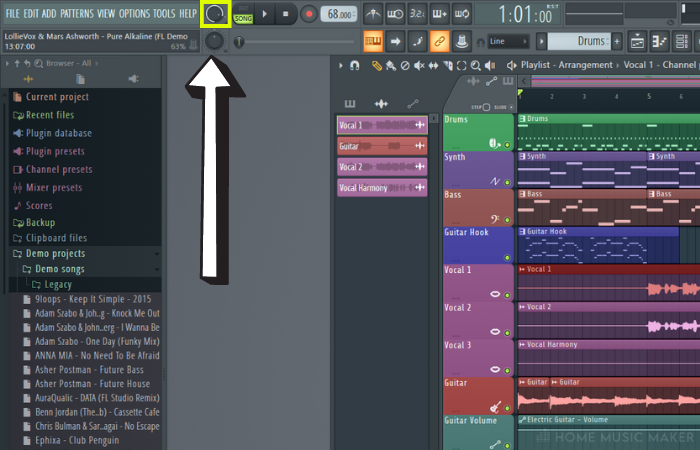
Here you can change the pitch of all of the tracks in cents. Remember, every 100 cents is a semitone. So if you want to transpose your project to 4 semitones higher, increase the Master Pitch value to 400 cents.
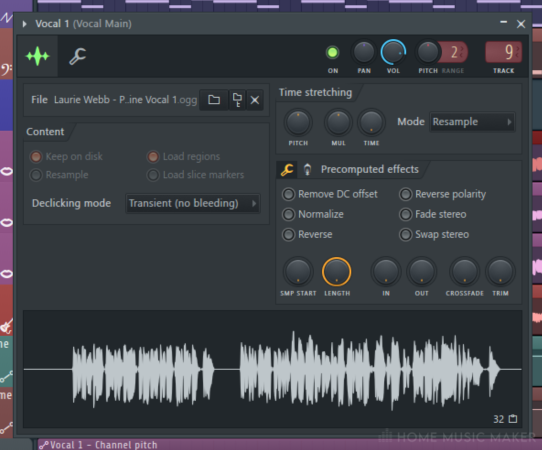
How To Transpose Vocals In FL Studio
Transposing vocals in FL Studio is very similar to transposing a sample. The main differences are that we will change the pitch of the entire track and the Time Stretching mode we use.
Step 1: To change the pitch of the track, using the Draw tool, double-click on the track head, which is to the left of the arrangement grid. This will bring up a similar Sampler window, but with all the audio clips in the track as one big audio clip.
Step 2: In the Time Stretching section of this window, change the Mode to e3 Mono or e2 Mono for singing vocals and e2 Speech for spoken word or rap.
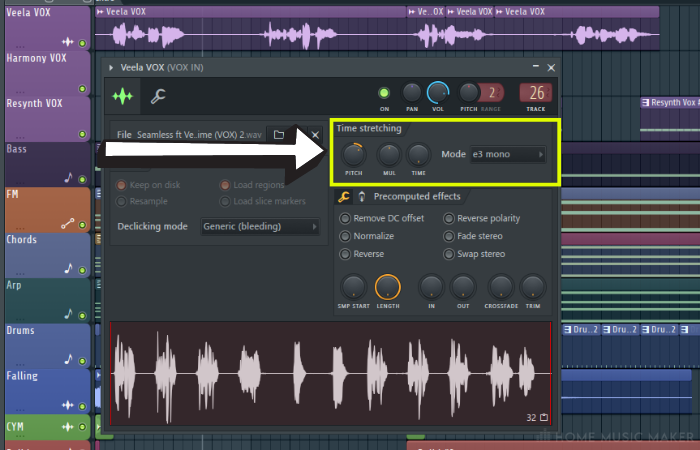
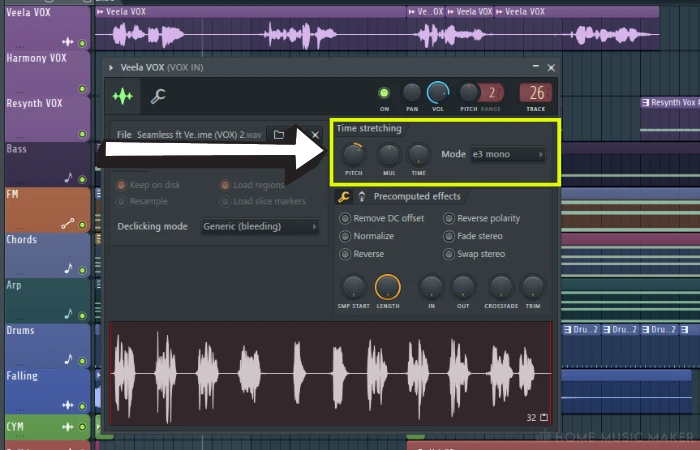
Step 3: Use the Pitch knob in this section to transpose up or down.
READ NEXT:
Want to make your vocals sound even better? Check out our article on how to use autotune in FL Studio.
How To Transpose Melody Loops In FL Studio
We will use the Sampler in FL Studio to transpose a melodic loop, although this can be used for any audio file.
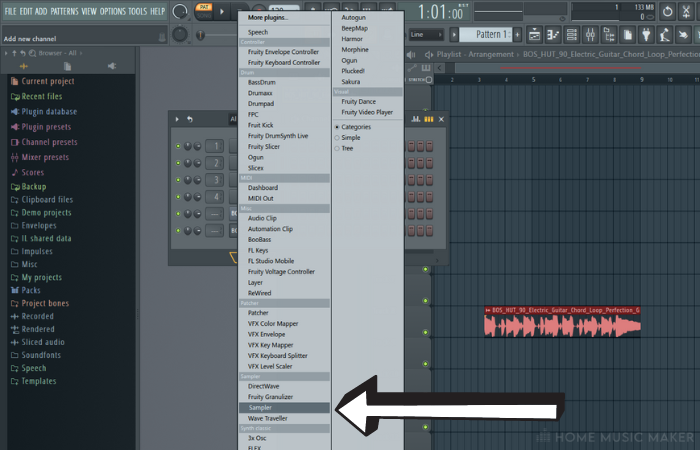
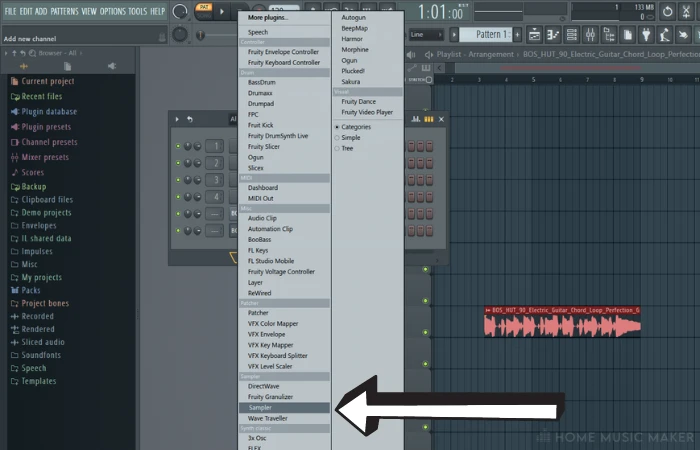
Step 1: Press the + in the bottom bar of the Channel Rack. Select Sampler under the section with the same name from the menu that appears.
Step 2: In this new instance of Sampler, drag and drop the loop you want to transpose into it.
Step 3: Automatically, the original pitch of the sample will be assigned to the middle C note. Use the Pitch knob in the Time Stretching section to transpose the key of the loop to match the keyboard. For example, if your loop is in E Major, decrease the pitch by 400 cents (4 semitones).

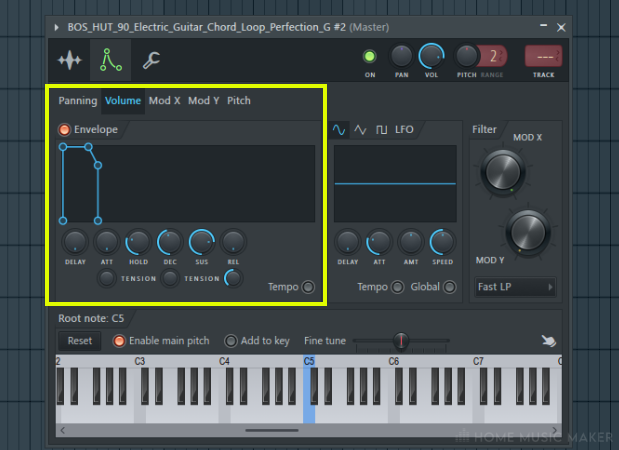
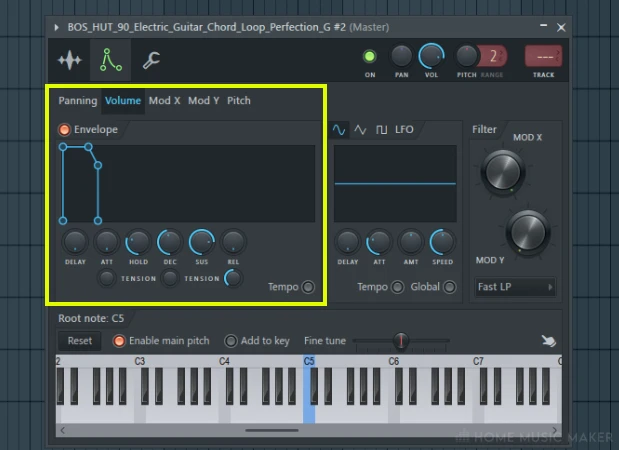
Step 4: Use the Envelope Settings to control how your sample will be triggered. If you want the sample to play only when a note is held, set the release to 0%.
Step 5: You can now transpose the loop to a specific key by either drawing in the MIDI notes or playing them using a MIDI keyboard or MIDI controller.
How To Transpose MIDI Keyboard In FL Studio
We shall use the Patcher effect to change the input MIDI data from your MIDI keyboard or MIDI controller.
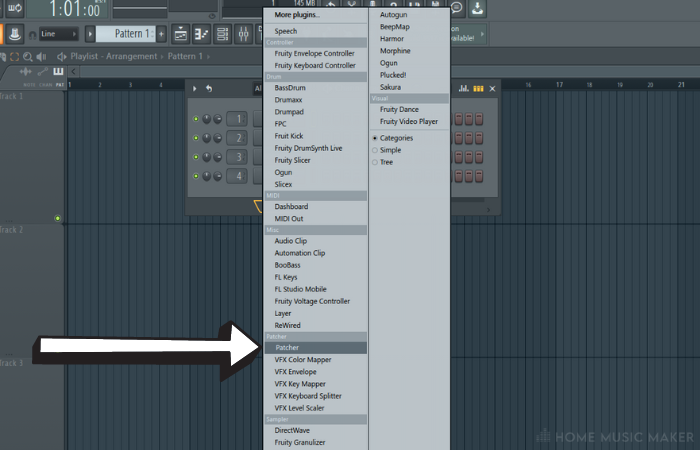
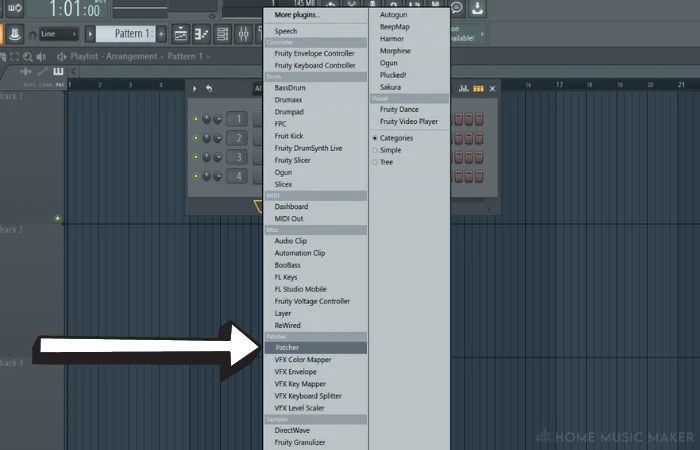
Step 1: Go to the Channel Rack and press the + button in the bottom bar. Within this menu, locate Patcher under the Patcher section.
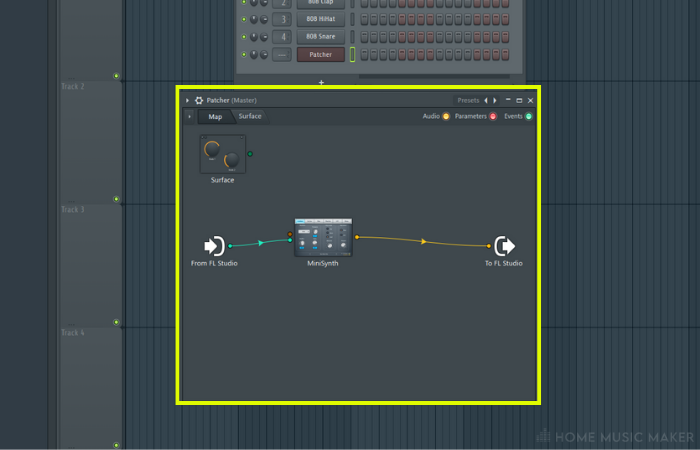

Step 2: Within the Patcher window, right-click and select Add Plug-In. Locate the virtual instrument you want to use for this, then click on it. This will connect the virtual instrument to the inputs and outputs of FL Studio.


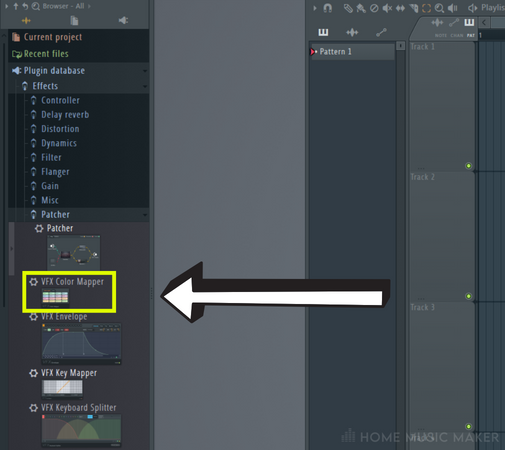
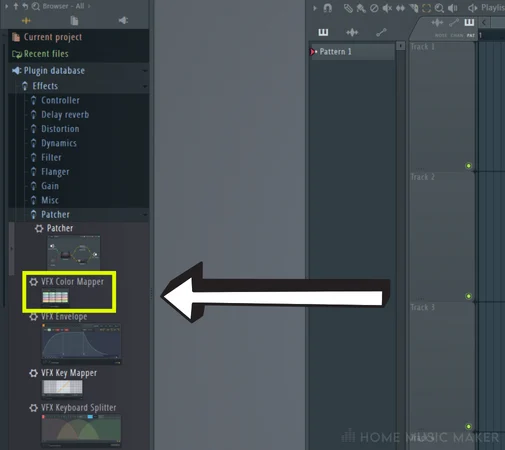
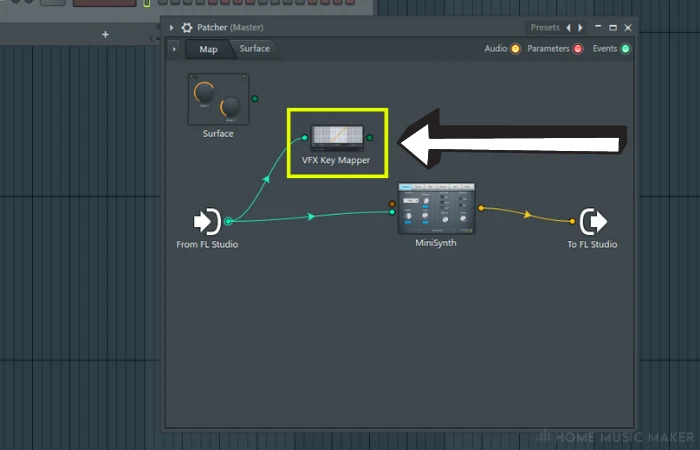
Step 3: Go to the Browser panel and under Plug-In Database, then Effects, and finally Patcher, locate the VFX Key Mapper plug-in. Drag and drop this into the Patcher.
Step 4: The From FL Studio input will automatically have an event-type connection to the VFX Key Mapper. However, the VFX Key Mapper is yet to be connected to our virtual instrument.
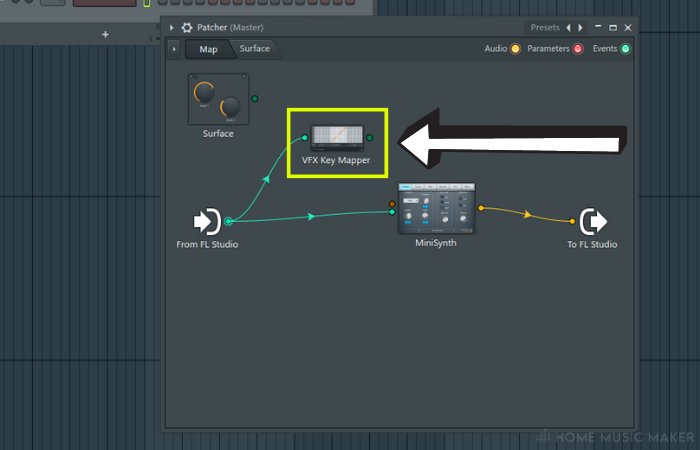
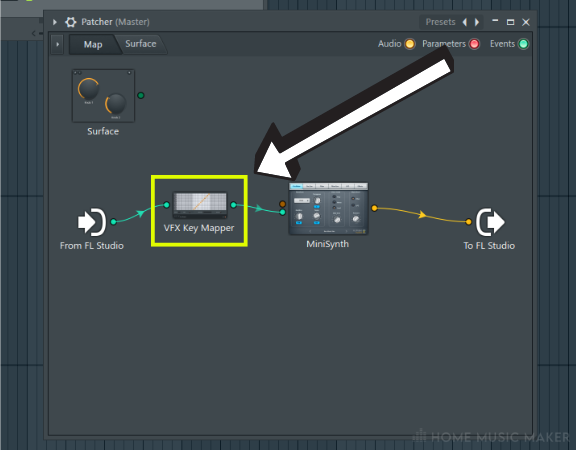
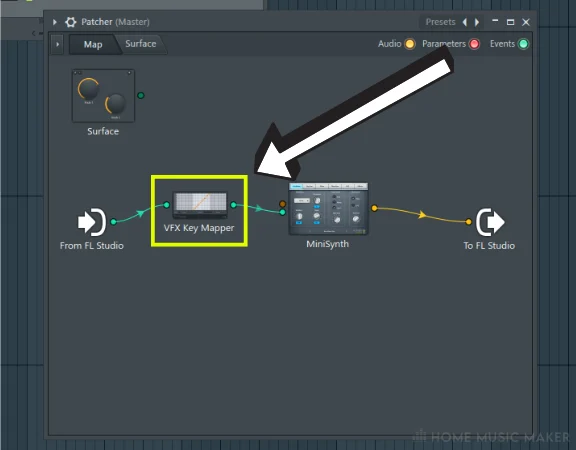
Remove the connection from the input to the virtual instrument by clicking on the node connected to it and dragging it away. Now take the node on the right of the VFX Key Mapper and connect that to the virtual instrument.
Step 5:Double-click on the VFX Key Mapper to bring up the window for it. Here, you can see what each MIDI note corresponds to. To remove a note association, click on the note in the grid, and to add one, click on another square in the grid in that row.
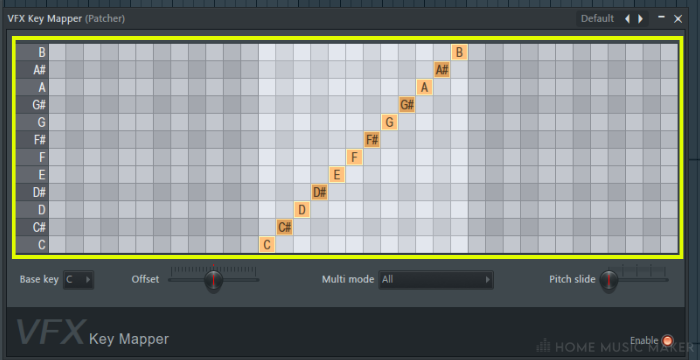
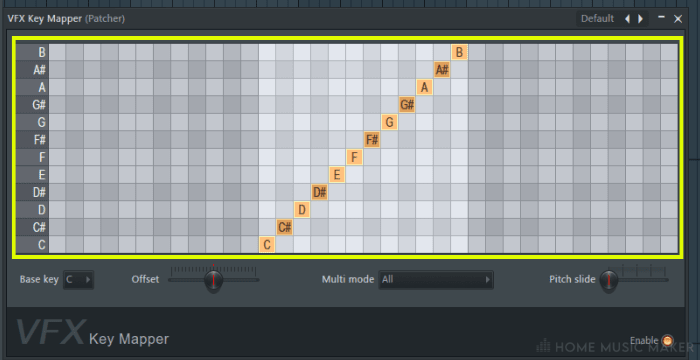
To increase the note pitch of a particular MIDI note, go right in the row, and vice versa, to decrease the pitch. There are also presets for a variety of scenarios.
Related Questions
Can I Use Automation To Transpose A Track In FL Studio?
Absolutely. Double-click on the track using the Draw tool, and locate the Pitch knob in the top-right corner of the window that appears. Adjust the range. You can automate the pitch by using the parameter next to this knob.
Right-click the Pitch knob and select Create Automation Clip. This will cause an automation track to appear, which you can adjust to automate the track’s pitch.
What Are Some Common Uses For Transposing In Music Production?
Transposing can be used to change the key of a track to suit a singer’s vocal range better or to fit the project’s key. It can also change the sonic character of an audio clip for stylistic reasons.
You can also transpose the entire project to have a key change in a song, which can be a great way to ramp up the chorus of a song.
Are There Any Limitations Or Potential Issues With Transposing In FL Studio I Should Be Aware Of?
Transposing audio will change its sonic character. This is only sometimes a pleasant thing. If you transpose by many semitones, the audio could sound terrible. Sometimes artifacts and glitches, such as clicks, pops, and distortion, are also introduced into the sound.
What Are Some Techniques For Using Transposing Creatively In Music Production?
You can use the time-stretching aspect of transposing to create interesting rhythmic effects, such as stretched-out grooves or stuttering beats. You can also create new sounds and textures by manipulating the pitch and timbre of existing sounds.
Transposing can create remixes of existing songs, allowing you to create new track versions with a different key or tempo.
Can I Use Transposing To Create Variations Of A Melody Or Chord Progression In FL Studio?
You can use transposing to create melody or chord progression variations in FL Studio. When transposing, you will still retain the original rhythm and duration. This means you can change the pitch of the melody or chord progression while maintaining most of its musical identity, allowing for variation that still suits the song.
READ NEXT:
Learning these techniques is great, but knowing how to fix common errors in FL Studio is also essential. Check out our article on fixing FL Studio exporting without sound to sort out one of these issues.