KEY TAKEAWAYS:
Autotune is a powerful tool in any modern producer’s arsenal. Luckily, there are several ways to achieve it within FL Studio. Native FL Studio plugins NewTone and Pitcher are a simple and effective way to accomplish that autotune sound in Fruity Loops Studio.
FL Studio Autotune
Autotune has become so commonplace that it is strange when we don’t hear it used, at least to some extent, on vocals in a track.
Over the years, it has become more accessible and easier to apply this effect to vocal tracks. There are ways to use it subtly to ensure that the vocal stays in key.
After this FL Studio tutorial, you can quickly apply an autotune effect to any vocal samples.

Does FL Studio Have Autotune?
When looking to autotune in FL Studio, one primary native VST plugin will be helpful to you, and that is NewTone.
Pitcher is the second FL Studio autotune plugin, which we will look at a little later.
NewTone is an excellent tool for visualizing and adjusting the pitch of a vocal sample and features some simple controls that allow you to dial in the sound of the autotune.
Using NewTone To Autotune
If you are looking to autotune vocals within FL Studio, one of your best options will be to use the native plugin called NewTone. Unfortunately, this plugin doesn’t work in real-time as you record vocals, meaning that it only works with pre-recorded audio and samples.
That said, NewTone allows for an excellent level of adjustment to vocal samples. It will enable users to fine-tune the sound of the autotune to their liking more than most other similar VST plugins.
Step 1 – Opening NewTone And Dragging In Audio
To start with, you will want to open up a new instance of NewTone on a mixer track. Open up the mixer view, select the desired mixer track, and click on an empty insert slot within the mixer track.
From the drop-down menu, navigate to the ‘Misc‘ section, where you will find NewTone, and click on it to open a new instance.


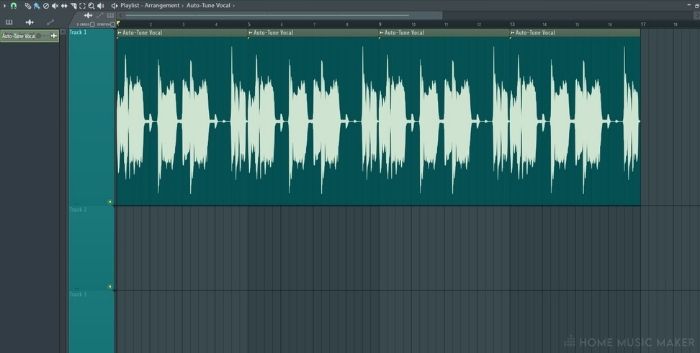
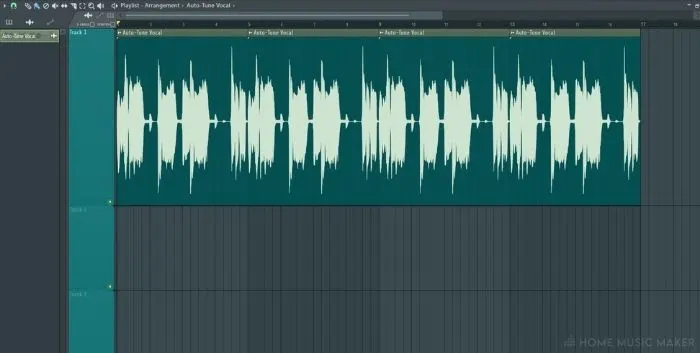
With NewTone open, you can drag the desired audio directly into the plugin window. Once you have done this, the audio gets sliced and placed upon correlating notes.
Step 2 – Adjusting The Vocal
Once you have the audio within NewTone, you can manipulate it in various ways. At the top right, you can see three knobs called ‘center,’ ‘variation,’ and ‘trans.’
Centre
Center determines how close to the note you want the vocal to be; a higher value results in a more autotuned sound.
Variation
Variation is similar. A higher value means less variation in pitch when a note is being hit, meaning the higher value results in a more robotic-sounding voice.
Trans
Trans is short for transient, and a higher value means more variation when a note transitions from one to another, which is a more natural quality.
Between these three dials, you can adjust the sound of the autotune to your liking.
Another great feature of NewTone is that you can click and drag individual parts of the sample to different notes. This means that if you want to apply pitch correction to only certain vocal elements, you can do that in NewTone.
Step 3 – Exporting The Audio
Now that you have applied the autotune effect using NewTone, you will want to export the audio for use in your project.
To this, you can use any of the four export options located on the right of the main hot bar within NewTone.
These options are:
- Copy The MIDI
- Save As
- Drag Selection
- Send To The Playlist
Use whichever of these options suits you, as they have their uses in specific contexts.
Using Pitcher To Autotune
Pitcher is another native plugin for FL Studio. Still, this one focuses more on real-time pitch correction than working with pre-recorded audio.
Step 1 – Opening Pitcher


As Pitcher is an effects plugin, you will want to ensure that you place it on the same mixer track as the vocal you wish to autotune.
Click the drop-down menu within the effects slots on the mixer channel and select Pitcher.
Step 2 – Using Pitcher
Now that you have Pitcher open, you should be able to immediately hear the effect when playing the vocals through that mixer channel.
Knowing which key your vocal is in or which key you want it to be can be helpful when using Pitcher. You can then individually select which notes the vocal will be confined to.
To select which notes the vocal is allowed to play, click on the corresponding note, so it does not light up.
You can also change the pitch speed using the dial on the left and adjust the fine pitch of the vocal with the dial on the right.
Related Questions
Why Is Autotune so Popular?
Autotune is so popular mainly because of its ability to make any vocal sound pitch-perfect, regardless of how they were recorded in the first place. Its prominence in all genres means it is now one of the most used effects in any music producer’s toolkit.
Should I Always Use Autotune on Vocals?
There are instances when autotune is unnecessary or may sound out of place if used. For example, suppose the original recording has the correct pitch. In that case, autotune may not be necessary unless used for stylistic purposes.
Specific genres are likely not to feature autotune as heavily, such as acoustic music. However, some cases exist where autotune can be used very subtly in these genres.
Do All DAWs Have a Native Autotune Plugin?
Some DAWs feature a fully-fledged native autotune VST, such as FL Studio and Logic Pro.
Ableton does not feature any native autotune plugin when writing this. However, there are some good free autotune VSTs that you could consider if you are using a DAW with no native autotune plugin.
What Are Some Good Third-Party Autotune Plugins?
Some of the best autotune plugins currently include: Antares autotune pro, Waves Tune Real-Time, and Celmony Melodyne 5.
There are plenty of other great options out there, so look around to find the best one for your needs and price range.
How Can I Change the Notes of The Autotune in NewTone?
To change the individual notes within NewTone, click and drag on the particular audio slice you want to change the note of. On the left side, you will see a midi keyboard going from the bottom to the top of the plugin, which allows you to see which notes you are using.
Are There Any Other Autotune-Based Plugins in FL Studio?
FL Studio also features a Pitcher plugin used for real-time pitch correction. Within Pitcher, you can select the key you are working on or even which individual notes you want a recording to stick to, making it great for live performance.
Unfortunately, Pitcher can have very mixed results when working with vocals, as the singer has to be often close to hitting the right notes to give a consistent autotune effect sound.
Do I Have to Know how To Autotune?
Knowing how to apply autotune is not entirely essential, depending on the style of music you are predominantly creating. That being said, there are many instances where you might find yourself wanting to apply this effect.
Final Words
After following those steps, you should know how to quickly apply an autotune effect within Fruity Loops Studio using the native NewTone and Pitcher plugins.
Knowing how to use this effect is a great asset as a music producer, as it is one of the most popular effects used in modern music production.
READ NEXT:
If you want another awesome effect in FL Studio, check out our guide to doing a tape stop effect here.