KEY TAKEAWAYS:
Your mixes will improve when implementing proper gain staging while checking for clipping. It would be best if you only used the necessary effects and not for the sake of having them on the tracks. Using send channels for impact is a great way to mix in the 3D space and parallel the process.
Improve Your Mixes
Mixing can be a daunting process and rather clinical.
How you want to mix is down to taste and preference. However, there are some things you can do to help your mixes sound more professional and to improve your workflow.
There are also standard practices that you can put in place to avoid common mistakes when mixing. These include unwanted distortion and too many elements fighting for the same space.
This article will discuss 11 mixing tips to elevate your skill level and make a more efficient mixer without sacrificing quality.
Gain Staging
Firstly, listen through the entire song and adjust the volume of each element. You want to strike an initial balance of all the parts within the music.


However, gain staging is a continuous process, not just a starting process. As you add effects to tracks, volumes will vary, so you need to keep adjusting these tracks to maintain the balance in terms of volume.
Check For Clipping
Clipping is where there is unwanted distortion in the track. This applies to both the entire song and also each channel.
If your master track is clipping, it’s a result of the cumulative volume of each track being too high. This can be fixed by lowering the volume of all tracks other than the master track. Sometimes clipping can also be caused by a particular effect on the master track that increases the volume too much.
For individual tracks that are clipping, it can be several things. You may have the fader too high or a gain plugin too high, so you can fix this by turning it down. However, this can affect the balance of your tracks, so make sure to adjust other tracks to compensate.
Another cause could be an effect increasing the volume, which can again be reconciled by adjusting the effect.
Finally, it’s possible that the track was recorded with the clipping. This is usually due to needing more input gain on the audio interface or mixing desk. Unfortunately, the only way to fix this issue is to rerecord the part.
Only Do What’s Necessary
It can be tempting to try and apply as many effects as possible to each track, but that’s rarely a good option. You don’t have to be a complete minimalist with effects, but it does pay to be more essentialist with your choice of effects. Every effect should serve some purpose.
Use Send Channels For Reverb And Delay
Rather than putting reverbs and delays on individual tracks, you should use send/return/fx tracks. You can have multiple fx tracks for each effect. For example, having a small room reverb, a plate reverb, a large hall reverb, and a gated reverb.
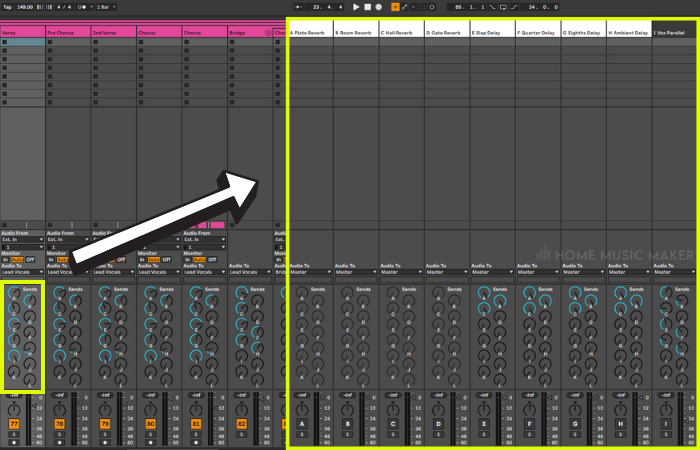

Doing this allows you to send different amounts of each track to these effects. By using the same effects on these return tracks, you save CPU power, have all the tracks in the same space, and use multiple variations of the same effect on each track.
Mix In 3D Space, Not Just 2D Space
You may be panning your mixes correctly, but have you considered more than just the stereo space?
Think about a song as a band playing in a room. The drums are in the back, the singer is up front, the bass is in the middle, and the guitars are on either side. Of course, in your mix, you may not have these elements; it’s just a way to visualize the theoretical 3D space in which the song exists.


But how can you implement this into your mix? This is through EQ, reverb, and delay.
You can use reverbs and delays to create space. The elements of the mix that you want to push further back will have more reverb and delay. You can reduce the high-end frequencies of the tracks you want to go further back. If an element is further back, it will be less bright.
Parallel Processing
Parallel processing is where you place effects on a return track and send tracks to that return track to be processed. This means that you’re not directly applying to tracks.
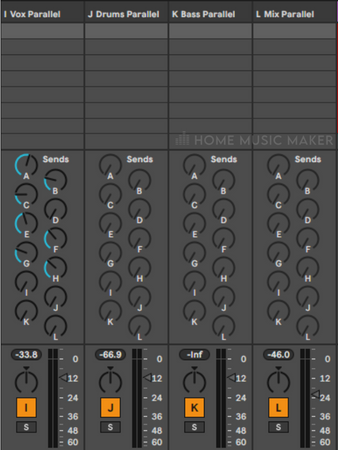
The most common of these is parallel compression. You can do this for drums, bass, or an entire mix.
The return track has a compressor with lots of gain reduction, so it squashes the affected audio. Then you have the regular track and the highly compressed track playing together. You can balance the volume between the two to get the desired sound.
You can use parallel processing with any effect. I enjoy having a parallel vocal track that is compressed and bright. I will then increase this when I want more vocals in the mix rather than the regular track.
Master Track Processing
You may think to leave the master track alone for the mastering engineer to handle, but I think it’s the secret weapon of the mix.
Similar to how applying effects to groups can help gel the tracks within the group, the same can be used for the master track. Having an EQ, compressor, and tape emulation on the master track with small amounts of each can help to marry the elements of the song together.
Process Similar Tracks Together
Group similar tracks using bus tracks or groups (depending on your DAW). This way, you can apply effects to all these tracks together. This is a great way to gel tracks together, bringing them closer to that final song.
I typically group tracks by having a drum group, bass group, chords group, lead group, and vocal group. I’d recommend mixing these groups before going into the individual tracks. This helps to glue the tracks together in a more cohesive way.
Using groups and processing them together allows you to build up a cumulative level of the effect, such as compression, instead of using one at the end of the mix to do all the work. This makes it sound more natural and will avoid any ducking in volume.
Drum Group
My drum group includes all my drum tracks (obviously) and all percussive elements that aren’t strictly melodic. I’ll process this group with a graphic EQ, an analog compressor emulation, an analog EQ emulation, and a tape emulation.
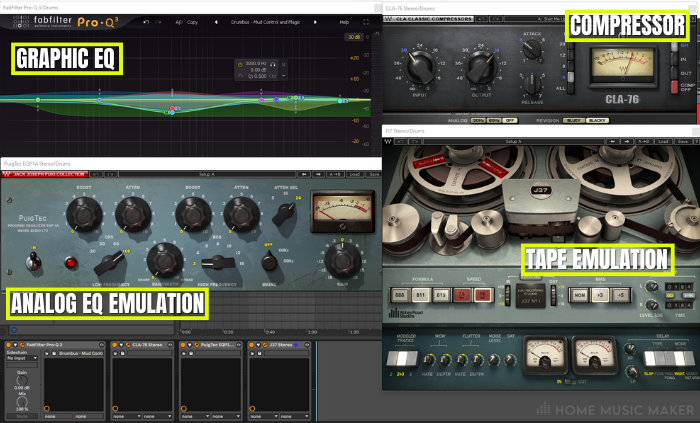

The first EQ is mainly to get rid of any problem frequencies that are cluttering up the mix or are just unpleasant. The compressor will then do around 1 to 2 dB of gain reduction to help smooth the group.
The second EQ will boost frequencies that help the track stand out. Finally, the tape emulation adds a little saturation to the track. This will also slightly compress the group further.
Bass Group
All my bass guitar, 808, synth bass, and bass sample tracks will reside in the bass group. This allows me to process all the low-end parts of the song together and get reasonable control of these frequencies. This is what glues the drums to the rest of the song.

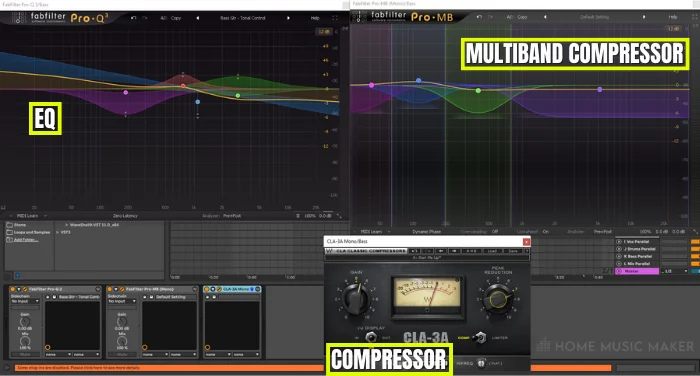
First, I will use an EQ to shape the sound for the low end and remove unpleasant frequencies. Then I will apply a multiband compressor to the track. I can then compress different frequencies of the bass group with varying compression levels.
The following effect in the chain is a compressor, which will further make the track’s low end more consistent. I will have the compressor making quite a bit of gain reduction. I always aim for a constant volume and low dynamic range with the bass elements.
Chords Group
You can go about grouping a song’s melodic and harmonic elements in several ways. The two typical ways are either by instrument types or their role in the music. I opt for the latter.

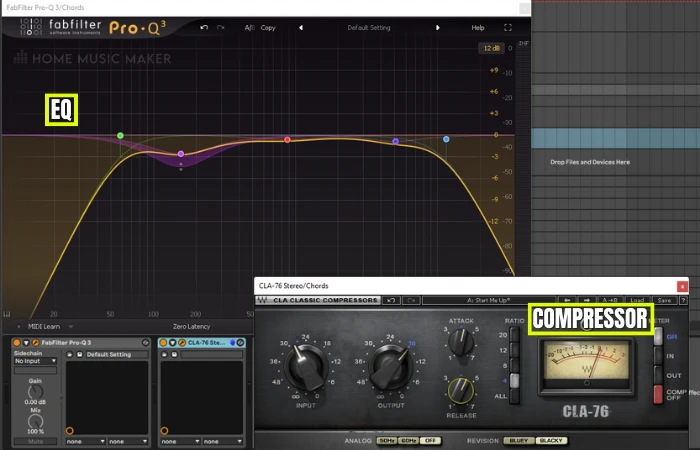
The chords group is where anything playing chords lives (what a surprise). This can be piano, guitar, synth, etc. These elements bridge the bass elements to the lead and vocal parts.
I typically process this group less than the drums or bass, but I will use an EQ and a compressor at the minimum.
The EQ will shape the sound and remove unwanted frequencies. The compressor is doing a minimal gain reduction to smooth out the transients. Suppose I’m having issues with frequencies that I don’t want to be eliminated but are more consistent. I will use a multiband compressor to control these.
Lead Group
The leads group is where I keep all of the melodic components of the song, other than vocals. This includes main lead lines, background melodies, and even a melodic sound that appears once in the music.
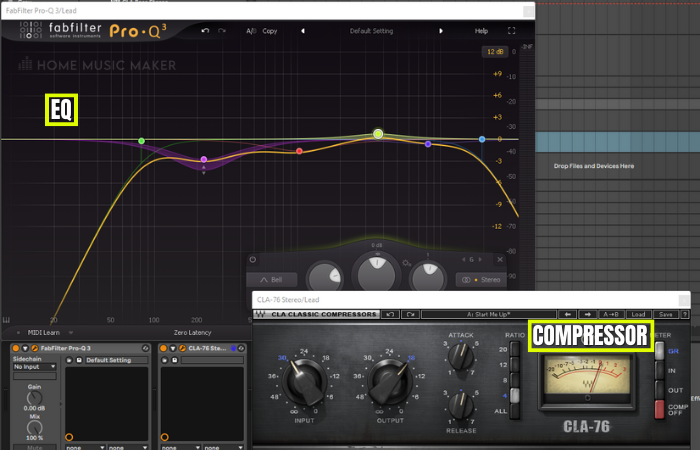
I treat this similarly to the chord group but with a different EQ curve. I want this group to be more prominent than the chord group and to sit on top but still not overpower the vocals.
Vocal Group
I process my vocals on individual tracks for most of the work, as it’s a prominent part of the song. However, if required, I will use an EQ, compressor, and possibly a de-esser. To catch anything that these effects aren’t getting on the individual tracks.
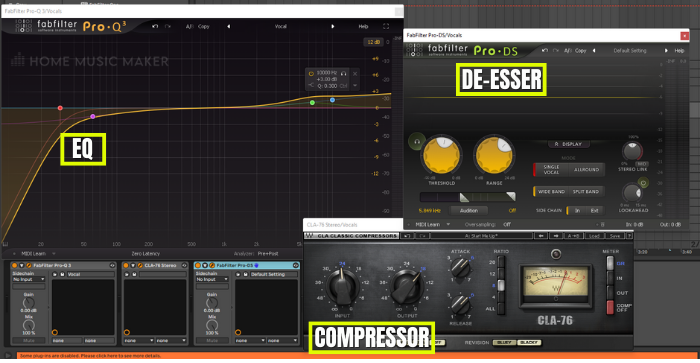
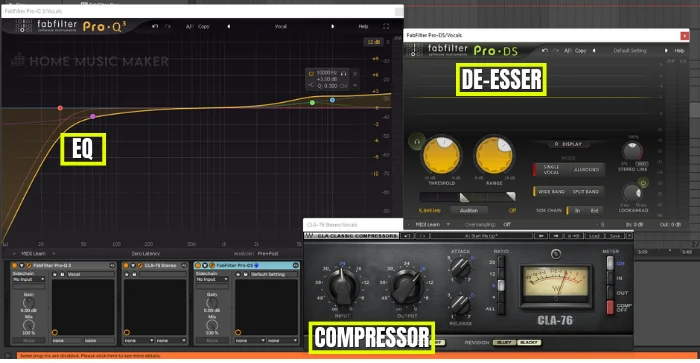
This is also helpful as sometimes each track sounds fine on its own. Still, when combined, it can result in a build-up of undesirable frequencies or too wide of a dynamic range. Having these effects on the group can help to further control these.
READ NEXT:
Mixing vocals can seem tricky. They’re at the forefront of a mix and therefore are crucial to get right. For tips on how to get better-sounding vocals, check out our article on why mixing vocals is so hard.
Check The Mix In Mono
Most people mix in stereo, but do you check in mono? Doing this can help you see how your tracks are interacting with one another.
Without the separation created by panning the tracks, you can hear whether your mix sounds cohesive and pleasant or a complete mess. Of course, most people will listen in stereo, so make that your primary focus. However, checking mono is a fantastic way to hear the track’s balance.
READ NEXT:
You should read our article on mixing in mono for a more detailed look into how to mix music in mono.
Referencing With Other Songs
The best way to improve your mixes is by listening to other songs that you consider well mixed by professional mixing engineers. Find a song or multiple songs similar in style to the song you’re mixing.

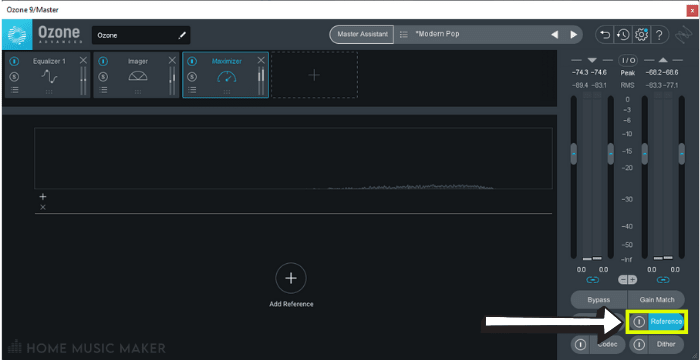
You can compare the frequency spectrum of the songs, the dynamic range, the compression amount, and more. There are also great plugins to help you compare reference tracks to your mix, such as the Izotope Ozone plugin.
Referencing With Many Listening Devices
Your mix will be listened to on many devices when released. Anything from a phone speaker to a Bluetooth speaker, to a car, to a hi-fi system. So it is essential to check your mix in more than just one or two situations. Of course, I still use studio monitors and headphones, but I don’t exclusively use them.
I like to get a notepad and write notes regarding the mix for each listening device. Sometimes I will also listen to a reference track for perspective within each device.
You can then see common problems with your mix across different devices and find some middle ground. Of course, no mix is perfect for every device, but you can find a good balance.
Related Questions
Is Mixing Hard?
It’s not easy to say whether a skill is complex. It’s entirely down to the person. However, it is not easy and does require lots of practice.
Luckily there are tonnes of free resources to learn mixing out there. You can find free stems to mix and free tutorials with a quick Google search. You’ll be undeniable by referencing your mixes and always continuing the learning process.
Can You Mix Music On Headphones?
Absolutely. Of course, it’s better to use a combination of headphones and studio monitors, but if you only have headphones, it’s not the end of the world.
Once again, referencing saves the day here. Learn your headphones and how well-mixed songs sound through them. Also, referencing other devices you have lying around can make you even more sure of your mix.
How To Get Started Mixing Music?
If you’ve never mixed anything, I would first learn the DAW you chose to blend in. The better you know this software, the better you can shape the music.
To practice, find stems online with a mixed version of the track. This will allow you to clearly understand how a professional mix can sound and practice with the same song you’re listening to.
Should I Mix My Music?
There are, of course, pros and cons to this.
Pros:
– You can create the sound you desire.
– You have complete control over the next stage in the music-making process.
– You don’t have to pay for a mixing engineer.
Cons:
– If you’ve already written, recorded, and produced the song, mixing can be complex with the fatigue of hearing the song on repeat.
– Your skill level may differ from where it needs to be to achieve the desired sound.
– It can take longer for you to do it than for someone with fresh ears.
Where Can I Find Mixing Engineers?
SoundBetter is a great site to find freelancers in the audio world, including mixing engineers. Here you can talk to the mixing engineers to ask any questions you have, and you can listen to their previous work.
Other freelance sites, such as Fiverr and Upwork, are also great for finding freelance mixing engineers, even though these sites are for freelancers of all varieties.
Another option is to look at songs you love the mix for, then find out who mixed them. Depending on your budget, you could get your music mixed by someone who mixed your favorite song.
READ NEXT:
Now that you’ve learned how to improve your mixes, maybe you’re ready to start charging for mixes. Or, possibly, you’ve already started, but you don’t know how to price your work. In that case, check out our article on maximizing your earnings for mixing.