KEY TAKEAWAYS:
A warp mode in Ableton is the name for different methods of time-stretching audio. Beats mode preserves transients. Tones mode works best with a precise singular pitch contour, whereas Texture mode is for more harmonic content such as chords. Re-Pitch mode works like slowing down a record. Complex and Complex Pro are combinations of all the other modes.
Ableton Warp Modes
You may have noticed the “Warp” button when you’re in the audio clip view.
You may have tried to quantize, change the pitch, or change the tempo in Ableton before and noticed the options for warping.
It can seem pretty complicated, to begin with, but once you understand what they do and what each mode is for, you can start to use them with ease.
In this article, I will go through each warp mode, how it works, when to use which one, and also what a warp mode even is in Ableton.

What Is A Warp Mode In Ableton?
Ableton has a way of time-stretching audio without changing the pitch, as do many other digital audio workstations such as Pro Tools and Studio One. In Ableton, this is called warping.
What is unique to Ableton is that there are six different ways of doing this based on various algorithms and techniques. These are called warp modes.
They are all based on changing the audio speed without affecting the pitch. Still, they are specifically designed for different types of audio.
The Six Different Warp Modes In Ableton
Let’s look at Ableton’s different warp modes and give examples of when to use which one. On top of that, I will guide you through each parameter with the warp modes.
Of course, please do not feel you must use these warp modes, as I suggest. Experiment and see what sounds best.
Beats
The Beats warp mode focuses on the transients in the audio clip. Ableton will analyze the transients in the audio clip and will warp the sample based on this.
You can also determine where the transients are in the audio clip rather than using what Ableton produces. However, I find the transient analysis within Ableton perfectly adequate.
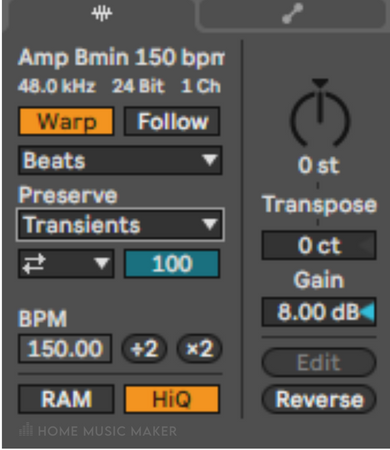

You will notice that underneath the warp mode drop-down menu, another option is “Preserve.” This lets you determine the divisions you wish to use as boundaries while warping the audio.
This can either be based on transients, as mentioned, or on a fixed note value.
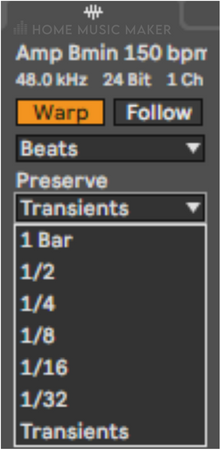
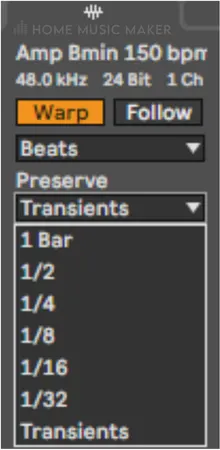
The most accurate warping will be using the “Transients” option for “Preserve,” as the boundaries will be based on the transients of the audio clip.
Underneath the “Preserve” option, there are two more parameters. The drop-down menu on the left with arrows is the “Transient Loop Mode.”
This determines how the warp mode will compensate for any empty space between transients.
- Loop Off is the single arrow option. This means that Ableton will not compensate for the empty space and, if it exists, plays the section until it ends. This can result in a lot of gaps in the audio.
- Loop Forward is the choice with two arrows both going right. The audio will play a loop of the audio in the gaps only going forward. At the end of the audio, the playback will jump back and keep playing from that point over and over until the next transient.
- Loop Back-And-Forth has the symbol of two arrows going in opposite directions. However, instead of jumping back to a point in the audio, it will reverse the audio back to that point, play from that point, and repeat until the next transient.
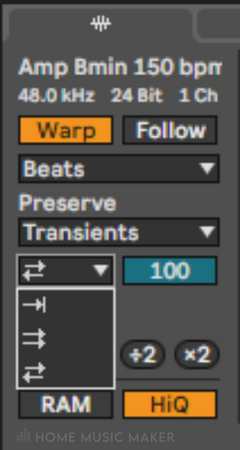

Next to the “Transient Loop Mode” chooser is a slider that can be any integer value between 0 and 100. The “Transient Envelope” parameter provides fade-ins and fade-outs to the audio segments.
A value of 100 will apply no fades, and 0 will apply a rapid fade to the audio segments. Therefore, the larger the number, the slower the fade.
When dealing with stretching audio and compensating for empty space, the methods to do this can produce clicks from the quick changes of the regular audio to the looped audio.
Fades with this warp mode can minimalize the clicks or remove them entirely. But make sure to eliminate any impact in your sounds by doing this.
Beats mode benefits rhythmic audio clips, especially drum loops (surprise, surprise!). If you mess around with the features, you can get some weird artifacts from the warp mode.
It won’t give you a natural sound but can be a fantastic musical tool for messing with sounds.
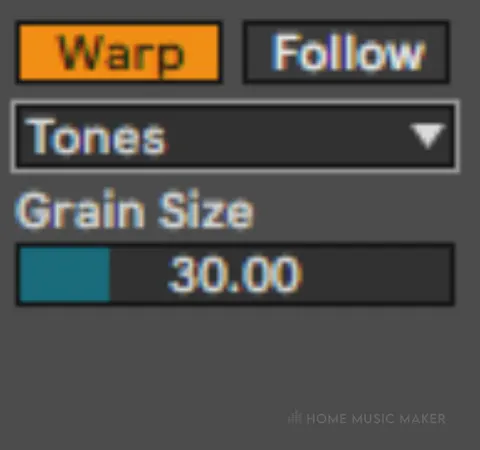
Tones
The next option is the Tones warp mode. This has fewer parameters, one to be specific. But before we discuss what this parameter “Grain Size” does, maybe we should elaborate on what grain is in terms of audio.

A grain is an audio segment formed from granulation, a process that splits an audio sample into tiny pieces. You can see how this can be applied to warping audio quite well.
Tones mode is excellent for applying to audio with a clear singular pitch, such as vocals. It also works on other single-note instruments, such as a lead guitar, bass, monophonic synths, etc.
Using the “Grain Size” option will allow you roughly determine the grain size used to a certain degree. Each grain size is different for each audio clip, but using this can steer it in the right direction for you.
Using a smaller grain size will be best for audio with a clear pitch structure, whereas using a larger grain size can compensate for audio with a less clear pitch structure.
READ NEXT:
For an in-depth look at vocals, take a look at our guide to creating amazing vocals in Ableton.
Texture
Texture mode is excellent for less singular pitch audio signals, i.e., audio with multiple pitches/frequencies. You can think of it as the harmonic version of the Tones mode, but it behaves differently.

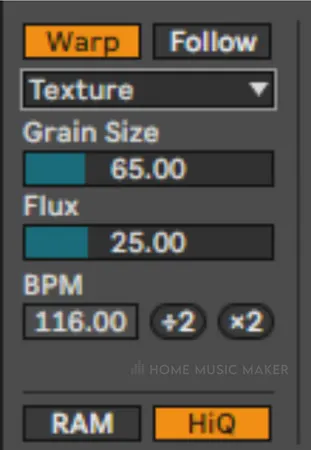
It also has the parameter “Grain Size,” but unlike Tones mode, Texture mode doesn’t base this on each signal. Instead, the grain size you set will actually be used.
The second parameter is “Fluctuation,” which introduces more randomness into the granular resynthesis of the audio clip.
This mode works best for audio clips with harmonic content (i.e., chords) and soundscapes. Examples include a polyphonic synth, guitar chords, a piano, street noise, etc.
Re-Pitch
Re-Pitch mode behaves differently from the other modes. Instead of using granular resynthesis or basing the stretching on transients, it focuses on the playback rate of the clip.
As you may have guessed, this mode will alter the pitch of the audio clip based on how fast or slow you want the clip to play.

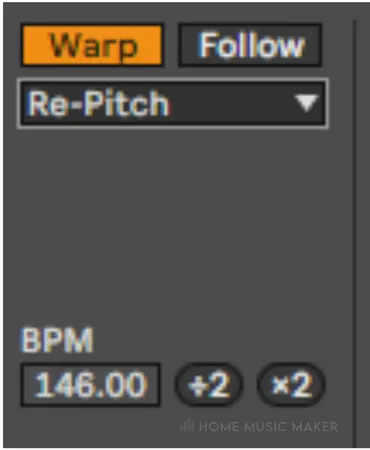
Think of it like slowing down a vinyl record.
If you turn down the speed, the music slows down and lowers the pitch. The same for if you turn up the speed; the music is faster and higher in pitch.
Because of this, the “Transpose” and “Detune” parameters cannot affect the Re-Pitch mode. There are actually no parameters specific to Re-Pitch mode.
However, the main controls for this are the half-tempo or double-tempo options, plus altering the tempo of the project or clip.
When doubling or halving the speed of the audio clip, the key that the part is in doesn’t change, just the octave. However, getting the right pitch can be tricky when you’re more specific with the tempo change.
I use this effect for making lo-fi hip-hop beats. It allows me to take a sample and change the sound in a vintage and analog way, which is perfect for the lo-fi beats genre.
Sometimes I have to freeze and flatten the track to print the warp to the audio clip and then adjust the pitch in a different mode, but other times it’s good to go.
Complex
The Complex warp mode is my personal go-to. It is more taxing on the computer, so I was more selective before I had a computer that could handle every clip with this warp mode. It’s a combination of the other warp modes.

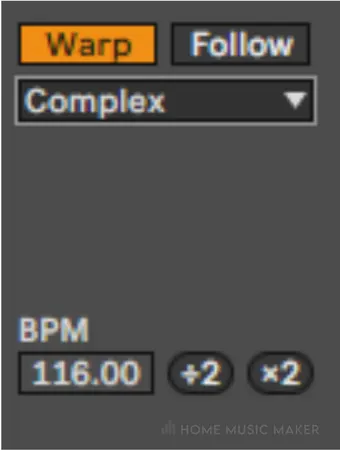
There are no specific parameters for Complex mode. Still, you can alter the “Transpose,” “Detune,” and any other parameter in the audio clip view.
This works well on everything because it is an excellent combination of each warp mode feature. It can even be used to warp an entire song. I use this warp mode 90% of the time.
Complex Pro
For the 10% of the time that I don’t use Complex mode, I use Complex Pro mode. This is similar to Complex mode, but a bit better and has two extra parameters.

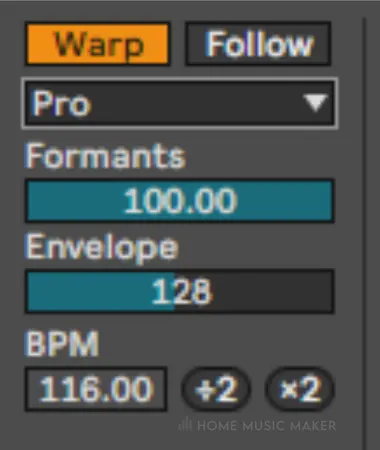
The first parameter is the “Formants” slider. Formants are what determine the sound of a pitch through a vocal tract.
It is why a note sung by two people will sound different, even if they are both at perfect pitch. Within this mode, you can alter the formants digitally.
This can compensate for transposing an audio clip to make it sound as close to the original but just a different pitch. Or you can use this as a significant effect to change the tone of your voice or any other audio clip completely.
When the slider is at 100, the formants will be preserved in transposing, i.e., the tone of the clip will stay as close to the same as possible.
Warning: The “Formants” slider will only affect the audio clip if it has been transposed.
The second parameter is the “Envelope” slider. This will also affect the tone of the audio clip, but typically the value that is the default (128) will work fine. However, play around with it again to get the desired sound.
READ NEXT:
To learn what great effect these warp modes can have, check out our tutorial on creating an octave effect in Ableton.
Related Questions
Can I Use Warp Modes To Remix A Track In Ableton Live?
Absolutely. You can remix whole songs or even certain parts of songs with warp modes.
My favorite way to utilize this is to use the Complex Pro mode on vocal chops to get some attractive tones out.
Can I Use Warp Modes To Adjust The Pitch Of A Sample In Ableton Live?
Yes. You can use all the warp modes to change the pitch of a sample independent of the speed of the sample, other than the Re-Pitch mode.
You can adjust the pitch based on semitones or cents.
How Do I Use Warp Mode To Create Glitch Effects In Ableton Live?
Using Tones or Texture modes with larger grain sizes can achieve some glitchy artifacts in the sound.
Using Beats mode with fixed note values for the “Preserve” option can also yield glitchy chops.
Can I Use Warp Modes To Adjust The Timing Of A Recorded Performance In Ableton Live?
Absolutely. Warp modes with quantizing/warp markers can adjust a recorded performance well.
You can also change the tempo of this recording.
How Do I Use The Ableton Live’s Warping Engine To Match The Tempo Of A Track To A Metronome?
In the audio clip view, you can adjust the BPM of the audio clip. You can then get as close as possible to the bpm of the project by changing this value.
You can use quantizing to fix this if you can’t get it perfect or the audio wasn’t excellent in time.
READ NEXT:
Warping is one of many things that Ableton can do. Read our article on the best ways to learn Ableton to master more.