Setting up a microphone is relatively straightforward in Studio One. Once you add a new track, make sure to properly route the channel according to the input on your audio interface. Once you get the latency to a minimum, you’ll be ready to record.
Learning to set up your microphone is probably the single most crucial skill you’ll need to master as a DIY musician and producer. The chances are that most of your recordings will be done by micing up a particular instrument, guitar cab, or placing a mic in front of a vocalist, so it’s vital to know how to do it properly.
Additionally, it’s essential to master the software side of things. Navigating through your DAW (digital audio workstation) without any guidance can be tiresome and frustrating, so we’ll go through it all in this article.
Hopefully, by the end, you’ll have a firm grip on how to set up your microphone inside your DAW (in this case, we’ll use Studio One) and how to place it on different sound sources.
There’s a lot to cover, so let’s dig straight into it!
Setting Up Your Mic In Studio One
Before dealing with mic positioning and other treats, it’s vital to first talk about the basics.
To get the most out of your microphone, you’ll need to plug it into a good preamp. By “good preamp,” I don’t mean some fancy $1000 device. A simple and affordable audio interface will do the trick just fine.
Not only will you record in the highest possible quality, but you’ll also get loads of other benefits like phantom power for your condenser microphone, the option to adjust the input gain, and recording several microphones simultaneously.
Studio One Settings
Once you plug in your microphone, it’s good to check if everything’s routed properly in Studio One.

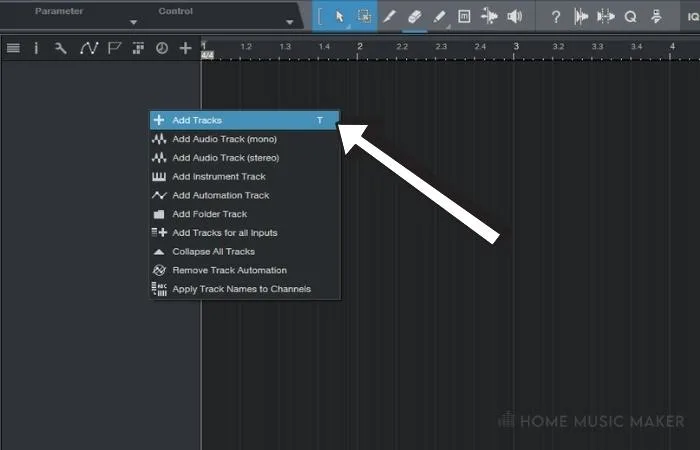
Once you add an audio track (by either pressing “T” or right-click on the left panel and choosing the option “Add tracks“), you’ll notice a new option window appear. Here you can adjust several track parameters like track name, track color, format, and input.

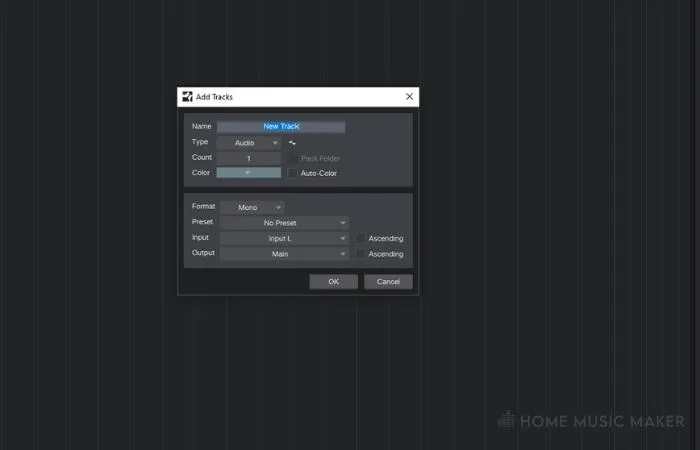
Whenever you’re recording something with a single microphone, I’d advise creating a Mono track. A very important feature is the “Input” section you see at the bottom of the pop-up window.
If you have an audio interface with two inputs, you’ll have the option to choose Input L and Input R. If you’ve plugged your mic in the first input, then select Input L and vice versa. This will ensure that your DAW knows which input to register the signal from.
If you happen to have multiple inputs (more than 2), your inputs will be shown accordingly (usually numbered by their order on the audio interface itself).
Latency
The next thing to consider is latency.
If you’re looking to record while monitoring yourself in real-time, you want the latency (a delay between what’s being played or sung and being heard in the speakers) to be minimal.
To do this, head over to the “Studio One” tab at the top of the main window and go to Options. From there, choose the “Audio Setup” tab, and next to your Audio device, click on “Control Panel.” Here you can change your latency settings to the lowest possible value.
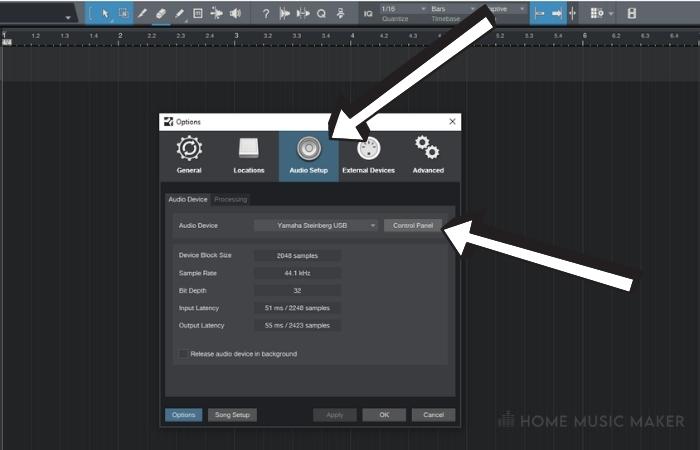

Note that each audio driver has a different menu, and terminology may vary. If you can’t find it under “Latency settings,” try looking for Buffer size or something similar. Generally, you shouldn’t have too much trouble finding it.
Also, it’s important to say that a small buffer size will dramatically affect your CPU performance. It’s best to use it in the early stages of your production, as you probably won’t have that many stacked plugins. Otherwise, you may experience glitches, pops, and crackles during the recording.
If you’ve set up and routed everything correctly but still get no sound from your microphone, check what type of mic you have.
Phantom Power
A condenser mic needs an additional electrical current to work properly. If that’s the one you have, make sure to engage the phantom power switch on your audio interface. Depending on the model, you may find it under a “48V” label as well.
When it comes to the software side of things, generally, you should be good to go at this point. If you’re still not getting the sound out of your microphone, you can try a couple of things.
Troubleshooting
First of all, check your Output options that the output device matches your audio interface. Studio One always does this automatically, but it’s advisable to double-check.
Secondly, you can uninstall and reinstall a fresh and up-to-date audio driver.
Finally, you can switch cables, swap microphones, and even borrow another audio interface to see if the issue is resolved.
Click here as we pit two heavyweight mics against each other. The AT2020 vs. NT1A
General Overview Of Microphone Types
Learning how to properly mic up different instruments (or even a single one) takes a lot of time and trial and error.
It’s usually highly dependent on your situation, meaning that the instruments you’re recording, the room you’re recording in, and several other factors will be vastly different from mine.
This means that all of the tips we’ll discuss should be taken as mere guidelines. It’s entirely up to you to test those out and see what works for you and what doesn’t.
Let’s start by describing the general tonal qualities of each type of microphone.
What Is A Dynamic Microphone?
Dynamic Mics are great all-purpose mics. They can honestly be used on everything, and you can expect to get good recordings in the worst-case scenario.

A good thing about them is that they can withstand a considerable amount of sound pressure without being damaged by it. They are generally built like a tank, so you can throw them on anything that’s really loud, like electric guitar cabinets, snare and kick drum and all kinds of percussion.
The only possible downside of these mics is that they generally tend to capture intricate details slightly worse than some other types. This doesn’t mean that they sound dull and flat by default, but they have somewhat less “edge” to them.
What Is A Condenser Microphone?
Condenser Microphones are usually thought of as microphones to capture all the little details and intricacies of the sound source. This means that they’re primarily used for recording vocals, drum overheads, and solo instruments that need to sound as big as they possibly can on the recording.
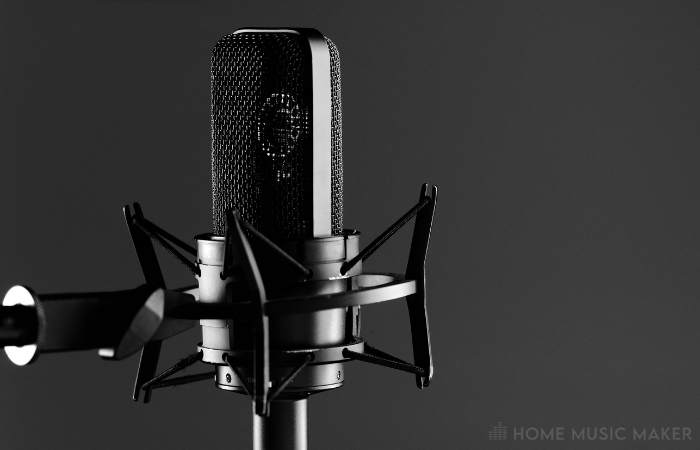
They generally work the best when used on bright instruments as there’s a certain silky smooth feel to their top end. However, condenser mics are pretty fragile in their design, so you’ll need to pay attention to the number of decibels that reach their capsules.
This means they’re usually avoided when a guitar amp is turned to 11! Also, transient rich sources like a snare drum can potentially break the capsule.
What Is A Ribbon Microphone?
A Ribbon Mic is known for its dark, warm sound. I personally quite like them on anything really. I prefer using plugins to brighten things up inside the DAW rather than tame harsh recordings with an EQ.
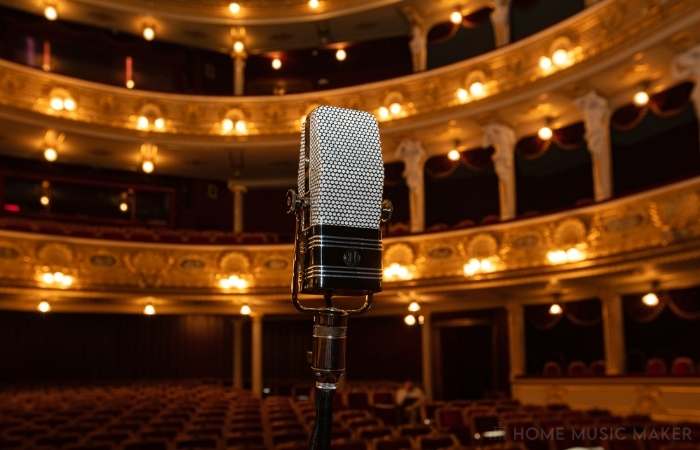

They’re a great choice whenever you need low-end on anything.
This mic is mainly used for room mics in drum recordings. Still, you can use them on anything as an excellent supplementary mic to bring out the bass frequencies. They’re usually blended with other mics because they lack sparkly treble.
Of course, this is a relatively simplistic and often misleading way of thinking about microphones. You should actually think about them as just different tonal colorations.
Hopefully, these guidelines will influence your judgment when deciding which microphone to use in different situations.
How To place Your Microphone On Various Sources
Here, I’ll describe the effect a mic position has on the tonal quality of a couple of the most common sound sources. I’ll generally try to avoid saying how you should mic things up and instead describe how the sound changes depending on the position.
How To Record Vocals
Generally, the more you pull the mic capsule towards the singer, the more bass you’ll get. This is known as the proximity effect and is used effectively by podcast and radio hosts to achieve that ASMR-ish deep and warm voice effect.
Keeping it 20-30cm away from the singer will provide a nice tonal balance with significantly less bass and without the room getting too prominent. Moving it away from the singer will introduce more and more of the room reverb the further you move it away. Hence, it’s advisable to experiment until you find the right spot.
How To Record Acoustic Guitar
Most engineers like to record acoustic guitars in stereo. The reason is that you can place two microphones to capture various tonal qualities of the guitar.
An acoustic guitar is a complex instrument that emits sound through the soundhole and the whole instrument.
Placing a mic directly in front of the soundhole will give you a lot of bass and boom. Pointing the mic somewhere at the 12th fret is a good trade-off between capturing the body of the sound and the sparkle of the strings.
How To Record An Electric Guitar Amp
With digital technologies taking over in the last decade, more and more artists have decided to line-record the guitars. However, learning how to mic up a real amp is still helpful on many occasions.
The closer you put the mic to the center of the cone, the brighter it gets, and vice versa. You can experiment with stereo recording. Place one mic near the center for brightness and the other one closer to the edge for a richer sound and blend it all to tase.
How To Record Drums
Drums are notoriously hard to record. You need better equipment to accommodate multiple microphone preamps and the skill to make it all work together. You can still record some fantastic drum sounds if you only have two inputs.

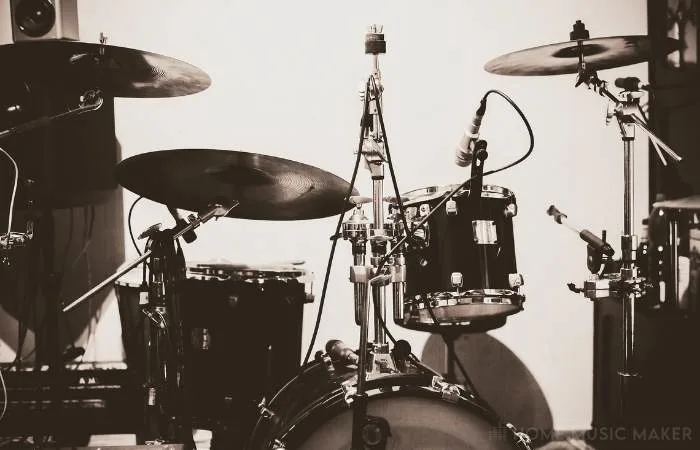
There are a couple of ways to approach this.
I’d advise dedicating one of the mics to capturing a solid low end of the kick, as that’s the most essential part of the drum. The snare is loud anyway, and it will cut through in most situations.
You can even mix it up and place a mic somewhere over the kick, pointing at the snare. That way, you can get the two to be solid in one microphone and use the rest for cymbals.
Finally, you should take each recommendation with a grain of salt and experiment to determine what works for you and what doesn’t.
Related Questions
What to Look for In a Recording Studio Microphone?
That will depend on what you intend to record with it. Each Microphone Has a Certain Frequency curve that may or may not work for your purposes.
How Do You Connect a USB microphone in Studio One Artist?
A USB mic usually does not need any special treatment. After you plug it in, your PC will make it functional automatically. Afterward, you treat it like a regular mic.
Why Is Studio One Not Recognizing Your Audio Interface?
This is probably due to the faulty interface or the USB cable that connects it to your computer.
How to Stop Your Condenser Microphone from Buzzing?
A buzzing microphone is usually a sign of a poor electrical installation in your studio. Having an expert fix your grounding problem will usually result in the issue going away.
Can You Make Pro-Sounding Recordings in A Home Recording Environment?
It is absolutely possible to record like a pro even with budget gear with today’s technology. You only need a lot of experience and good performers.
Want to learn more? Click here to fix issues with Studio One failing to open the microphone.