KEY TAKEAWAYS:
Unless a component of your XLR cable or Focusrite audio interface is damaged, friction is the only thing restricting the cable from coming out. In almost all cases, to remove a stuck XLR cable from your Focusrite, you must apply enough force and pull the cable out straight.
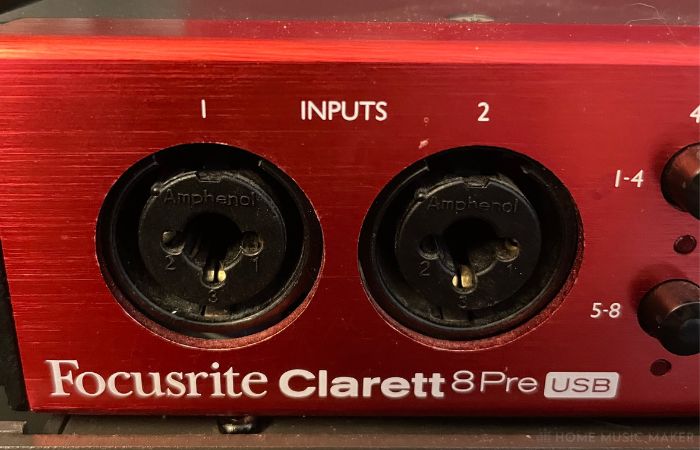
Removing Stuck XLR Cables From A Focusrite Audio Interface
If you own a Focusrite audio interface, knowing how to remove a stuck XLR cable can be handy.
You will have significant issues recording if you do not know how to remove a tight XLR cable from your Focusrite.
I have had my Focusrite for about six years, and I have not had an XLR cable get stuck that I could not remove myself.
In this article, we will look at how to remove a stuck XLR cable from your Focusrite audio interface.
What You Will Need To Follow This Tutorial
Here is a list of everything that you will need to follow along with this tutorial:
- A Focusrite audio interface
- An XLR cable that is stuck in said Focusrite audio interface
- A strong friend or family member (in some cases)
Now that you have what you need, let’s get started!

How Can I Prevent My XLR Cables from Getting Stuck or Difficult to Remove in The Future?
Here are some tips for preventing your XLR cables from getting stuck or difficult to remove in the first place:
- Only use XLR cables made by known and reliable brands.
- Don’t use an XLR cable if it seems damaged in any way.
- Don’t use an XLR cable that has previously given you trouble.
- Don’t use an XLR cable if it is dirty or covered in any residue or debris.
- Be gentle when connecting an XLR cable to any audio equipment.
If you follow these tips carefully, you will prevent your XLR cables from getting stuck in the future.
Step-By-Step Guide: How To Remove XLR Cable From Focusrite
Let’s dive in and look at removing a stuck XLR cable from your Focusrite audio interface.
Step One – Prepare
Preparing is the first step to removing a stuck XLR cable from your audio interface.
Clear any objects next to your Focusrite interface out of the way and power down your audio interface.
Now that your interface and area are ready, you can move on to step two.
READ NEXT:
If your Focusrite audio interface doesn’t have a power button, then how do you turn it off? For more on this, check out our article on how to turn off the Focusrite Scarlett 2i2.
Step Two – Wiggle And Loosen
The next step is to grab the end of the XLR cable that you have plugged into your audio device and wiggle it. This will loosen the cable, which will help you pull it out.
Now that you have loosened your cable, it’s time to move on.
Pro Tip
Be firm but also careful on this step! You don’t want to damage your cable or audio interface.
Step Three – Pull The Cable Out
With our cable loosened up, the only thing left to do is pull it out from our Focusrite interface.
To do this, get a firm grip on your cable’s end and interface.
Pull the cable out in a straight line with as much force as possible to remove it from your Focusrite interface.
Remember, unless there is damage to your cable or audio interface, nothing is holding the cable in except friction. In some cases, it might take a surprising amount of force, but there is usually no trick to getting a stuck cable out except a firm grip and torque.
Pro Tip
Once you can get your stuck XLR cable out of your audio interface, put it in the do not use pile. If the cable gets stuck, you should not use it anymore – it’s not worth damaging other audio gear.
If your XLR cable is still stuck, move on to step four.
Step Three – Repeat
Repeat these steps if your cable is stuck until you solve the problem.
You can also consider asking a friend or family member who might be stronger than you to take a stab at it.
Keep reading if you have no luck removing your stuck XLR cable.
Contacting Focusrite
If your cable is stuck with no way to get it out, your audio interface might need a new input jack.
I recommend getting in touch with Focusrite for support. They will help you assess your options and make a repair plan.
They can also help you determine if you have any warranty on the device and whether it applies to your situation.
Taking Apart Your Audio Interface
You can also consider making the repair yourself.
important
WARNING: You should only attempt this if you are a confident sound engineer and have experience repairing audio equipment. Trying to repair yourself will likely void any warranty on your Focusrite interface.
An audio interface is definitely not the most complicated piece of equipment. However, you should only work on yours if you are 100% confident.
Tips For Maintaining And Organizing Your XLR Cables
Here are some tips for maintaining and organizing your XLR cables:
- Make sure to learn the proper way to coil your XLR cables (over-under technique).
- Store all of your XLR cables in the same place, so you always know where to find them.
- Store your XLR cables somewhere safe and elevated, so they are never stepped on or damaged.
- Consider coloring the ends of your XLR cables with tape or marker. This will help you keep your cables organized and separate when multiple plugged-in.
- Never tie knots in your XLR cables, even if it makes your life easier. It will damage your cables.
The Importance Of Proper Cable Management
Here are some reasons why cable management is essential:
- It prevents your workspace from looking messy and cluttered.
- It makes it easy to locate or rewire specific cables.
- It prevents damage to your cables over time.
- It makes your workspace look more professional in general.
- It prevents injury from someone tripping on a cable.
As you can see, practicing proper cable management in your workspace is essential.
Handling Damaged Or Frayed Cables
Suppose you have damaged or frayed audio cables. In that case, it is essential that you set them aside until you can properly repair them.
They can cause issues with sound/audio quality or even get stuck in your input device or microphone.
READ NEXT:
As well as checking for the condition of the cables, you need to make sure you have the right ones. Check out our article on how to choose the right monitor cables.
Related Questions
What Is The Proper Way To Connect And Disconnect XLR Cables From Audio Equipment?
Connecting and disconnecting XLR cables from audio equipment is quite simple.
The only tip I have for doing so is to be gentle so that you don’t damage your cables, microphones, or audio equipment.
For the male end, push in or pull out the cable. For the female end, you will also have to press down the tab on the cable as you connect or disconnect it.
What Are Some Common Mistakes To Avoid When Removing XLR Cables From Audio Interfaces?
Let’s take a look at some common mistakes to avoid when removing XLR cables from your audio interface:
Pulling Your XLR Cable Out At An Angle
Make sure that you only pull your XLR cables out at a straight trajectory. This will prevent damage to your XLR cables.
Pulling Your XLR Cable By The Cable Itself
When you disconnect an XLR cable from your audio interface, pull from the connected plug, not the wire part of the XLR cable. Otherwise, you might damage your XLR cables.
Not Having A Firm Grip On The Audio Interface
Ensure you grip your audio interface firmly as you pull out your XLR cable. This will prevent your audio interface from moving or even taking a fall from your studio desk.
What Should I Do If I Accidentally Damage An XLR Cable While Trying To Remove It From An Audio Interface?
You must never use damaged or frayed XLR cables for recording or live sound.
If you accidentally damage an XLR cable while trying to remove it from an audio interface, set it aside and mark it as damaged. Please only use it once you have appropriately repaired it.
What Are Some Alternative Methods For Connecting Audio Equipment That Doesn’t Involve XLR Cables?
Here are some other common types of connections in the world of audio:
– ¼” cable
– 3.5mm/AUX cable
– RCA cable
– 5-pin MIDI cable
– Optical audio cable
– USB cable
– USB-C cable
– Speaker wire
As you can see, many different types of connections regarding audio gear.
How Can I Determine If An XLR Cable Is The Cause Of A Connectivity Or Performance Issue In My Audio Setup?
To determine if an XLR cable is the cause of a connectivity issue in your audio setup, try using another XLR cable and see if the problem persists.
This will help you determine whether the XLR cable is the problem or if it is something else in your audio setup.
What Is The Difference Between An XLR Microphone And A USB Microphone?
The primary difference between an XLR microphone and a USB microphone is its connectivity method.
For example, an XLR microphone has an XLR output, while a USB microphone has a USB output.
XLR microphones are much more common and practical regarding professional audio. However, a USB microphone can be handy for gaming, streaming, online meetings, etc., since it plugs right into your computer.
READ NEXT:
This is one of many common issues that can arise with Focusrite audio interfaces or any audio interface. Another issue is solved in our article on how to fix static noise on your Focusrite.