How To Loop A Track In FL Studio
Want to know how to loop a track in FL Studio? The simplest method in the playlist view is to right-click and drag on the bar counter at the top, just below the horizontal scroll bar. You will then be able to see the looped section highlighted in red.
When producing, it can often be helpful to loop a section of audio so that you can work more efficiently on it without having to hit play and pause continuously.
This article will look at how this can be achieved in the playlist and piano roll views FL Studio’sto help speed up your music production process.
How To Loop In Playlist View
Step 1 – Locating The Playlist View


First, you want to ensure that you have the playlist view selected from the tab on the top toolbar. This can be seen in the screenshot above.
Step 2 – Locating the Bar Timeline
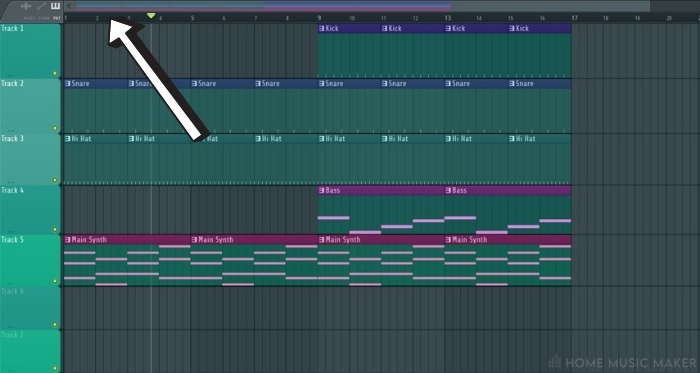
Once you have the playlist view selected, you can locate the bar timeline. This is found just below the horizontal scrollbar in the playlist view and shows how many bars through the song you are when playing through it.
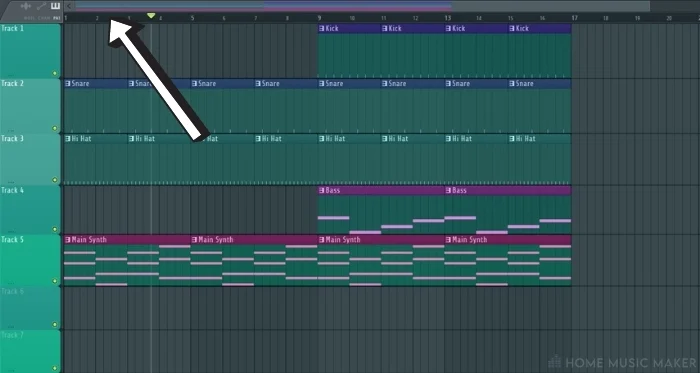
Step 3 – Selecting The Loop

After you have located the bar timeline, you can then right-click and drag across it to loop the desired section of the track. If you are looking to make a seamless loop, use the bar timeline as a guide.
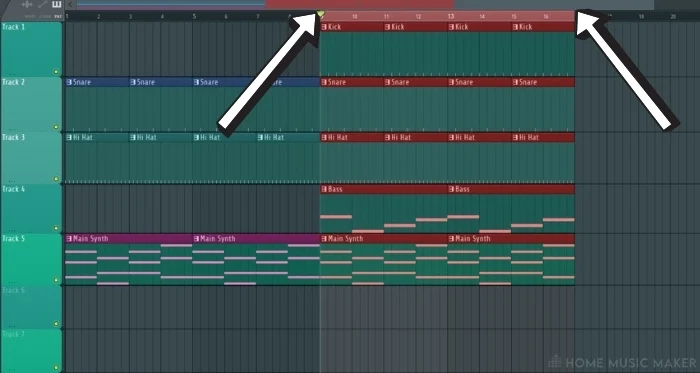
Now when you press play, you will hear this selected section of your audio track looping.
If you want to remove or reshape the looped region within the playlist, you can simply right-click and drag on the red section of the bar timeline.
(Optional) Step 4 – Looping A Single Track In Playlist View
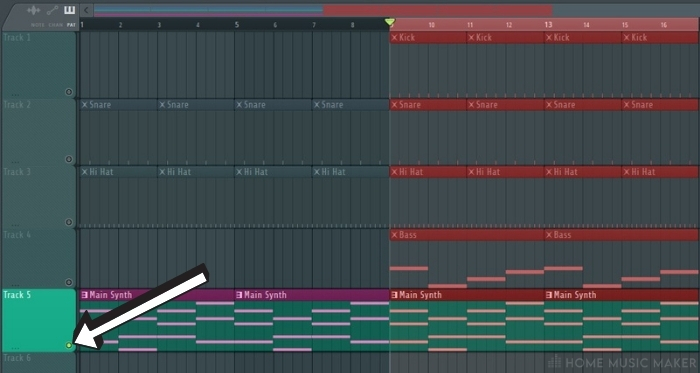
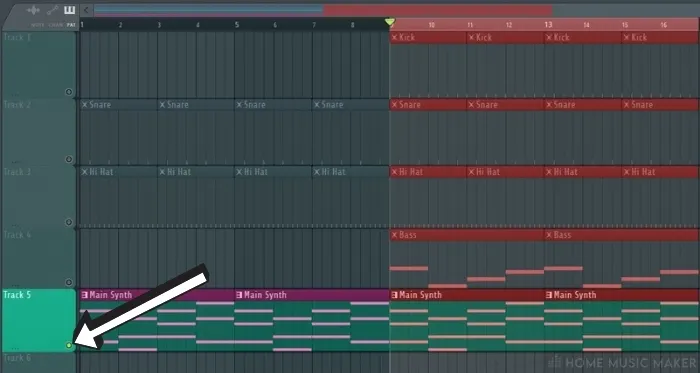
Suppose you are looking to single out an individual playlist track from the playlist view for looping.
In that case, this can quickly be done by double right-clicking on the mute/solo button on the desired track.
This button can be seen in the bottom right corner of the playlist track indicator, on the left-hand side of the playlist view (shown in the above screenshot)
How To Loop In Piano Roll
Step 1 – Locating The Piano Roll


As with the last example, you will first want to ensure that you have the piano roll selected from the tab from the top toolbar. This can be seen in the screenshot above.
Step 2 – Locating The Bar Timeline
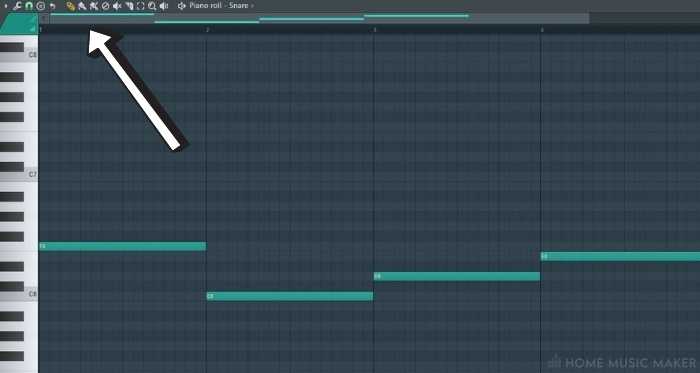
Once you have the piano roll view selected, you can then see the bar timeline at the top below the horizontal scroll bar.
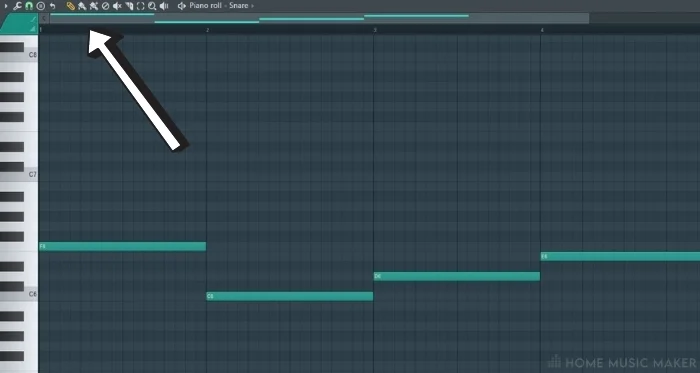
Step 3 – Selecting The Loop

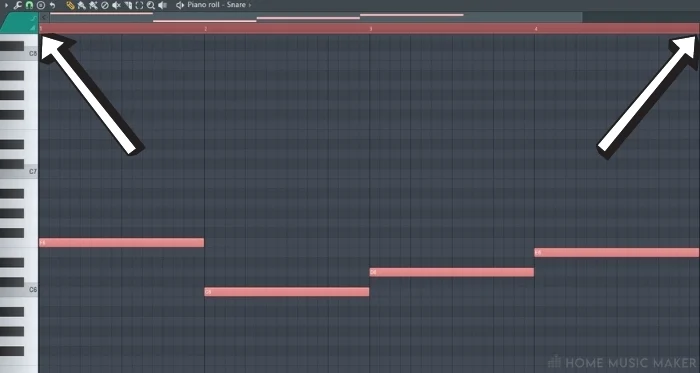
After locating the bar timeline, you can right-click and drag on it to select the desired part of the audio. A red highlight will then appear and show you the chosen loop region.
If you want to resize the looped section or move either of the loop points, then you can simply right-click and drag over the loop in the bar timeline to do so.
You can create an audio loop in both the playlist and the piano roll with FL Studio, which will allow you to speed up your workflow in your music productions!
Related Questions
How do you loop a sound in FL Studio?
You can usually use the above techniques; however, you can use Edison and left click-drag on the desired loop section if you are using an audio file.
How do you loop a pattern in FL Studio?
Patterns loop themselves in the step sequencer, but the above techniques can be used when patterns are placed in the playlist view.
How do you render a pattern into a sample in FL Studio?
This can be done by selecting the drop-down arrow to the left of the selected pattern indicator, located on the top toolbar, next to the view modes. In this menu, you can select different options for rendering out the pattern at the bottom of the list.
How do you sync drum loops with any vocal or melody sample in FL Studio?
You can sync samples with a different bpm either by double-clicking on it and using the time stretch function or by clicking on the waveform icon at the top left of the sample and using the ‘fit to tempo’ function.
How can you stop a loop from continuously repeating in FL Studio?
To stop a loop, you can simply right-click and drag along the bar timeline located beneath the horizontal scroll bar at the top of the piano roll and playlist view.
How do I make a unique pattern in FL Studio?
You can either use the F4 key as a shortcut or click and drag upwards on the pattern indicator found in the top toolbar.
Are FL Studio shortcuts essential for every producer?
They are not essential, but they can help quicken up your workflow if you get them memorized.
Final Words
There you have it, a really simple but effective technique to have in your audio recording arsenal, and a sure-fire way to speed up your workflow inside your FL Studio project.
I find using the loop feature especially helpful when working on a drum loop, dragging in different drum kit elements into the loop. These can then be bounced down and saved, as you create your own drum samples that can be used in future tracks.
If you are looking for other techniques to improve your workflow, check out our guide on how to lock tracks in FL Studio.