KEY TAKEAWAYS:
At a certain point, distortion can become irreparable and impossible to remove from a recording. Techniques like noise reduction algorithms and manual gain adjustments can improve the situation. All of these are available in Audacity.
Issues With Distorted Audio?
Distorted audio can ruin an otherwise great recording. Whether you’re working on a podcast, a video project, or trying to listen to music without interference, getting rid of distortion is essential.
Audacity is a powerful audio editing tool that can help you fix distorted audio and improve the quality of your recordings.
In this article, we’ll show you how to remove distortion from audio in Audacity and offer tips and tricks for improving your audio quality.
So if you’re ready to clean up your audio and make it sound its best, read on!
How To Remove Distorted Audio With Audacity
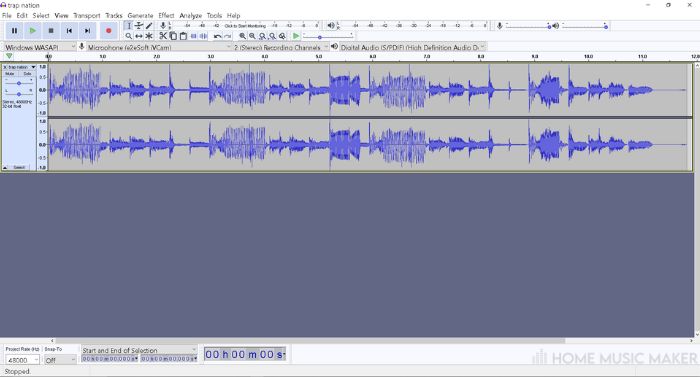
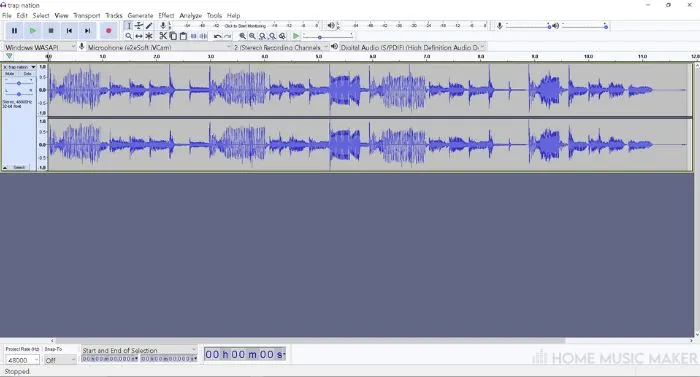
There are two main points in audio production where distortion is likely to happen (I’m talking about distortion caused by signal clipping or “overloading”).
The first is as the audio is being recorded. It can clip by the recording level being too loud for the input of the hardware it is going into. This results in clipped audio. In this situation, the distortion can never be “fixed” because the distortion is part of the recording.
It can be minimized so that the negative effect of the distortion is not as noticeable.
The second point is that within your DAW. It is easy to overload part of your signal chain. Since the audio is not rendered yet, this can be fixed by turning down the volume at the overloaded point in the chain.
There is a common practice called gain staging in which you load a simple gain plugin between every processor in your signal chain. Then use them to adjust the output of each processor so that the audio level is not clipping as it goes to the next step in the chain.
Since the second situation is straightforward to fix, I will focus on how we can deal with the first situation.
Step 1 – Identify The Affected Areas
Listen to the audio and note when the distortion occurs since it likely won’t be consistent throughout the recording.
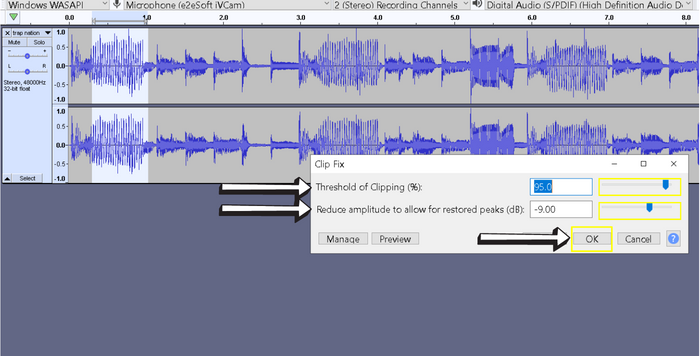
Step 2 – Use The Clip Fix Effect To Fix Clipping Distortion
To fix clipping distortion in Audacity, select the affected part of the audio waveform and use the Clip Fix effect by selecting it close to the bottom of the effect menu.
Step 3 – Duck The Volume
You can also turn the volume down for the duration of the distorted audio by using the Amplify tool.
Highlight the audio in question and then select Amplify in the effect menu. When it opens, bring it down until you are satisfied.
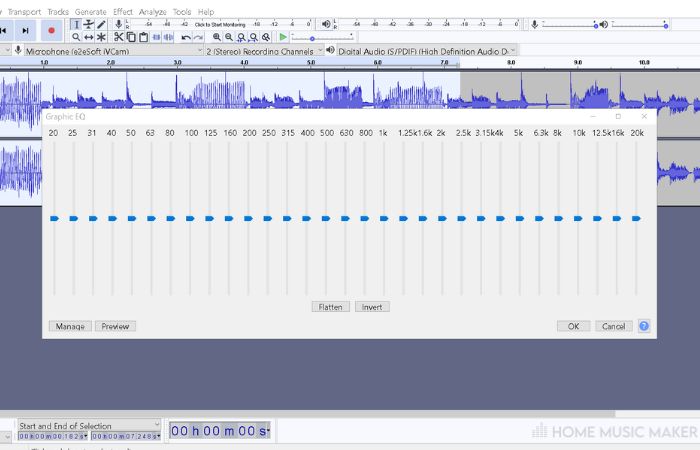
Step 4 – EQ
Use the Equalization effect to lower only specific frequencies. You can limit the EQ’s frequency band and isolate the distorted frequencies. Then try to invert the phase and sum it up with the original recording.
This will remove the distorted audio through phase cancellation.
Step 5 – Auto Duck
You could also try the Auto Duck effect as a last resort. Like the others, it can be found in the effect menu.
How To Fix Bad Audio In Audacity
In addition to removing distortion, Audacity offers several tools and features to help you fix other common problems with bad audio quality recordings, like noise removal. Here are a few tips for improving the quality of your bad audio recording in Audacity:
Normalize
Use the Normalize effect to raise the peak dB level. This will increase the volume by the same amount throughout the entire recording.
Select the entire audio waveform and apply the effect. You can adjust the settings to specify the maximum level you want to normalize. Audacity will adjust the volume levels to match.
This can be useful for audio that was recorded too.
Compressor
Suppose you have a recording that has a wide dynamic range (i.e., a big difference between the quietest and loudest parts). In that case, you can use the Compressor effect to bring the levels closer together and even out the overall changes in volume throughout the track.
This can make the audio sound more consistent and easier to listen to. Select the audio waveform portion you want to process and apply the effect.
You can adjust the settings to specify the threshold level (i.e., the level at which the compressor starts to take effect). Or the ratio (i.e., the amount of reduction applied to the signal above the threshold). And the attack and release times (i.e., how quickly the compressor responds to changes in the signal).
EQ
Use the EQ effect to shape the sound of your audio file. You can use the EQ effect to boost or cut specific frequencies. This can be useful for correcting problems within a specific frequency range. Or for giving it a particular character or vibe.
Select the part of the audio waveform that you want to process and apply the effect. You can use the graphic or parametric equalizer to adjust the levels of specific frequencies. Or choose from a variety of preset filters to apply standard EQ curves.
How To Improve Audio Quality With Audacity
In addition to fixing specific problems with your audio, there are a few general tips and tricks that you can use to improve the overall quality of your recordings in Audacity. Here are a few things to consider:
Use A Good Microphone
A good microphone is essential for capturing high-quality audio. When using a built-in microphone or a cheap headset microphone, you’ll get better results by upgrading to a dedicated external microphone.
There are many different types of microphones to choose from. The best one for your needs will depend on your budget. It will also depend on the kind of recording you’re doing and the environment you’re working in.
Use A Quiet Recording Environment
You’ll need to work harder to get a clean recording if you’re recording in a noisy environment. Try to find a quiet, isolated space to record in. And use a pop filter or windscreen to reduce wind noise and plosives (i.e., the popping sound that occurs when you say certain consonants).
If you’re recording outdoors, try to find a location sheltered from the wind and noise.
Hold The Microphone At The Correct Distance
Most microphones have an optimal distance range. Which is the distance at which they sound the best. For example, some microphones sound best when held close to the mouth. In contrast, others sound best when they’re held further away. Experiment with different distances to find the sweet spot for your microphone.
Use The Right Recording Position
The position of the microphone relative to your mouth can significantly impact the sound of your recording. For example, suppose you’re recording your voice. In that case, you’ll usually get the best results by holding the microphone above your mouth and tilting it down towards your lips. This helps to reduce plosives and improve the clarity of your voice.
Use A Pop Filter Or Windscreen
A pop filter or windscreen can help to reduce plosives and wind noise. Which can make your recordings sound cleaner and more professional. You’ll want to use one of these if you’re recording vocals.
Is It Possible To Remove Distortion?
It is impossible to remove distortion from recorded audio in Audacity altogether. However, it is possible to minimize the adverse effects it causes. But your degree of success will depend on the severity of the distortion and the quality of the original recording.
READ NEXT:
Unsure if Audacity is the software for your needs? Check out our article on whether Audacity can be used for music production.
How To Fix Distorted Audio Tips & Tricks
Here are a few tips and tricks that can help you deal with distorted audio more effectively in Audacity:
Use headphones or high-quality speakers to listen to your audio. This will help you identify the distorted parts of the audio more and give you a better idea of how to fix them.
Experiment with different settings and effects to find the best solution. Other audio problems require different solutions, so try different settings and effects to find the best results.
Feel free to undo it and try again. If you’re not happy with the results of your edits, you can always undo them and try again with different settings or effects.
Use the “Undo History” feature to keep track of your changes. Audacity’s “Undo History” feature lets you see a list of all the changes you’ve made to your audio. Use it to undo or redo any changes that you’re not happy with.
You can use Audacity’s “Snap To” feature to snap the waveform to specific points, such as the beginning or end of a word or phrase. This can make it easier to get the exact results you’re looking for.
Use the “Preview” feature to listen to your changes before you commit to them. Audacity’s “Preview” feature lets you listen to your changes before committing them, which can be helpful when you’re trying to fine-tune your audio.
What Causes Distorted Audio?
There are several common causes of distorted audio.
- Clipping (the most common)
- Overloading
- Noise
- Interference
A few less common causes include poor recording technique and/or faulty equipment.
For example, when using a microphone that is too close to your mouth, you may get a lot of plosives (i.e., the popping sound that occurs when you say certain consonants). Using a pop filter or windscreen can help to reduce this type of distortion.
And finally, equipment failure can also cause distorted audio.
If you’re using a faulty microphone, recording device, or another piece of equipment, you may experience distorted audio even if you use good recording techniques and a quiet environment.
In this case, the only solution is to replace the faulty equipment with something in good working order.
READ NEXT:
Related Questions
Could The Distortion Be Caused By Faulty Equipment?
Many types of equipment can cause distortion, including amplifiers, microphones, speakers, and digital processing equipment.
If this equipment is not functioning, it can distort the signal.
What Does Allow Clipping Mean In Audacity?
In Audacity, “allow clipping” refers to the ability to record or import audio that exceeds 0dB peak level. This will result in clipping. Hence the name “allow clipping”.
How Does The Noise Reduction Tool In Audacity Work?
It creates a digital filter with a frequency response based on your feed’s noise sample. It then applies that filter to the entire song to filter only the noise.
What Is Frequency Smoothing In Audacity?
Frequency smoothing is a setting inside Audacity’s noise reduction tool. The setting smooths out the filter curve generated with the noise sample. A smoother filter curve means less chance of artifacts being created in the resulting audio.
Is Audacity Free?
Yes, Audacity is cross-platform, open source, and, most importantly, free.
Final Words
In conclusion, Audacity is a powerful and versatile tool. It can help you deal with distorted audio and improve the quality of your recordings.
It can help when dealing with clipping, noise, and frequency problems. Or other types of distortion, Audacity has the tools and effects you need to get the job done.
By following the steps and tips outlined in this tutorial, you should be able to cut the impact of the distortion from your audio and get the best possible results.
READ NEXT:
Now that you’ve fixed this issue, let’s discuss another. Check out our article on how to fix choppy audio in Audacity.