Many beginner music producers face spending a lot of money on expensive music production software to begin their musical journey.
Luckily, there are a couple of free options out there, with Audacity being the one mostly used.
Although it is well known as a simple audio editor, can Audacity be used for music production and a full-fledged DAW?
In this article, we’ll explore how you can take full advantage of it and point out some of the limitations so you can judge if Audacity is good enough for your needs.
How To Get Started In Audacity?
Audacity is a surprisingly versatile piece of audio recording software, and it can technically allow you to record, edit and mix your songs.
But before we go into detail, let’s discuss the first major drawback of this software – you can’t record MIDI.
There isn’t support for such a feature, so the only option is to work with audio.


This can be an immediate turnoff for some electronic music producers who record most of their sounds through VST’s. Production of such genres will have to be limited to using audio loops, which still isn’t too bad, but it drastically impacts the workflow.

However, if the style you’re producing mostly features live recordings, you’ll be glad to know that Audacity can handle almost all of your recording needs.
Let me take you through the process.
Recording Audio In Audacity
Before we begin recording for real, it’s useful to see if we have the proper equipment.
To ensure the best possible quality of sound, it’s desirable to get a USB audio interface. This will give you a clean input signal as well as solve the problem of latency.
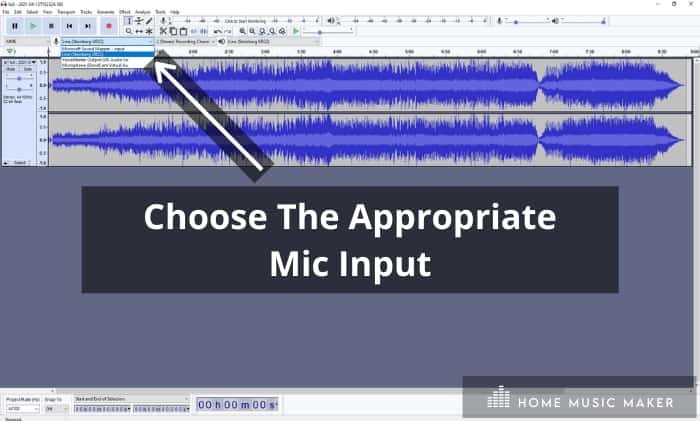
The next step is as simple as choosing the appropriate mic input and clicking the Record button in the transport section located in the top-left corner.
Right beside the input option, there is an option of choosing between mono or stereo recording.

Depending on your setup, you’ll want to consider this:
If you’re recording with a single microphone, make sure to set it to 1 (Mono) Recording Channel or 2 (Stereo) Recording Channels if you plan on recording a single sound source with 2 microphones.
To ensure our input signal is not too hot, we can monitor our recording levels by clicking the area at the top of the screen beside the transport options. You’ll easily find it by looking for a big microphone symbol.
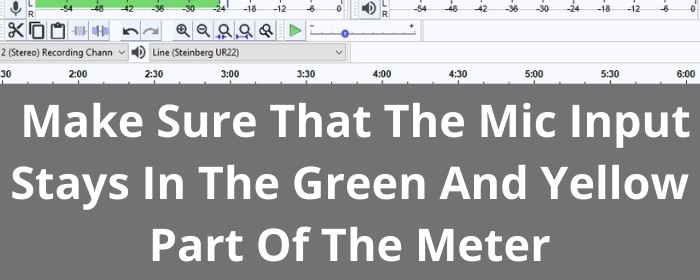
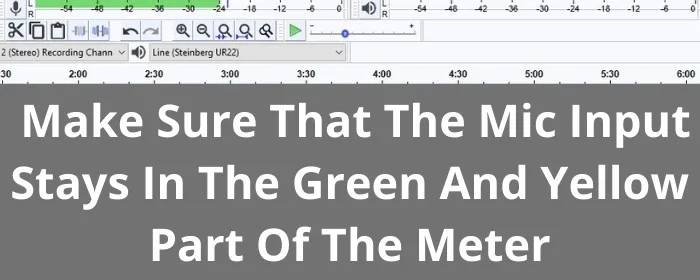
Once we enable the monitoring, we want to make sure our recorded signal doesn’t reach the red region of the meter. If that happens, we need to turn down the input gain on our USB interface or input level in Audacity.
Audacity also allows you to do a multi-track recording session in much the same way as a single-channel recording. Just make sure to set all the tracks to Mono if you are recording multiple sources simultaneously.
Also, go through every channel separately to ensure that every channel has the right input level.
Importing And Editing In Audacity
There are two ways to import an audio file- either by going to File>Import and choosing the type of file you want to import or drag and drop it right into the session.
If audio is imported, you see clear audio waveforms that can be very useful in navigating the track and finding parts you want to edit.
What makes Audacity stand out is a mighty and intuitive editing function. It has basic functions like Copy, Paste, Cut, Trim, and even some advanced options like Time Shift and Detect Silence.
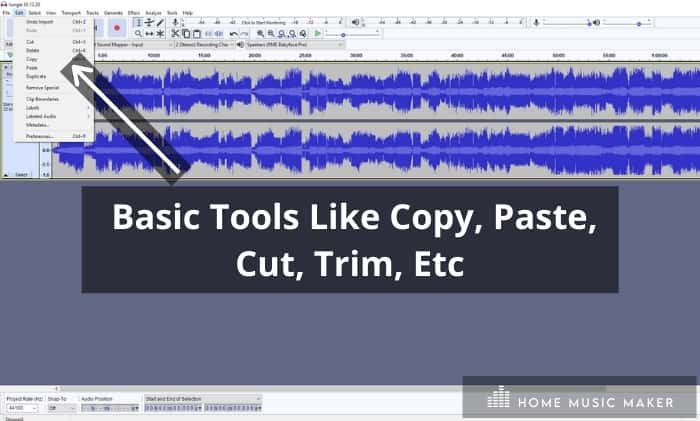

The way editing works is by using the Selection Tool (accessed by pressing F1), selecting the portion of the audio file you want to edit, and simply choosing the right tool from the Edit drop-down menu.
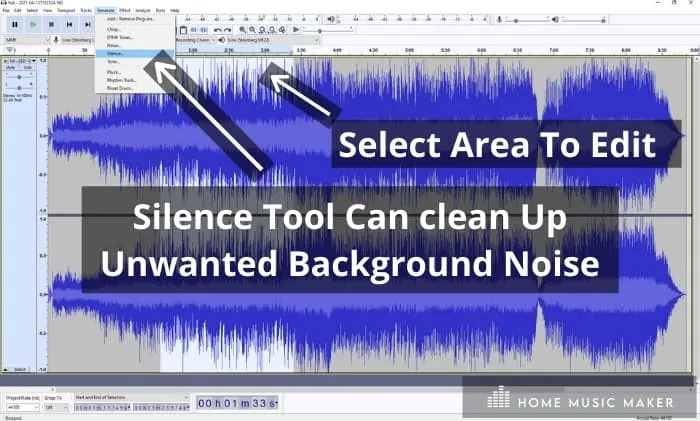
Editing is useful to enhance and tighten up your recordings. For example, you can use the Silence tool to clean up unwanted background noise in parts where the particular channel isn’t playing any actual notes. Just select the area you want to process, go to Generate>Silence and click Ok.
You should see that the portion you’ve selected does not contain any audio information afterward.

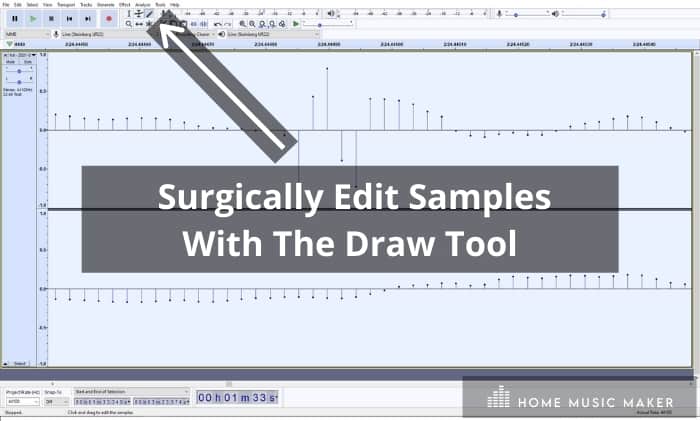
Another useful feature is the ability to zoom in on individual samples for some surgical audio editing.
By selecting the Zoom function (F4), zoom in until you can see every individual sample and then select Draw function (F3) to change the level of each sample.
This comes in handy when you want to get rid of pops and clicks in your audio track.
For an automated version of this process, you can go to Effect>Click Removal and see if that does the trick.

Mixing In Audacity
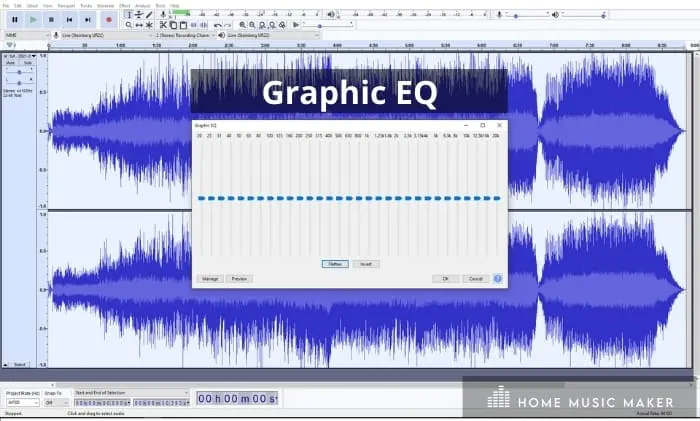
Although it isn’t generally used that much for mixing, Audacity provides you with most of the tools you need to mix and master a song fully. It comes with a variety of digital sound effects that can manipulate your audio in various ways.
Some standard stuff like EQ, Compressor, Noise Gate, Delay, and Reverb, plus some more advanced effects like Vocal Remover and Noise Reduction.
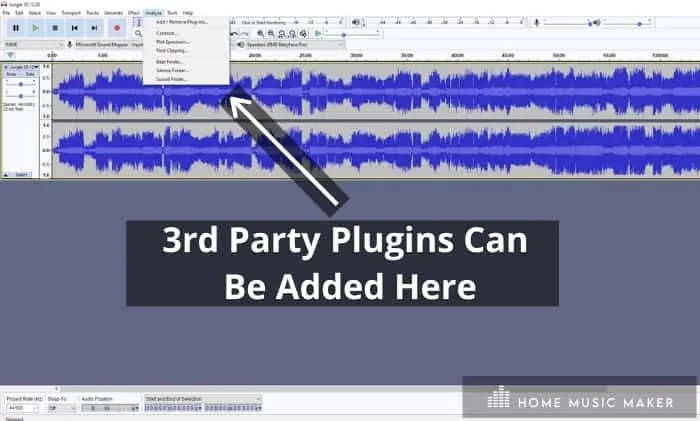
If you find that all of these are not enough for you, you can add 3rd party plugins by going to Analyze>Add/Remove Plug-ins and enabling the ones you want to use. Afterward, they will appear in the Effect tab and be available for use.
If you can’t seem to find the plugin you’ve recently installed, make sure to copy the .dll to Audacity>VSTPlugins folder. You shouldn’t expect too many of your plugins to be recognized, though, as Audacity supports only 32-bit plugin versions.

To the left of each track, you’ll find essential options like Volume and Pan, as well as Mute and Solo buttons.
Once you are happy with the overall balance, you can add some effects and process the sounds further.
This is where we hit a second major drawback of Audacity- the inability to apply effects in real-time.
The way it works is pretty much like with editing- you select the area you want to apply effects to (if you want to process the whole channel, you need actually to select the whole waveform), go to the Effect tab and choose the plugin you need.
But the problem is that you won’t be able to access the plugin menu while the track is on playback, so you need to pause the music beforehand. This means that all your EQ and compression decisions will have to be made by blind guessing first. You do have the option of previewing the effect before applying it, though.
Once you click OK, you’ll immediately see the effect being printed onto the track, meaning that the effect is now permanently baked into the channel without the ability to reverse it down the mixing process.

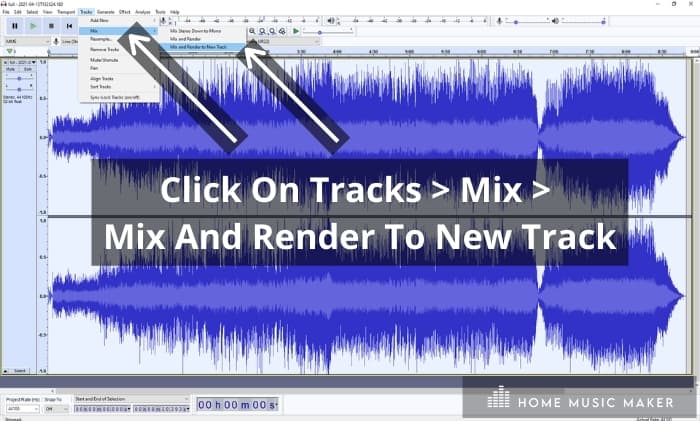
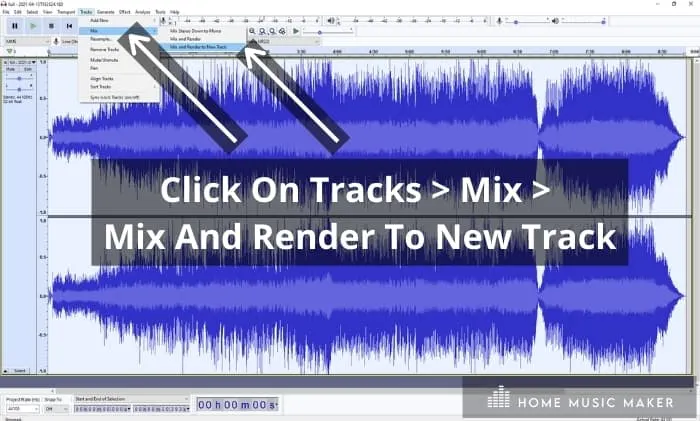
Another issue you may face is not being able to bus your tracks into a single channel to process multiple channels together. However, there is a workaround to this problem – you can print out the tracks you want to process by going to Tracks>Mix>Mix And Render To New Track. At that point, you got yourself a printed group of tracks that you can now process as a whole.
All in all, mixing in Audacity is definitely doable. Still, the inability to apply and turn off effects in real-time and route the channels to buses makes the situation challenging, especially for beginners.
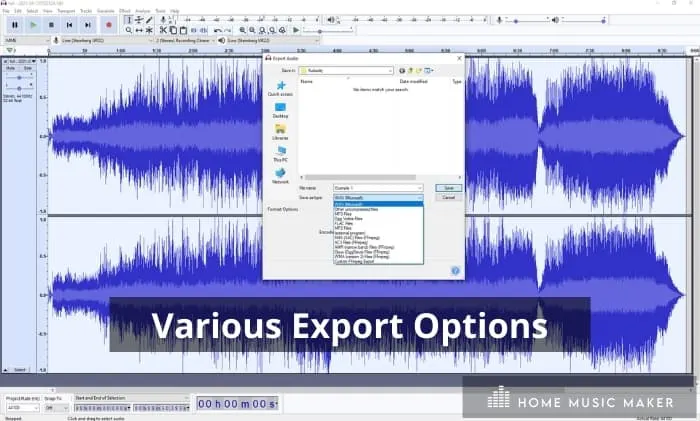
Audacity Export
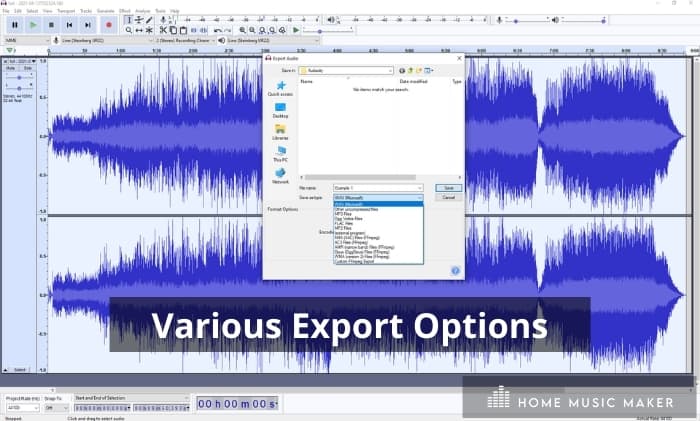
Once you are satisfied with how your track sounds, you have various options when it comes to exporting, you can go to File>Export and choose some of the usual export options such as WAV or MP3.
If you need your track to be exported in some other format, instead of choosing an export template, click on Export Audio, where you will be offered loads of formats as well as a variety of encoding options.
Can Audacity Be Used For Music Production? – FAQ
Is Audacity good for music production?
It can be a great entry-level software for beginners to try things out and see how different effects work. Although it does have some impressive editing options, Audacity lacks some major options that make mixing enjoyable. You can definitely make an awesome-sounding mix in there; you should opt for a proper DAW if you get serious about music production.
Do professional musicians use Audacity?
I am not aware of anybody using it for serious production, but I assume that many use it for quick edits or audio analysis.
How many tracks can Audacity handle?
Audacity actually doesn’t have a track limit so that it can handle as many as your CPU can.
Is Audacity good for mastering?
I wouldn’t say it’s ideal, but using it for mastering is a lot easier than mixing. It does, however, come with all the tools you need, such as EQ and a limiter.
Does the software support VST plugins?
It does support VST’s but not VSTi. This means that you won’t be able to load virtual instruments in Audacity. But most of the 32-bit VST’s should work fine.
You should always expect some bugs here and there as the software does get a bit clunky at times.
Which is better, Audacity or GarageBand?
GarageBand definitely comes equipped with way more features and generally a better user interface. If you own a Mac, there shouldn’t be much discussion about which one to use, as GarageBand is a better choice for a DAW.
How do you get free to autotune on Audacity?
You can download a free plugin called GSnap and create autotuned vocals through Audacity.
How do you make your voice sound better in Audacity?
You have plenty of options to enhance the sound of your voice through EQ, compression, noise removal, and even Autotune.
All of these plugins are native to Audacity except GSnap used for tuning the vocals.
Final Words
Audacity is a great piece of software for basic audio recording, editing, and mixing. However, it does have its limitations in more advanced areas such as MIDI support or VST’s.
If you’re looking to produce music with MIDI, this isn’t the right tool for you- but if not, Audacity can be an affordable way to get started.
For a completely free audio production tool, you really can’t have too much to complain about. Even if you decide not to use it for creating music, it is still convenient to use for quick audio edits and one I use frequently.
If you have used Audacity to produce with, let us know how you got on below.