Time can be inserted in Ableton Live by placing your cursor where you would like to insert time. Next, you will hit “command+i” (ctrl+i on Windows). This will open a pop-up menu where you can enter the amount of time you would like to insert.
Inserting Time In Ableton
By learning how to insert time in Ableton, you can avoid laboriously dragging entire chunks of your song to make room for your new idea.
This will allow you to make room for interludes, pre-choruses, or transitions with ease and add a new level of creativity to your songs.

In this tutorial, I’ll break down the common ways to insert time into Ableton and review other topics related to customizing the time scale of your track.
To complete this tutorial, all you will need is a copy of Ableton Live.
Step By Step How To Insert Time In Ableton?
You can insert time in Ableton by going to the “Edit” menu and selecting “insert time.”
This can also be achieved by hitting the “ctrl + i” (“command + i” on Mac) keyboard shortcut.
You will be prompted with a menu asking you how much time you would like to insert in bars, beats, and quarter beats (sixteenth notes).
What Is a Measure In Ableton?
A measure is a more concrete musical term than the term bar and always refers to one complete grouping of notes as defined by the time signature.
For example, if you are in 4/4 time, one measure is four quarter notes long.
A time signature is made up of two numbers: the top number, which tells us how many beats there are in a measure, and the bottom number, which tells us what the beat note is.
The beat note will generally be 4 (quarter note), 8 (eighth note), 12 (twelfth note) or 16 (sixteenth note).
So, if our song’s measure length (sometimes called meter) is five-eighth notes, our time signature would be 5/8.
The actual time length of a measure will depend on the tempo of your song.
How Long Is A Bar?
The length of a bar in Ableton will depend on the time signature of your song and how zoomed in your view is.
Generally, the term “bar” and “measure” are used interchangeably.
Still, in some cases, “bar” may refer to the distance between two markers on the timeline or one part of a musical phrase.
How do I Insert A Measure In Ableton?
To add a measure of time in Ableton, you must be in the arrangement view.
From here, you will place your cursor in the spot you would like to add a measure.
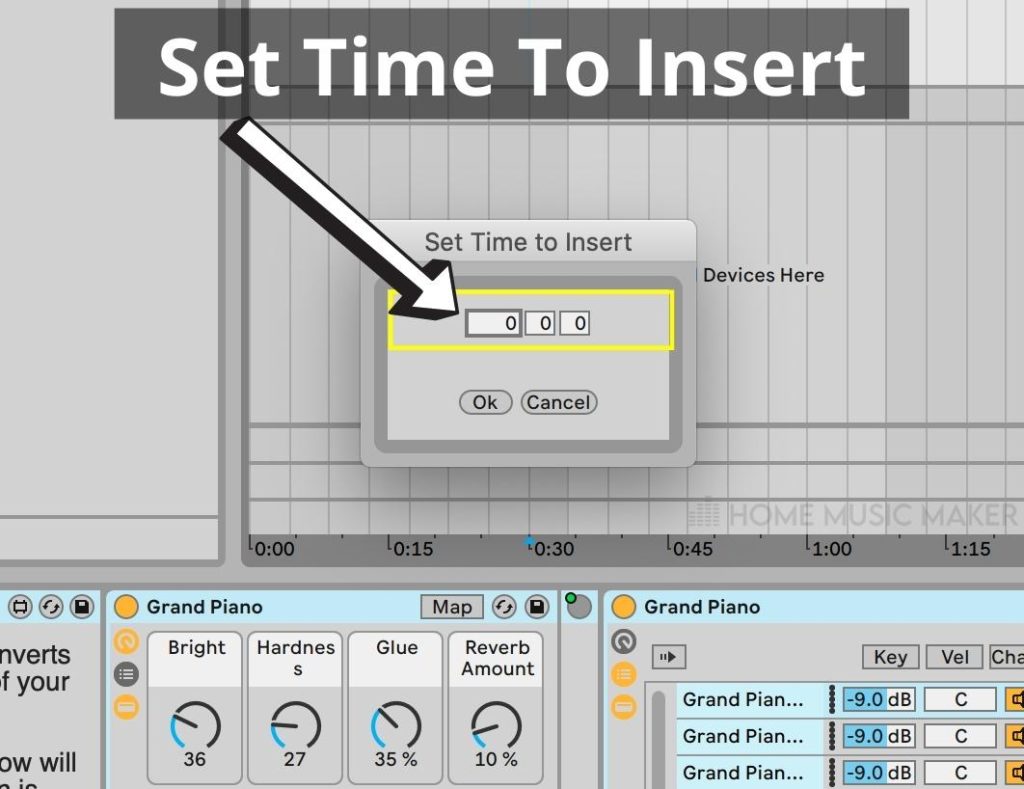
Next, select “Insert Silence” (command + i/ctr + i).
Once you do this, you will be prompted with a pop-up window with three fields to enter numbers.
Add the number of measures you’d like to add in the leftmost field.
Enter the number of beats you’d like to add in the middle field and then the number of sixteenth notes you’d like to add in the field on the right.
If you would like to add one measure, you would simply write “1” in the field furthest to the left.

You can also add a measure by duplicating time.
As opposed to adding silence, duplicating time will copy the amount of time selected and insert it directly following the end of the selected region without pasting over the following measures.
How Do You Change Bars In Ableton?
In this instance, “bar” and “measure” are being used interchangeably.
Changing a bar is the same procedure as changing a measure.
How To Insert A Time Signature Change In Ableton
Inserting a time signature change in Ableton can only be accomplished in the arrangement view.
Once you have selected the location where you would like to change the time signature, you need to right-click (two-finger click on Mac) in the “scrub area.” (1)
The scrub area is located between the track display and the overview near the top of the screen.
This is the area where we can also see the loop region controls.
Once you have right-clicked this spot, you can click “insert time signature change.” (2)


You will need to enter your new time signature expressed as a fraction. For example, common time (four-four) will be written as 4/4.
To use multiple time signatures in the session view, you will need to set up a song section in the empty arrangement view.
From here, you can map out the time signatures you would like to loop and enable the loop over this region.
You can use automation to control either the top or bottom value of your time signature. This can add an exciting layer of complexity to your music production.
How Do I Paste Multiple Times In Ableton?
Once you have copied an element to your keyboard using “ctrl + c” (“cmd +c,” you can continue to paste it repeatedly using “ctrl + v” (“command + v.” on Mac)
How To See Track Time In Ableton
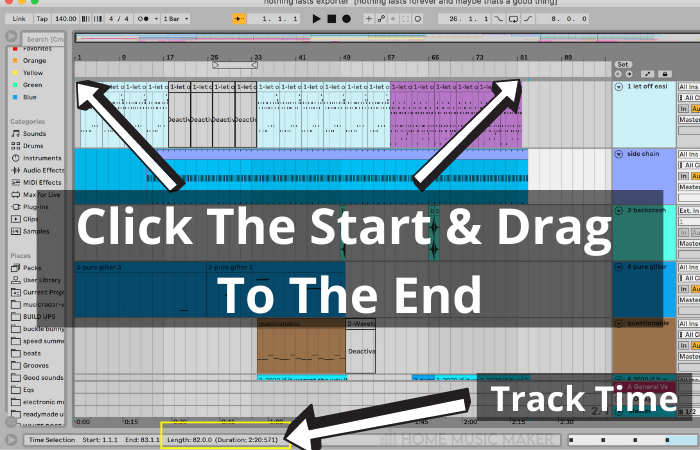
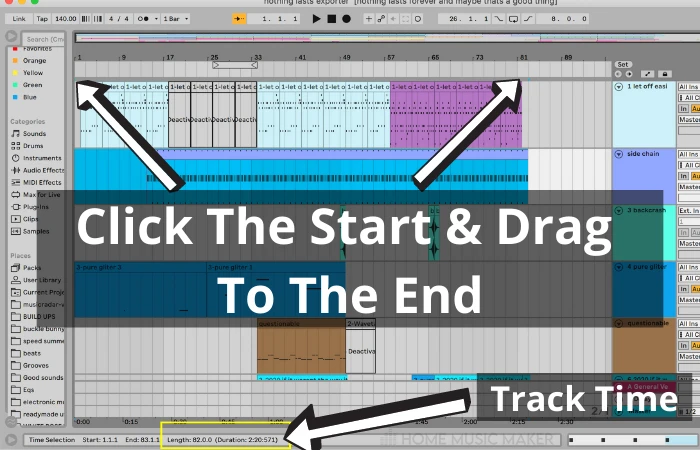
It can be hard to see the exact length of your track in Ableton.
To see my track’s length, I click the very beginning of my song, and then, while holding shift, click the end of the track.
With this selection highlighted, you will see the length of your track in time and bars and beats just below the arrangement view in the lower left-hand corner.
How Do I Change The Length Of A Track In Ableton?
Ableton does not have a predetermined song length.
The track will simply keep playing in session view until told to stop.
In the arrangement view, the length of the track is determined by the furthest bit of MIDI or audio in the track.
I will often move ideas and backup takes out past the end of my song to keep them available if I need to use or reference them.
However, once the song is done, I’ll need to cut these takes and ideas out of the final file.
We can do this by first deleting everything past the end of our song.
Once our arrangement view contains only the song, we can zoom in.
As we do that, you will see the track length in the overview expand as it stretches to fill the overview timeline fully.
How Do I Start Ableton From The Beginning?
I know many musicians who begin arranging their song in the arrangement view past the start.
This allows you to easily add extended intros.
But once the arrangement is finished, you may want to move your track to begin at the start for ease of exporting and clarity.
This can be done in one of two ways.
I do it by selecting the empty space at the start of the track by putting your cursor at 1.1.1 and then holding shift and clicking right before the start of your song.
Then I delete this time by hitting command+shift+delete (control+shift+backspace on Windows).
This will delete the time from the arrangement view.
Alternatively, you can select your entire arrangement at once by putting your cursor at the very beginning of your song and then holding shift and clicking the endpoint of your track.
Now, you can drag the entire arrangement to the start.
I find this method a bit clunky as it can lead to me not dropping the arrangement in the right spot or shifting all my tracks up or down.
How Do I Cut And Paste Time In Ableton?
You can cut time in Ableton by selecting the area you would like to cut and selecting “cut time” from the “edit” menu.
You can then paste time by selecting “paste time” from the “edit” menu.
This can also be accomplished using the keyboard shortcuts “ctrl (cmd)+shift+x” to cut and “ctrl (cmd)+shift+v” to paste.
You can also duplicate time by highlighting the area you wish to duplicate and pressing “ctrl+shift+d.” (“ctrl+shift+d“) on Mac.
Related Questions
How Do You Split a Track in Ableton?
Either a MIDI track or audio clip in Ableton can be split by positioning your cursor at the location you would like to split and hitting “command+e” (ctrl+e on Windows).
You can also go to the edit toolbar and select “split clip.”
In the MIDI note editor, you may notice that the MIDI file still displays the data from both sides of the MIDI clip when you enter the piano roll.
This can be fixed by consolidating the MIDI clip.
You can select multiple tracks and split them all at once if you need to shift a section of your song.
What is Control + J in Ableton?
The key command “control + J” consolidates both instrument and audio clips. It is important to note, especially when working with audio tracks, that you are creating a new clip and thus new data. It is easy to take up a lot of extra space on your hard drive by doing this.
Consolidating a selected track accomplishes a few things: it prints any changes from the original clip to a new clip. It changes the length of the clip to the desired area. Consolidating a clip can join clips or shorten a clip to make it more manageable.
How Do You Cut out Time in Ableton?
Time can be cut out in Ableton by selecting the portion of the track you would like to delete and hitting “command + shift + delete” (“control + shift + backspace” on Windows).
How Do You Shift Time in Ableton?
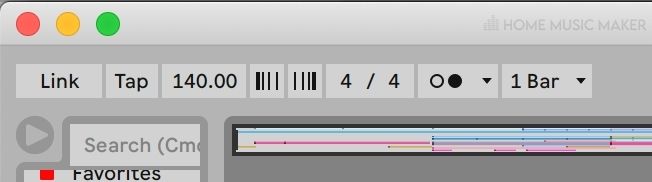
You can shift the tempo in Ableton by changing the tempo located in the upper left corner. Note that if you have any audio tracks, they must be warped before shifting the tempo. Otherwise, they will fall out of sync with the rest of the track.
How do I Add a Locator in Ableton?
You can add a locator in Ableton Live by right-clicking the scrub area and hitting “add locator.”
If you’d like to learn more awesome tips, check out this guide on pitch shifting in Ableton.