Ableton Live is an incredibly powerful audio recording and mixing tool. Still, contrary to what some may say, it can not be used to record audio directly from YouTube. The good news is that it’s still possible, just not directly. You can use third-party software like Audacity or a YouTube to MP3 converter.
Can I Record Directly From YouTube Into Ableton?
Although it’s not possible to directly record YouTube into Ableton, that’s not the end of the story, and it can be done indirectly!
It will require a few extra steps, but in the end, you will see that it is still relatively easy.
Here’s how to do it.
Method One: Using Audacity
[audacity.png
In order to get the audio from a YouTube video into your DAW like Pro Tools or Ableton Live, you’ll need the Audacity software.
Audacity is a free audio editing program available for both windows and mac. It is easy to use, can export in virtually any audio format, and most importantly, it gives us a way to capture streaming audio.
Streaming audio refers to audio delivered in real-time, over a network, instead of from an audio file.
To capture streaming audio, we need to set our audio device input source inside Audacity to a device that supports loopback.
Loopback is when the computer takes its sound output and sends the live audio back in as an audio input. This means that anything that is playing on the computer speakers can also be recorded at the same time.
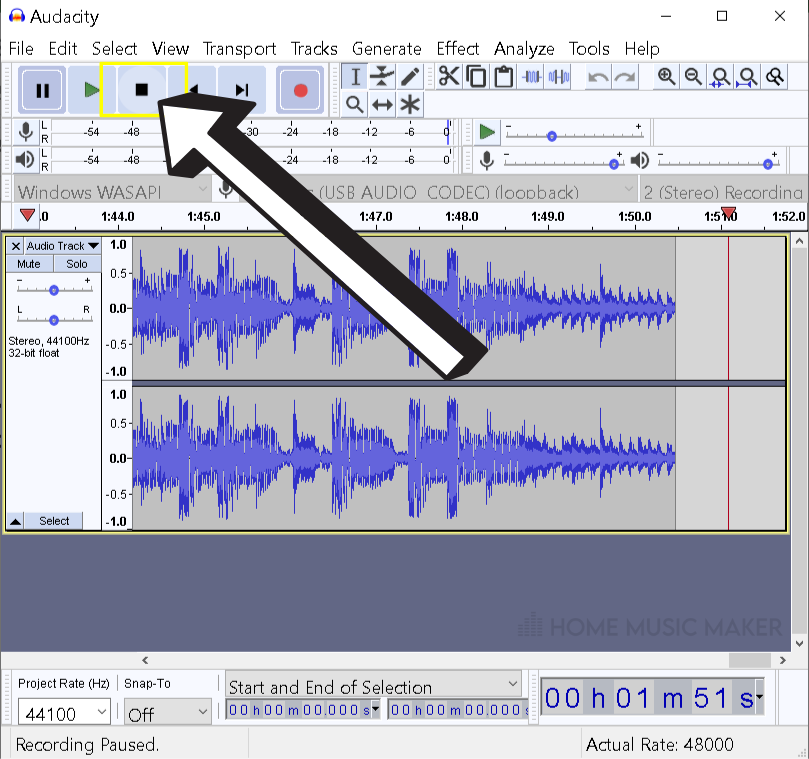
Step 1
Open Audacity and navigate the dropdown menu next to the little microphone icon. Click the dropdown menu and select any device from the list that says (loopback).
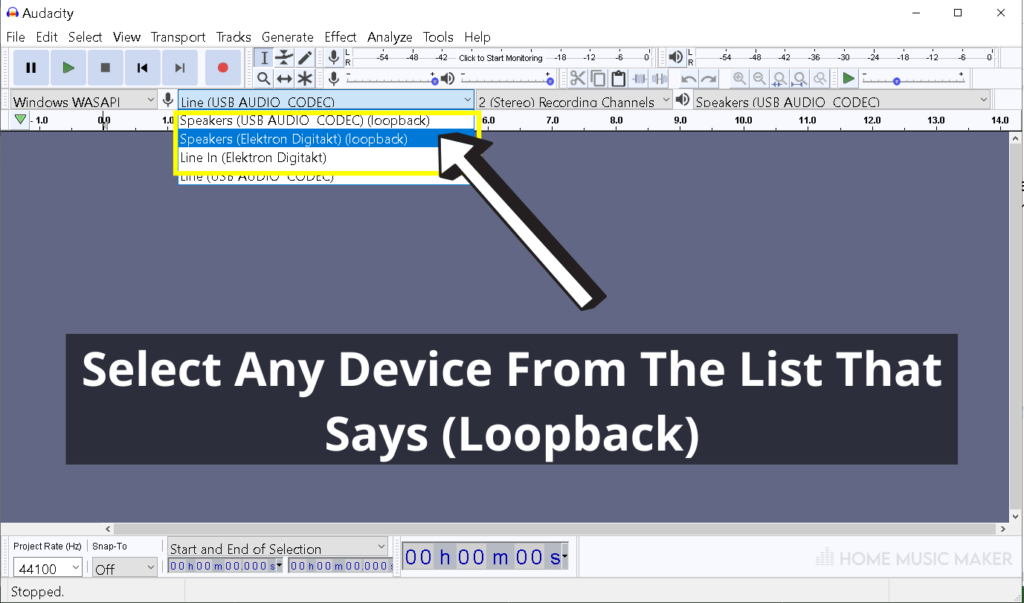

If you don’t see any such devices, you may not be using a compatible audio driver.
If that is the case, you will have to try a different method, such as using a YouTube to MP3 converter(don’t worry, I will go over this later in this article).
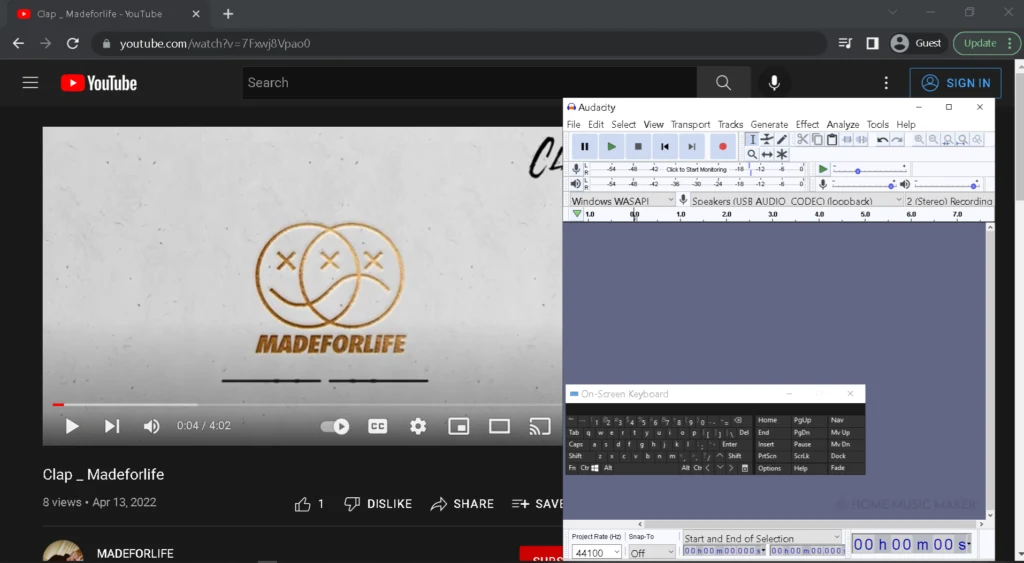
Step 2
Open your web browser (do not close or exit Audacity. If you need to, you can minimize it.) and navigate to the YouTube video you want to sample.

Step 3
Navigate back to Audacity, hit the record button, then go back to the browser tab with the YouTube video open and hit play to start playing the video.
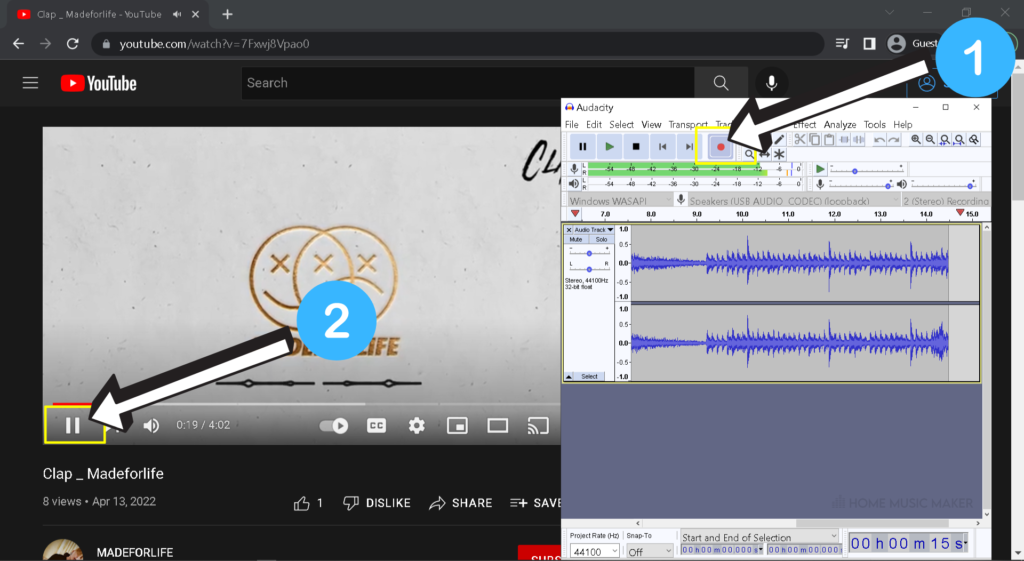
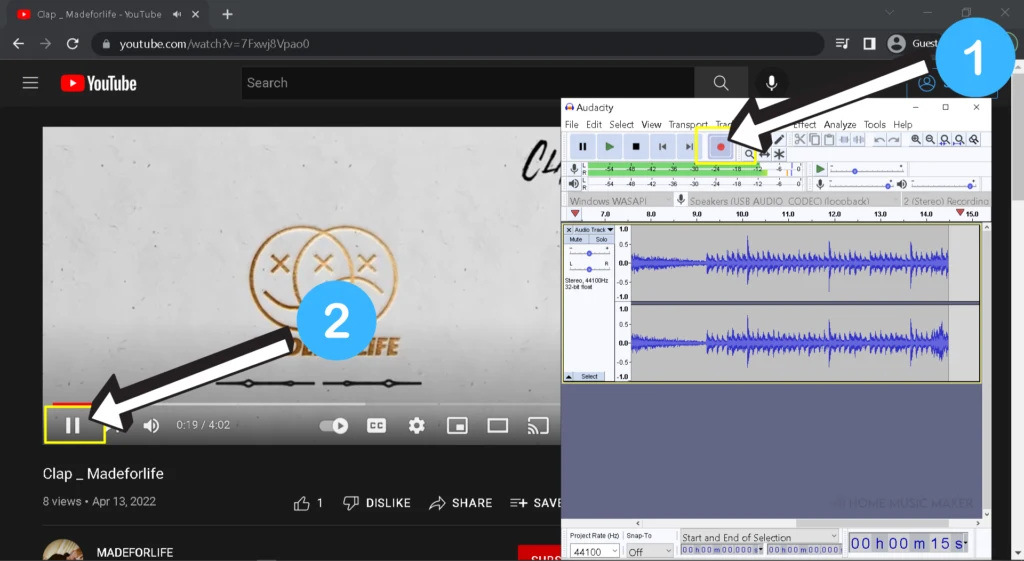
Step 4
Since we selected the loopback device as our input in Audacity, your video’s audio track will be recorded into Audacity in real-time as it is playing from the video in the browser.
You can hit stop in Audacity to stop recording when the video is over.

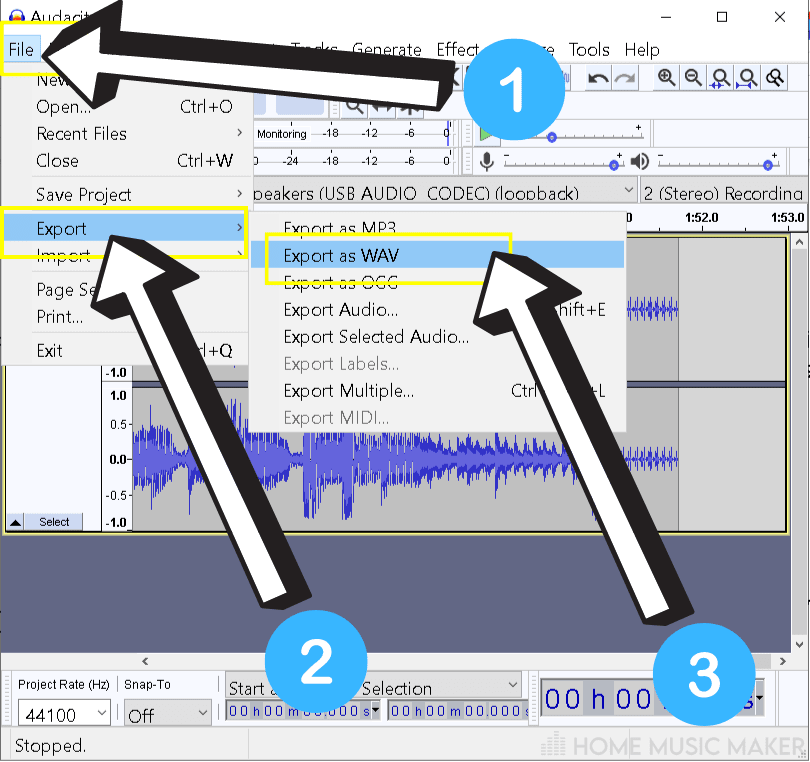
Step 5
Now that the audio is recorded, you need to export it from Audacity as a .WAV file and copy it to your user library for Ableton.

Click here for a complete guide on converting MP4 to MP3 in Audacity.
Step 6
Finally, open up Ableton Live and create a new project.
Drag the audio file from the browser and into Ableton Live’s interface, and you are done!
Method Two: YouTube to MP3 Conversion
Another popular method of ripping audio from YouTube is through a tool called a “YouTube to MP3 Converter“.
This tool will let you convert any YouTube video into MP3 format, allowing you to play the file and quickly transfer it over to your computer.
With a simple Google search, you can find tons of these tools, hosted and available for you to use online from your browser.
Most of these converters are free or have a free trial option that allows you to download only part of the song without paying for anything.
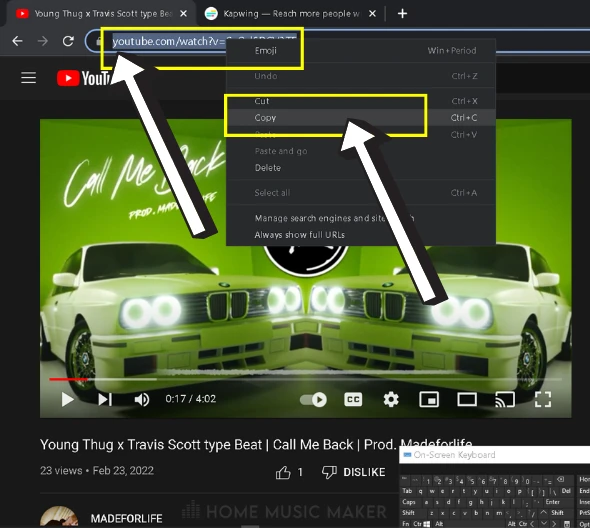
Step 1
Copy and paste the URL of the YouTube video from which you want to rip the audio into the converter tool by following the directions on the converter website.

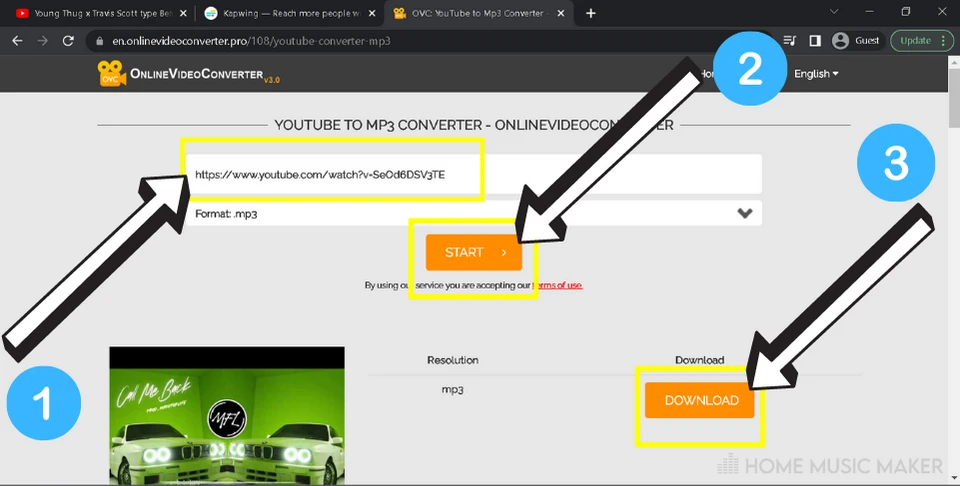
Step 2
Past the YouTube link into the converter tool and hit Start/Submit. The tool should give you a download link for the respective audio as an MP3 format file.

Step 3
From here, you can convert the recorded audio to .WAV(or any other audio format that Ableton is compatible with) by using whatever method is most convenient.
(If you are not sure how the free software “Audacity” that I mentioned earlier is a good option)
Step 4
Once it is converted, copy it into your user library, open Ableton, and drag it in like any other sample.
Method 3: Resampling
Another method would be to load an .MP4 format video into Ableton and then resample the audio from the master out as the video plays.
For this to work, you first need to have the YouTube video in question as an MP4 file.
One way you could do that is by using a screen recorder while the YouTube video plays in your browser, then exporting it as an MP4 file.
Step 1
Download a screen capturing software. You can do this with a Google search, in the Microsoft app store, the Android app store, etc…
If you are on Windows like me, you can open up the Microsoft app store and look for an app called RecForth.
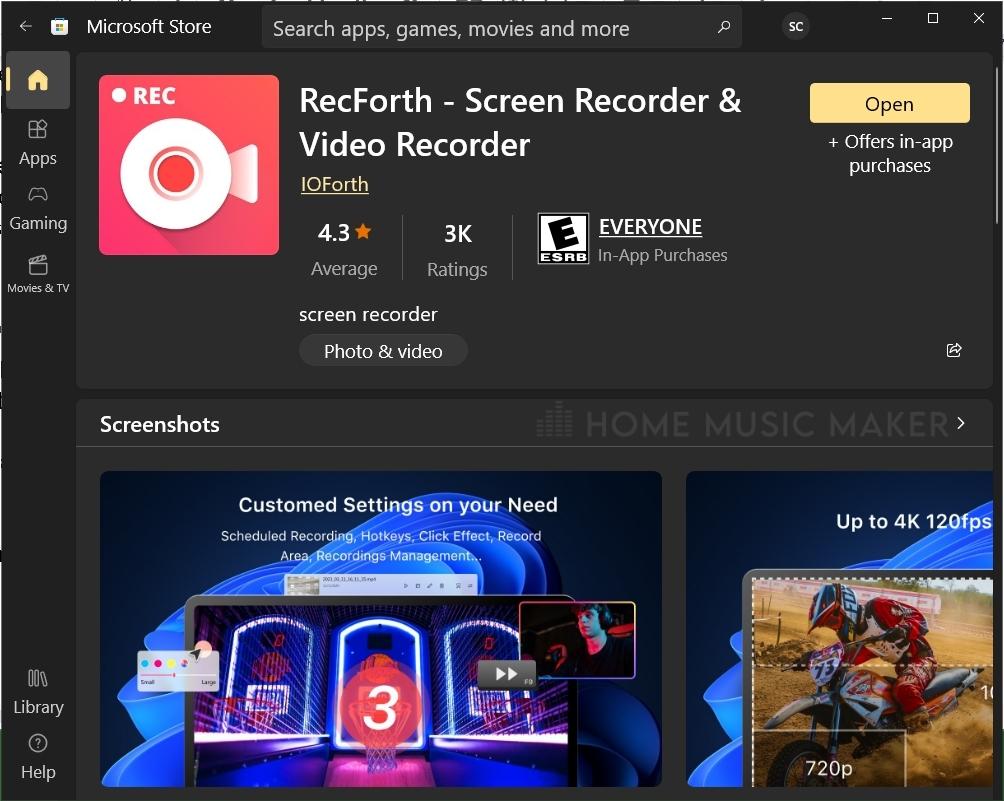

It is free and has all the features we need.
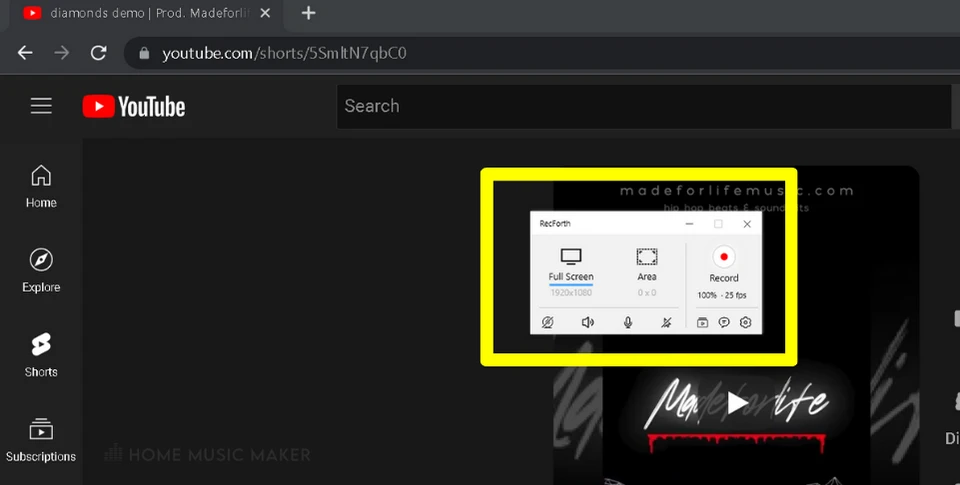
Step 2
Open your screen recorder and follow the instructions to record your screen while you play the YouTube video.

Step 3
Save the screen recording as a .MP4(or .MOV if applicable, since both .MP4 and .MOV formats are compatible with Ableton)


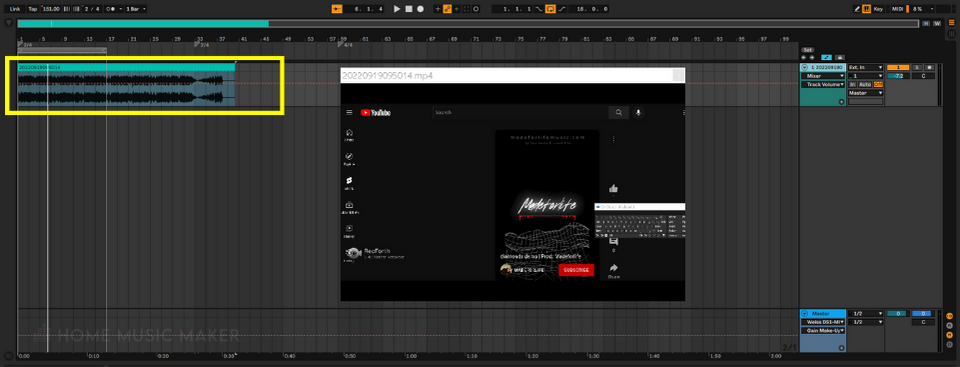
Step 4
Once you have the .MP4(or .MOV) file of the YouTube video, load it up in Ableton by dragging it from the browser onto a new track.

If you are having trouble importing the video to Ableton, this article from Ableton support forums might help.
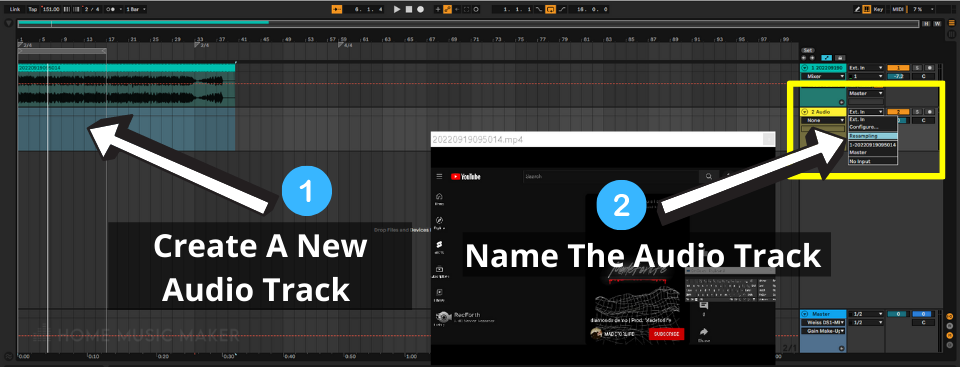
Step 5
Create a new audio track inside Ableton by right-clicking in the arrangement or session view and selecting “new audio track.”
Name it something like “resample,” set the audio in source to “Resample,” and arm the track for recording.

Step 6
Now when you hit record on the master transport (make sure the track with the video is not muted), Ableton should play the video, re-sampling the audio from the master output, and record it in real-time into the “resample” track that you created.
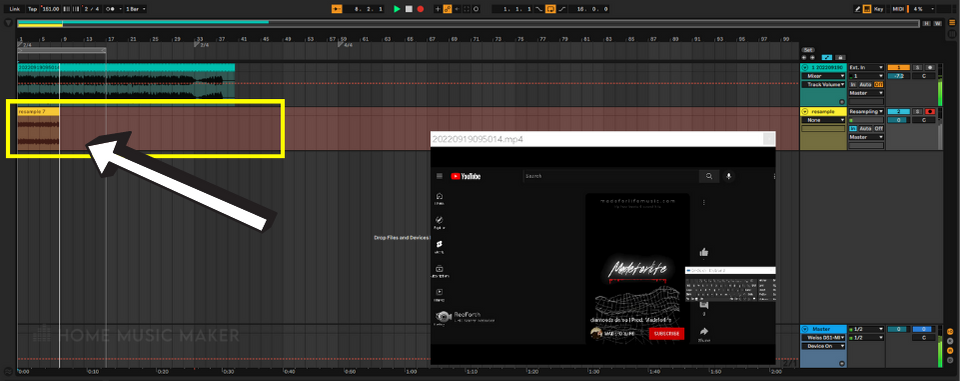
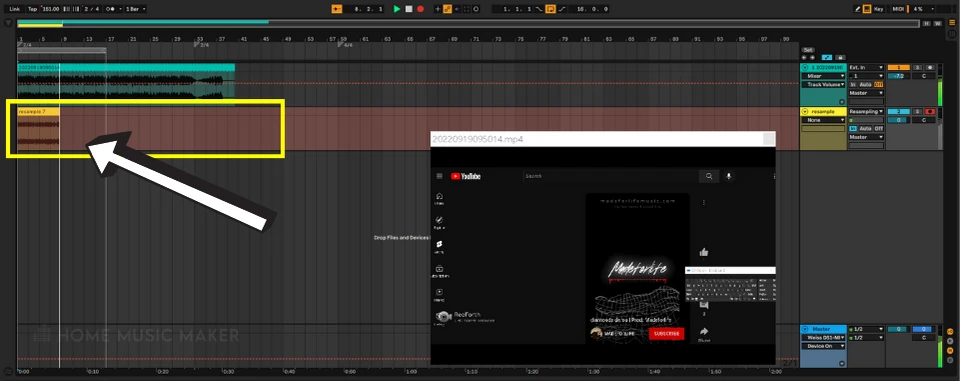
Then you can delete the video track and proceed to edit the audio on the “resample” track however you want.
Related Questions
Can Ableton extract Audio from Video?
While you can’t just extract the audio directly, the video does give you a clip of audio that can be recorded separately from the video in Ableton.
To record the audio from a YouTube video, follow these basic steps:
1) Open your favorite music program, such as Ableton.
2)Import the video.
3)Route the audio through an empty audio channel.
4)Play the video and record the audio input as it goes through the empty channel.
How to Download Songs from YouTube?
You can use an online service, stream, rip it from the network, or screen capture the video, then extract the audio from the video.
How Do You Turn a Video Into an Audio File?
Video to MP3 conversion is possible in various formats and multiple software packages. The first step for MP4 to MP3 conversion is simply searching Google for an MP4 converter.
There are various options, including a YouTube MP3 converter that will take any video off the popular website and instantly create a new version with audio on your computer.
What Video Files Does Ableton support?
According to Ableton’s website, “The 64-bit version of Live can use any DirectShow compatible demuxers and decoders that are available on the computer” however, Ableton has only been tested with “this codec: Haali Media Splitter (also known as MatroskaSplitter).”
Can You Put Video into Ableton?
Assuming you follow these instructions from Ableton’s help forum, yes, you should be able to put a video into Ableton.
Can Ableton live Edit Video?
While Ableton is a DAW (Digital Audio Workstation), which is used primarily as a tool for recording, mixing, and editing sound files, it can perform basic video editing as well.
Final Words – Important Things To Note
It is worth mentioning that just because you can rip the audio from a YouTube video doesn’t mean you should.
Whoever created the video owns the copyright, and only they have the legal right to use it. If the YouTube video is copyrighted, you will need permission from the copyright holder before using it in your projects.
If you don’t, you risk getting a takedown notice or potentially even a lawsuit.
(Granted, this primarily applies to commercial use, so if your project is not something you plan on selling, then you should be fine.
Regardless this is in no way legal advice, and as I said earlier in this article if you have any concerns about the legality of what you are doing, I recommend contacting a lawyer before continuing)
For another awesome guide, check out this article for the lowdown on sampling speeches in music.