Getting that ”larger than life” sound from your vocals is essential to having your productions shine. After all, most people will judge the quality of your mix by how well you’ve produced the vocal track, so it needs to be upfront and huge.
But how do you do it?
Learning how to mix vocals professionally is a long process, but these tips below should help set you in the right direction.
Besides teaching you how to make vocals sound bigger, we’ll also focus on recording them in the best way possible with the gear you have.


Here’s What You’ll Need:
- Any EQ with 4 or more bands
- At least two different types of compressors
- Any saturation plugin
- Dynamic EQ or multiband compressor
Step 1: Get Things Right At the Source
The first step to getting bigger sounding vocals is actually to record big sounding vocals in the first place.
Even though you have powerful tools at your disposal, a bad recording will always leave a lot to be desired, so it’s crucial to get things right from the very beginning.
Before we decide which microphone to use, it’s always a good idea to listen to the singer’s voice beforehand. The genre of music and style of singing is also an important factor to consider as they’ll massively affect your choice of mic and the positioning of the singer.
Condenser microphones are most widely used for recording vocalists. They are very sensitive even to the tiniest nuances in the singer’s voice and open-sounding, so it’s suitable for most singers.
However, if you plan on recording powerful vocalists and a song with huge changes in dynamics from section to section, dynamic microphones might be a better choice as they respond much better to sudden changes in dynamics and handle the massive burst of volume without clipping the input.


Another important piece of gear is a pop filter. That little thing literally separates professionally recorded vocals from amateur ones, so it’s wise to invest in one.
Even though they’re not that expensive anyway, you can still improvise and make a DIY version out of nylon socks or similar material. You’d be surprised how well it works!
The last thing to consider is the distance between the mic and the vocalist. If you’re going for an intimate and soft vocal, you can take advantage of the proximity effect and place the singer pretty close to a microphone. Otherwise, anywhere from 2 to 12 inches is a safe spot to place your singer.
Being too far from the microphone is also not advisable as you’ll introduce a lot of background noise and end up with the vocal not sounding present enough.
If you follow these steps and make sure not to crank the preamp gain too much and cause clipping, you can be sure to capture some great vocals regardless of the microphone you’ve got. That way, you’ve already made your life much easier in the mixing stage.
Step 2: Vocal Volume
Before reaching out to our favorite plugins, let’s make good use of the most basic audio effect – a volume fader. It’s surprising how drastically the sound changes with added volume.

By making our vocal really loud in the mix in the first place, we eliminate the need to add a bunch of low end to make it sound nice and fat.
It would be best if you aimed to set your vocal at the level where it obviously floats above the rest of the instruments. It might sound disconnected, but that’s a great place to start molding your vocals into a polished sound.
Step 3: EQ Settings For Vocals
With the vocal nice and loud from the previous step, you’ll notice that it doesn’t always fit well with the instrumental and feels like it’s not working together with the rest of the track.
Surprisingly enough, this doesn’t have anything to do with volume per se, but with tonal disbalance in the recording.
That’s totally fine, though; it’s just the way microphones capture a sound. Most of the time, they need a bit of love to blend into the background music, and that’s precisely what we do with EQ.
Most often, you need to address muddy low-mid frequencies around 150-250 Hz. As soon you do that, you’ll notice that the vocal doesn’t feel as disconnected as before.
However, cutting the lower register will inevitably bring out some shrillness in the higher mids. Depending on the vocalist, you should expect to cut anywhere from 2 to 6k.
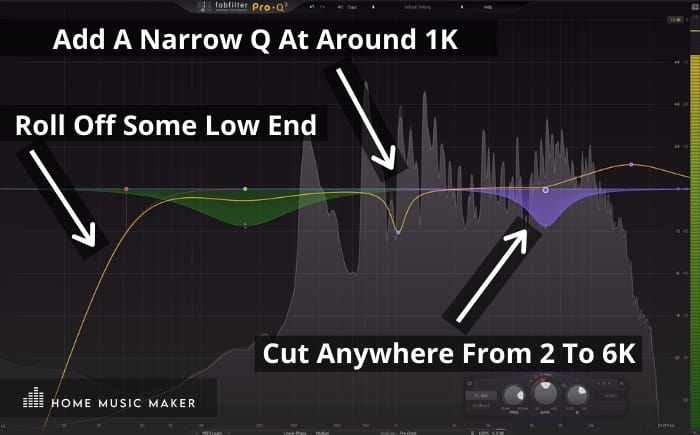
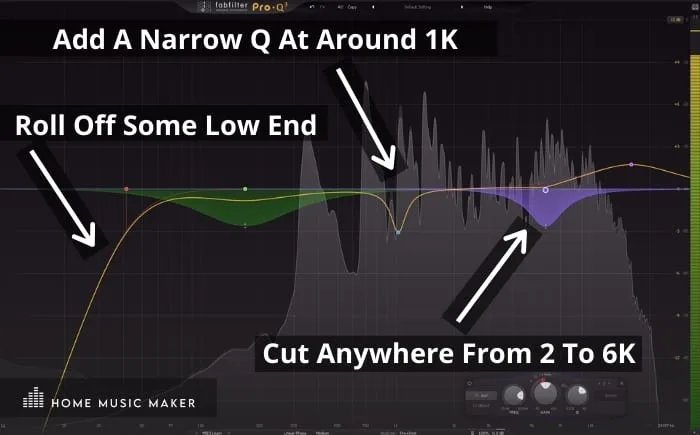
A neat trick I’ve found over the years of recording with budget microphones is that cutting with a narrow Q at around 1k makes the recording sound as if it was recorded with an expensive mic.
When recording with a budget microphone, that’s usually my first EQ move. The 1k cut brings out the bottom end in a more natural way compared to boosting it.
After that move, I judge whether it needs some taming in the low end and high mids.
I usually remove the rumble down in the subs with a gentle high pass filter.
An important thing to note here is to use quite subtle EQ moves. Having a couple of tiny cuts and boosts adds up and makes a world of difference once you bypass the EQ.
Drastic EQ moves should be applied only when having to salvage bad recordings, as in most other cases, they do more harm than good.
Step 4: Vocal Compression
Every mix engineer has a different idea about how the compression should be used on vocals. Still, I’m personally in the ”less-compression” team when it comes to this particular topic.
To my ears, driving the compressor does two major things to a vocal which I dislike:
- It introduces sibilance.
- It rolls off a lot of punch and low end on powerful notes.
However, vocal compression definitely plays a major role in getting that big vocal sound as long as you do not overdo it.
I like to use a combination of two different compressors and use them lightly.

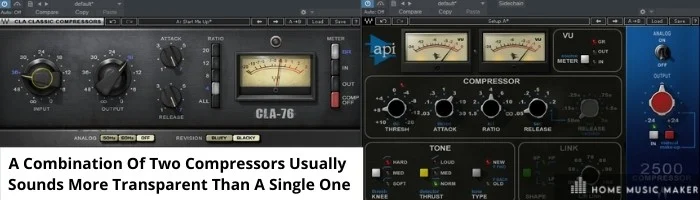
On the first one, I use a fast attack to slightly roll off the attack of the plosives and then use a slower attack to have the softer attack punch a little harder.
It might look counterintuitive to tame the attack first and then boost it, but this trick helps take out the rawness of a digital recording and make it rounder and warmer while still packing a punch.
I try not to go over 2 or 3 dB on each of the compressors. This much compression usually won’t cause excessive sibilance, but if you find that it still sounds a bit harsh, touching the signal with a De-Esser should solve it.
Once I’m getting the right sound out of my compression settings, I like to slightly tame the peaks using a limiter.
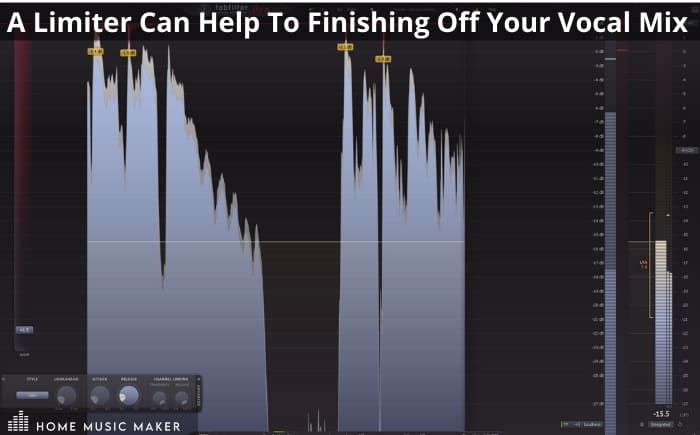

I try not to push it too hard and just let the limiter shave off a dB or two. Also, the limiter introduces a very distinct sound that I really like on vocals. It just fattens everything up and makes it nice and consistent.
While we are on the topic of consistency, I typically do not use compression to tame dynamics but rather to introduce a certain sound.
When dealing with dynamic singers, I often tame the peaks by manually automating the volume of a vocal performance.
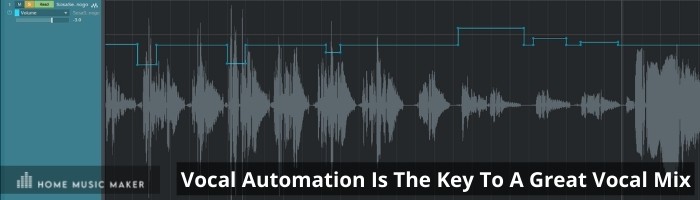
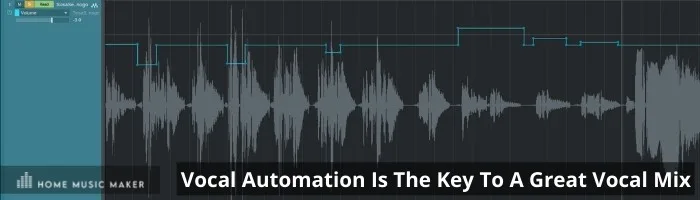
It does take a lot of time to get every line right, but you’ll ultimately have a better mix.
Your compressor will be fed a more consistent signal and, in turn, behave more consistently, so you shouldn’t expect a sudden loss of low end on powerful notes where the low end actually needs to deliver more than anywhere else.
If you do not like the idea of manually turning down each peak, you can get a similar effect by using a multiband compressor or a dynamic EQ.
The idea is to tweak the compression to kick in only on specific words where the buildup becomes overwhelming.
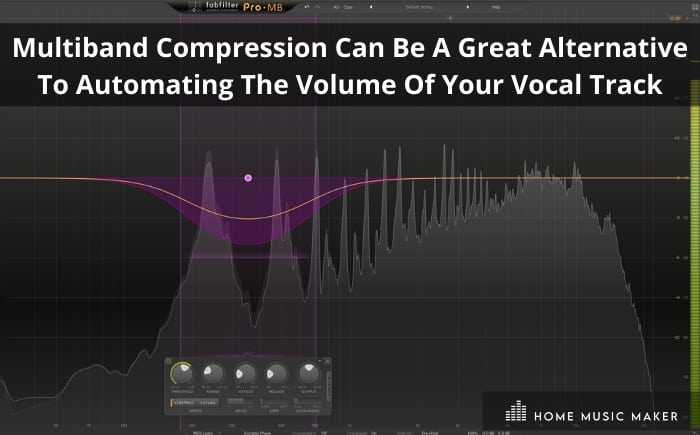
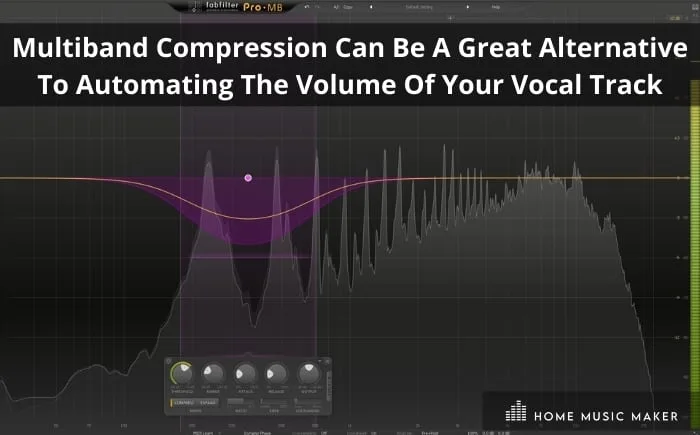
The same effect can be achieved by using a dynamic EQ, which is my preferred way of doing this as the options are more flexible and the sound more transparent.
Step 5: Build Your Mix Around the Lead Vocal
If you want to have big vocals in your mix, you have to prioritize them over any other element in the song. This means that all other instruments should be in the service of making the vocal sound as huge as possible.
You might have a fat-sounding vocal, but if you mask it with lots of other instruments, it won’t sound the way you intended it to sound.
Try to find the right balance between not thinning out your mix too much and maxing every element so that it ends up masking the main vocal.
It’s fine for some instruments not to sound amazing, as long as they fit the bill.
Making these kinds of trade-offs is common to do even on a professional level of mixing vocals.
How To Make Vocals Sound Bigger – FAQ
When I record vocals, they sound dry and boring. How do you jazz things up a little bit?
A cool way to add some excitement to your vocal recording is to use effects like tape saturation coupled with a subtle dose of delay and reverb.
Adding a sense of space with reverb really makes a world of difference, but make sure that it doesn’t sound cheap and cheesy.
Always look at the bigger picture and judge how much FX a song really needs.
How to achieve a big vocal sound if the singer’s voice isn’t that powerful?
If you need thickness in your vocal part and the singer’s voice doesn’t quite cut it, adding some interesting background vocals can be a lifesaver.
Also, try to double-track the main melody line.
Do you need an expensive mic preamp to record good quality vocals?
Although nice gear can come in handy, you can absolutely record great vocals even with a budget USB audio interface.
Good preamps will definitely add some value to the recording, but it is up to debate whether the big investment is worth the results.
Which budget microphone is the best for recording vocals?
If I would have to recommend a single, budget microphone to record every type of vocalist, I would definitely go for Shure SM58 for recording vocals.
You can pretty much record all types of singers, and it will always sound decent, if not amazing, in some cases.
You can also use it to record everything else besides the voice. It’s just a great mic all around.
What is a usual vocal chain when mixing a pop song?
I EQ into the compression, so the first thing in my vocal chain is an EQ followed by a compressor. I finish everything off with either a limiter or a saturation plugin.
After that, I’ll add some effects as I see fit, but these 3 plugins are in 99% of the situations.
Is it worth renting a professional studio only for vocal recording?
If you are in a position to do so, recording vocals in a professional studio rather than a home one can turn out to be a smart decision.
Besides having access to various microphones, a good isolation booth can enhance the final product as you’ll have no weird room reflections getting picked up by a microphone.
Should you record vocals in stereo or mono?
As far as I’m aware, most engineers prefer to record vocals in mono. After that wide vocal sound, try sending it to a stereo reverb and mix to taste.
Final Words
Recording vocals can be a daunting task, but it doesn’t have to be. With a good quality recording and using certain mixing techniques, you can make your vocals sound big without having an expensive studio or any fancy equipment.
In this article, we’ve given you some tips on how to get started with vocal recording and processing so that no matter what your budget is, you can produce professional-sounding recordings every time!