To perform gain staging on your track in REAPER, you should use a combination of volume automation, volume faders, plugin output, and BUS tracks to group and control certain items together. If you correctly implement these different techniques, you will achieve proper gain staging in REAPER.
REAPER Gain Staging And You
Gain staging is one of the most important parts of mixing/mastering. It allows you to clean up any clipping and distortion in your track and balance the different parts of your mix against each other.
If you learn proper gain staging in REAPER, you will see a huge improvement in your music production.
For me, becoming knowledgeable about gain staging has been crucial for finding paying clients and furthering my music career.
In this comprehensive step-by-step guide, I want to show you what gain staging is and how to do it in REAPER.
What You Need For This Tutorial
Here is a list of everything that you will need to follow in this tutorial:
- REAPER DAW (Digital Audio Workstation)
- REAPER stock plugin collection (included with REAPER)
- A track to work with that needs gain staging
What Is Gain Staging?
Before we get too far into gain staging in REAPER, let’s touch base on what gain staging is…
Gain staging is the process of setting volume levels in a digital audio signal chain to eliminate clipping/distortion and balance your different mix elements together.
When you record a piece of audio, it goes through several points in your digital audio workstation before you hear it.
For example, it first goes through your audio interface to a channel in REAPER, then to your master track in REAPER, and any BUS tracks or sends that you have in between.
Your track will sound cluttered, distorted, and unprofessional without proper gain staging.
Becoming a gain staging ninja will put you a leg up over many other music producers.
How To Gain Stage In REAPER
To gain stage in REAPER, you have to control the volume/gain levels of the different tracks in your mix at the various points in which they go through the digital audio signal chain.
An audio signal in REAPER starts at the input of your audio interface/recording device. It then goes to the track it belongs to in REAPER, goes through any BUS tracks that you route it to, and finally ends at the master track.
Different Ways To Adjust Gain/Volume
There is more than one way to adjust gain/volume in your mix to help you gain stage.
For example, you can set the gain on your audio interface, the faders in your DAW, your plugin chain, etc.
Let’s take a closer look at the different ways to adjust gain/volume in REAPER to help you gain stage your track.
Step One – Setting Input Gain
The first step for gain staging a track in REAPER is setting the input gain of your audio interface for the instrument that you are recording.
To do this, adjust the gain level on your audio interface while playing/singing at the level you intend to while recording.
In my opinion, an optimal gain level for recording is between -24dB and -6dB, depending on what instrument you are recording and how you want it to sound.
This is the first step in our gain staging, so we must get it right from the beginning. Mainly because if we record clipping audio in this stage of the process, we cannot fix the clipping.
With our input gain set, let’s move on!
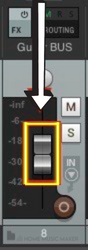
Step Two – Setting Individual Track Gain
The next step for gain staging in REAPER is setting your individual track levels using the volume faders in the digital audio workstation.
To do this, I typically wait until I have recorded all the parts of my track so that I can balance them against each other to my liking. This gives me an idea of what my rough mix might sound like.
Once you have your rough gain mix dialed in, you’re ready to move to the next step of the process.
Step Three – Volume Automation
The next step in the gain staging process is to perform volume automation on any tracks that might need it.
For example, if you have a guitar track with one or two bars that are way louder than the rest, you can use volume automation to bring down the volume of just these two bars.
Click ‘v’ on the track you want to automate to open up the volume automation envelope.
From here, press Shift>Click to insert automation points. Use these points to control your track’s volume.
Using volume automation can be very helpful for cleaning up audio that you would otherwise have to record again due to inconsistency.
You can use volume automation on an individual track or multiple tracks at once if you route them to the BUS track.
Now that you have completed your volume automation, you are ready to move along.
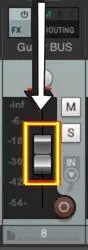
Step Four – Setting BUS Gain
With our rough gain mix complete and our volume automation done, we can adjust the gain of our different BUS tracks in our mix.
For example, in my mix, I have three BUS tracks controlling the drums, the guitars, and the vocals independently.
To adjust the gain/volume levels of your BUS tracks, you can either use the volume fader on the BUS track or you can use a plugin on the BUS track that can control the output level.
Because my rough gain mix is already close to where I want it, I’m just making minor adjustments to the gain/volume levels of my BUS tracks at this point.
Now that your BUS gain mix is where you want it to be, you can move on to the next step of the process.
Step Five – Setting Your Master Track Gain
The only thing left to do is check the output level of your master track to see if it’s peaking/clipping.
Observe the gain/volume level on your master track and turn it down or up if necessary.
If you have followed these steps carefully, your track should be properly gain staged!
How Do I Turn Down Gain In REAPER?
You can turn down gain in REAPER by using the volume fader on the track you are trying to control.
Remember that you can also adjust volume/gain by using the output level knob on a plugin.
How Do I Stop REAPER From Clipping?
To stop REAPER from clipping, you must have proper gain staging in your track.
Start by adjusting the input on your audio interface to a level that is not clipping or peaking too loudly.
All you have to do is make sure your volume/gain levels don’t clip at any other point in your REAPER project’s signal chain.
If they are clipping, just turn them down until they’re at a healthy level.
How Do You Use The Limiter In REAPER?
To use the limiter in REAPER, start by inserting the plugin on the track that you want to use it on.
For example, I like using the ‘Master Limiter‘ plugin on my master track.
From here, adjust the settings such as threshold, attack, release, etc., until you have your track limited to how you want it to be.
[7.Limiter
REAPER’s master limiter plugin is great for pushing your track to an industry-competitive volume level.
How Loud Should My Master Be?
It is typically best to make your master as loud as possible in today’s day and age.
Modern mixing engineers master the songs that one would hear on the radio to a level of most likely -0.1dB.
This is as loud as a track can be without it clipping.
You can make your master this loud without sounding bad or clipping by using a master limiter plugin or another type of limiter plugin.
Do You Gain Stage Before Mixing?
Yes, gain staging is something you want to do before you begin the mixing process.
This is because before you start processing and adding FX on your track, you want your volume/gain levels set in stone.
It is crucial that you complete your gain staging before you begin mixing your track. Otherwise, your mix will sound inconsistent, and you may experience harsh noise or distortion.
Is Gain Distortion?
No, gain and distortion are not the same things.
However, it will turn into distortion if you push gain too hard. This is why it’s so important to have proper gain staging. Without it, your track will have distortion and be full of extra noise.
Related Questions
What Are the Most Important steps in Mixing?
Two of the most important steps in mixing a track are gain staging and panning.
Gain staging and panning are the first two steps to mixing a track, and in my opinion, they are easily the most important.
Is Gain Staging Essential in Music Production?
Yes, setting the gain levels of the elements of your track before mixing is completely essential for having a balanced and non-distorted mix.
Make sure that you begin all of your mixes by gain staging and panning.
Should I Use Faders or Plugins For Gain Staging?
This depends on how you want to change the gain/volume of your track.
For example, use the fader if you just want to add some volume to a part of your mix. However, if you’re going to add some color to your track and volume, consider using a plugin.
Are you looking to go to the next level? Check out this guide on how to master in REAPER.