To export stems in FL Studio, select the track you wish to export and click on the File menu at the top of the screen. Then select Export. Stems are usually one single instrument in a song as opposed to the entire song itself.
Exporting Stems In FL Studio
Engineer: “Can you send over the stems?”
Producer: “What are stems?”
Engineer: *mutes phone*
Engineer: *screams* “FOR THE EVER LOVING LOVE OF STEMS!!!”
One of the most frustrating things about working on music in the modern world is not having entire, high-quality stems for a song. This is especially the case when working with another artist.
Stems are pivotal pieces of a song. They are one long audio file, usually exported/saved as a .wav; generally, each instrument in a track will be represented by one stem.
This tutorial will show you how to create and save stems, either one at a time or all at once in your FL Studio project.

What You Will Need To Follow This Tutorial
- FL Studio 12 or higher
- Computer with peripherals to control the FL Studio User Interface
- Time, motivation, patience, and attention
Before we start, let’s quickly go over what a stem is. If you already know this, then skip on to step one.
What is a stem?
A stem is usually one long audio file saved in .wav format. That’s it, that’s all.
The way stems are used, and referred to, is really what makes them unique.
The word “stem” used in the audio production and engineering world is a terminology that’s industry standard. This language helps people working together on a song understand that everyone is talking about the same thing.
As a producer matures and begins creating full songs, the organization of a project becomes critical.
Naming instruments, tracks, samples, loops, channels, busses, and so on is essential for individual producers and is paramount when more than one person collaborates on a song.
Generally speaking, a song consists of a handful of instruments, including drum elements, vocals, etc.
What We Are Doing When Saving Stems
I’m going to use the format of a simple song that contains a kick, snare, hi-hats, piano chords, piano melody, and a bassline.
If you’re working with an existing project, try to mentally map this overall basic framework to the elements in your song. You most likely have some similar combination.
The most important thing to remember is group and organize similar pieces if you have multiple melodies for a single instrument.
You’ll do this by routing to a bus or manually exporting specific tracks in conjunction with one another.
There’s a balance that is learned over time regarding how to organize your stems on a granular level.
A key thing to remember is to keep the song elements grouped and named, so the person receiving the stems will understand how the project elements fit together to form the complete song.
This is the power of stems, portability of complete projects from one person to another.
The technical bits to follow are pretty straightforward and are purely a function of the DAW. The organization and naming of track elements require a human touch.
Step By Step Instructions On How To Export Stems From FL Studio
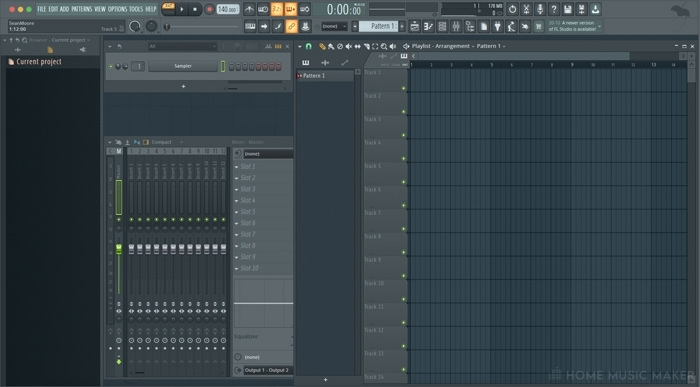
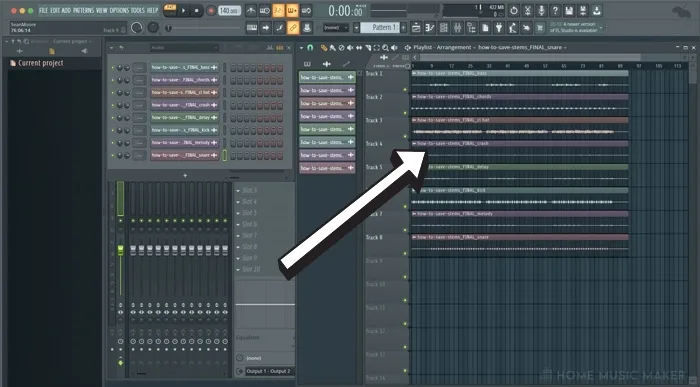
Step 1 – Open An FL Studio Project That Has Multiple Tracks And Channels
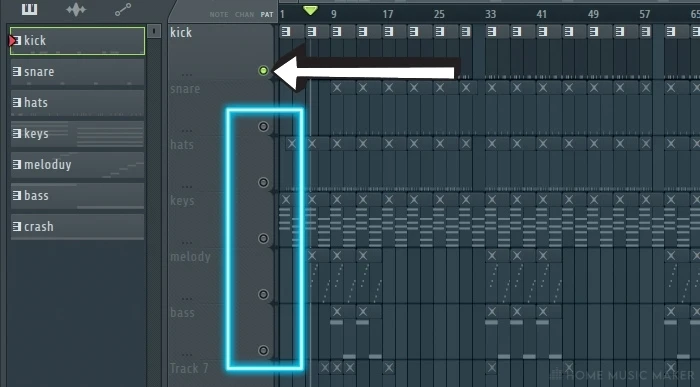
This is a close-up of the completed example FL Studio Project. A simple song, but there are several vital practices used that you’ll need to adopt in some form for your songs.
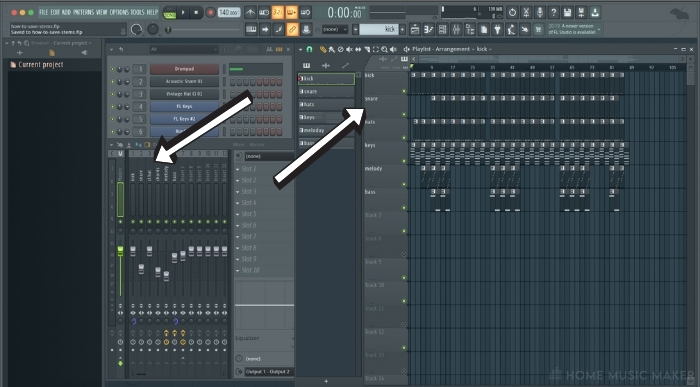
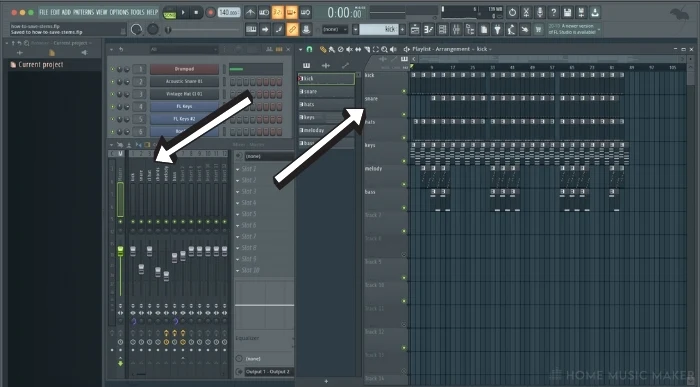
Notice how each Track in the Playlist and each Insert or Track in the Mixer are named according to their contents.
Each instrument will be routed to a mixer track, and each mixer track will be exported as a stem.
The name of the .wav file exported from FL Studio will match the name you used for the mixer track.

So not only does this help stay organized when you’re working on the project.
When you export all the mixer tracks at once, you’ll know what each of the .wav files contains just by looking at their names.
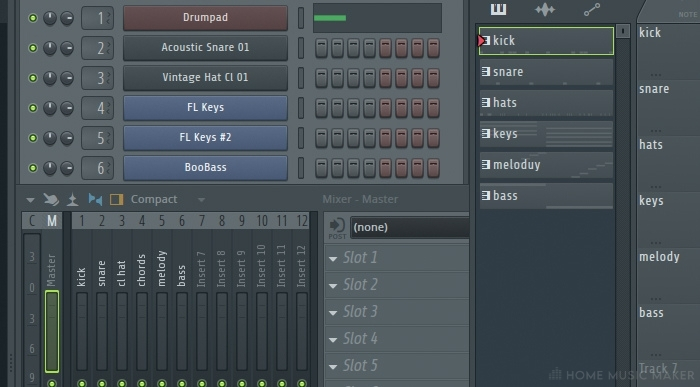
Step 2 – Route Every Channel You Want to be Exported As A Stem To The Mixer
When you add an instrument, it will be assigned to the master track.
You need to change this so that each instrument is mapped to a unique mixer track.
I’ve added a new crash cymbal to the project.
Notice how I named the track in the Playlist and the slot in the mixer that I’m planning on targeting with this new instrument.
The mixer track name is going to be the name of the stem file.
I’m going to show you how to do this in the next step. For now, get this process into your mind. Naming the different parts of the song is essential for many reasons.
Here is the new cymbal instrument added to the project.
The mixer track that’s targeted is the Master track.
We don’t want that; we want each instrument saved to its own stem.
Do this by changing the mixer track that’s assigned to this channel.
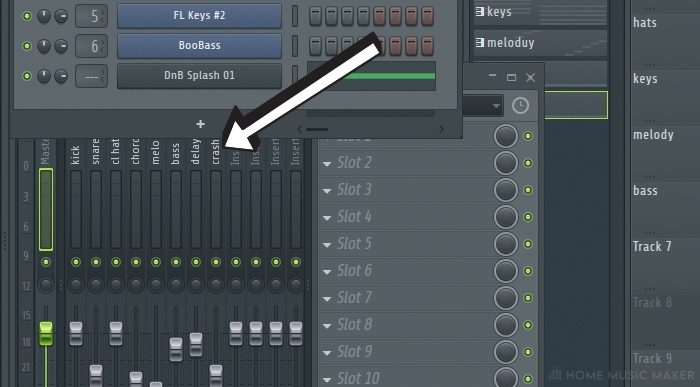
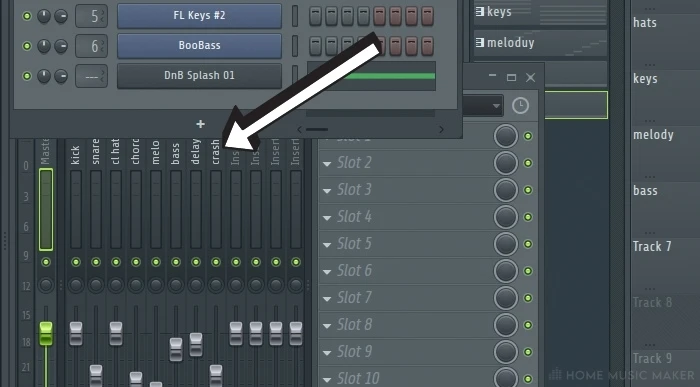
Hover your mouse above the — and use the mouse wheel to scroll to the desired mixer track.
You can also click, hold and mouse up or down to select a mixer track.
Again, assign each instrument or channel to a unique mixer track.
Later, as you learn more about how this works, you may route two instruments to an individual track.
Remember that those two instruments and anything you play with them will be rendered into one single .wav file stem.
You may have routing set up for your existing project. That’s fine. Just ensure that you’ll be saving each of the targeted mixer tracks as a stem file. You may want to make changes to your project at this time.
The goal here is to separate the different elements of the song to separate stem files so the song can be reassembled by another producer quickly following this format.
Some typical stems would contain all of the kicks or the snares or claps of a song.
Following this convention further, the bass, piano melody, and main chord progressions would also be stems.
I’ll show you how to reassemble the track later in the article, and if none of this is making sense, it should come together for you at that point.
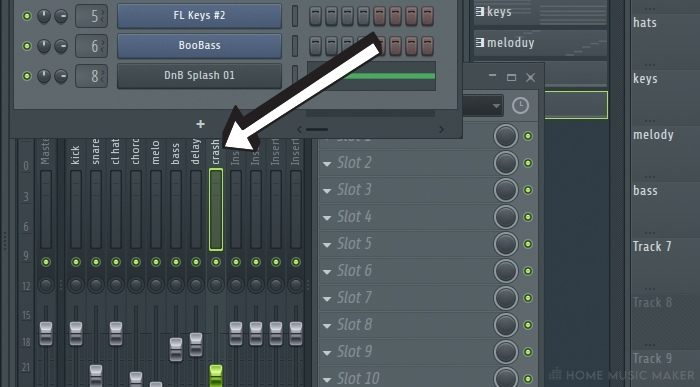
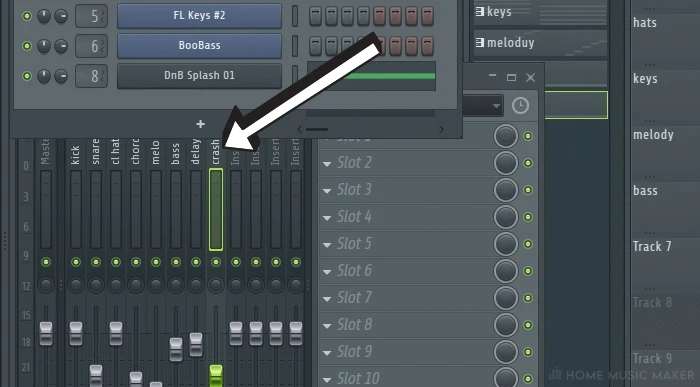
Step 3 – Name Each Mixer Track
Right-click on the Mixer track and then select Rename.
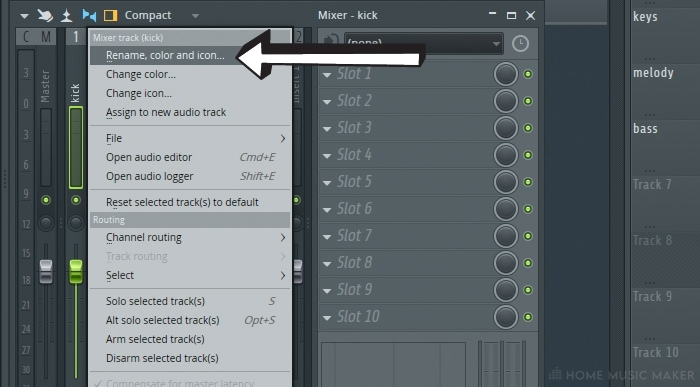
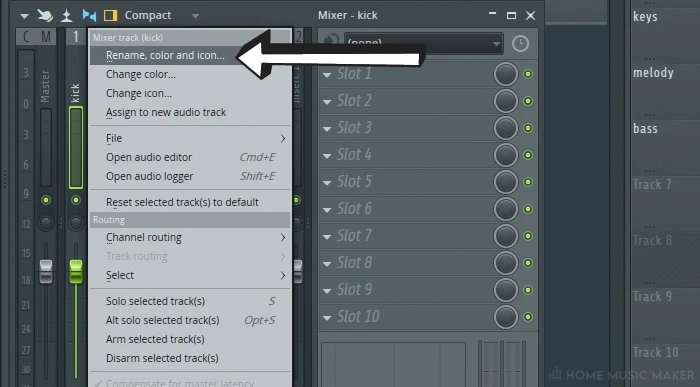
Enter a name that’s relevant to the song element related to this sound.
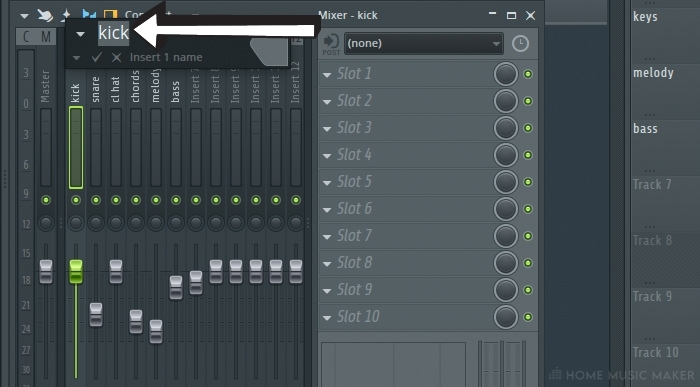
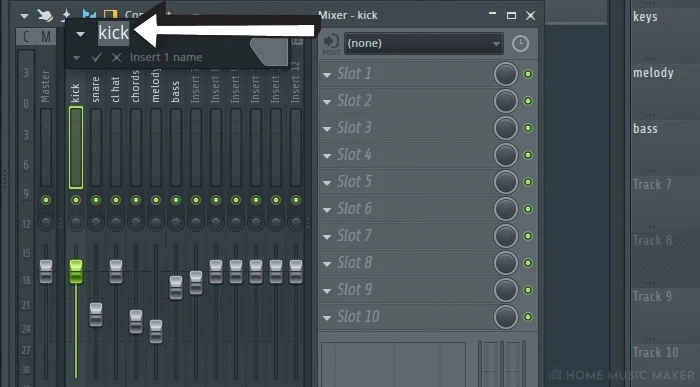
Repeat this process for every mixer track.
Step 4 – Export The Stems Manually Or Batch Process
If you want a single stem of a single instrument, you can mute all tracks that you don’t want to be heard in the stem.
You can also combine multiple tracks into a single stem using this technique.
Mute all the tracks you don’t want in the stem. I’ve muted everything except the kick here.

For the single stem below, I’ll be exporting the crash we added to the project.
This is how you can export single stems of different instruments.
Mute the tracks you don’t want in the stem.
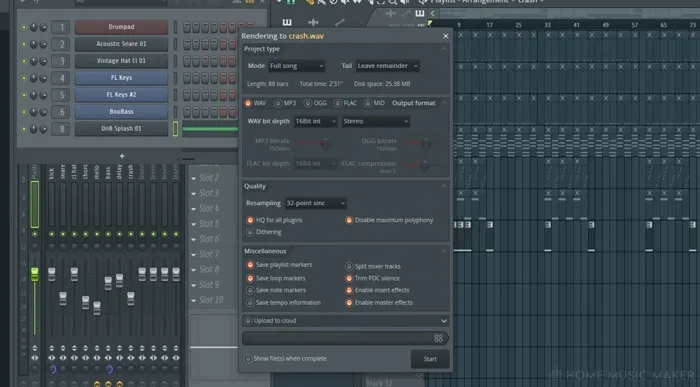
Next use File (1) -> Export (2) -> Wave file (3).
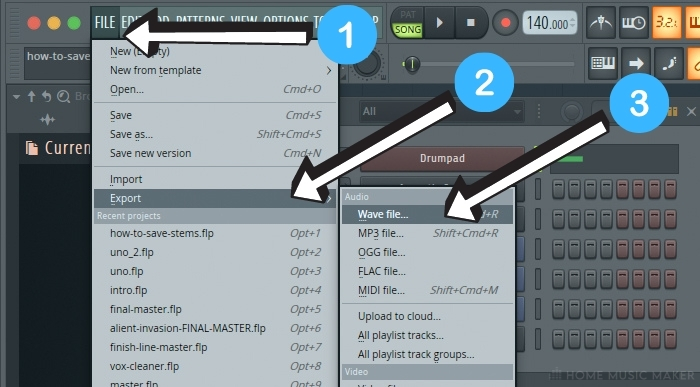
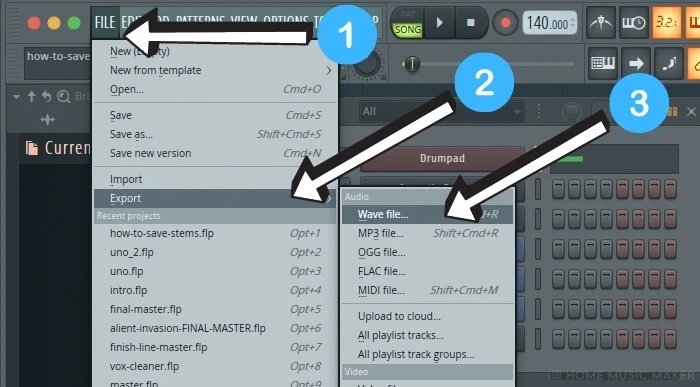
You’ll be prompted with a window specific to your Operating System to name the file.
When you’re rendering a single stem, this name is essential, and the only time you get the option of choosing a name.
When we batch export, this name isn’t that important.
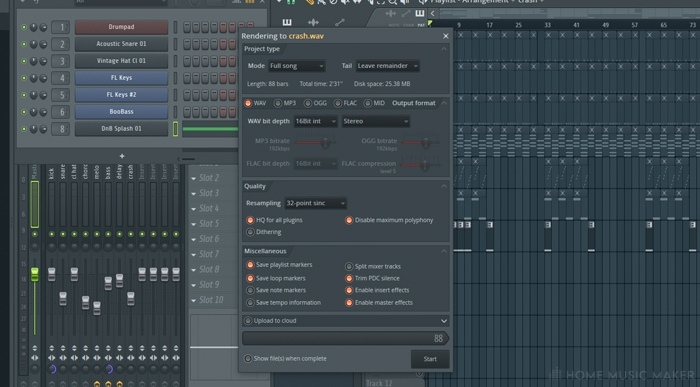
The default settings here should be fine for now. Until you understand the depths of each one of the options, the best approach is to leave them be.
You need to ensure Split for Mixer Tracks is unchecked, and you should also make sure the Tail is set to Leave Remainder.
Once you’ve checked those settings, go ahead and click Start.
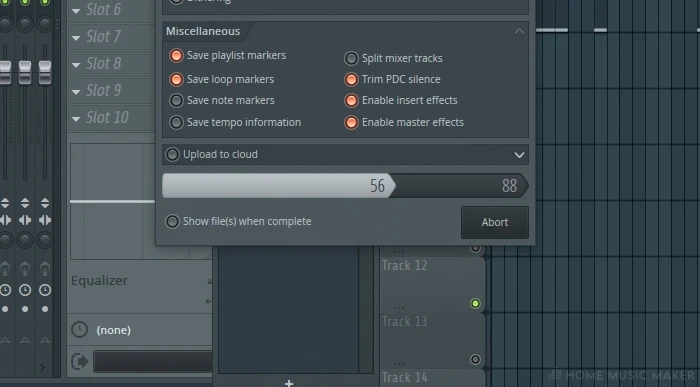
The export process for a single stem can take a minute or two to complete.
After your stem has finished exporting, you’ll hear a chime or ding sound. This means your stem has completed rendering!

Why Export One Stem At A Time?
Exporting one stem at a time is great and has many uses, as exporting every stem for a larger project becomes cumbersome and error-prone.
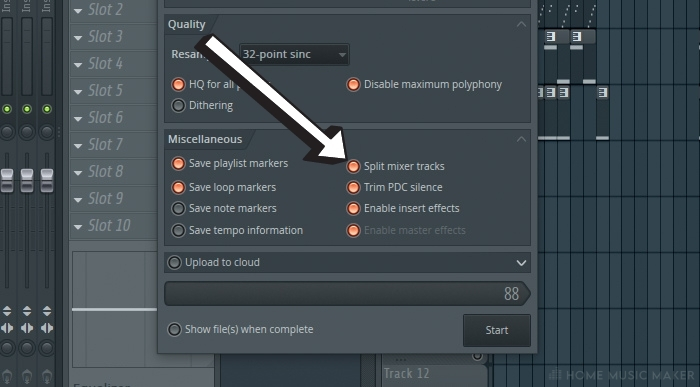
Recall the Split Mixer Track setting from the export process of a single stem?
This is the key to having FL Studio do the heavy lifting and exporting all the mixer track into separate stem files for us. Magic!
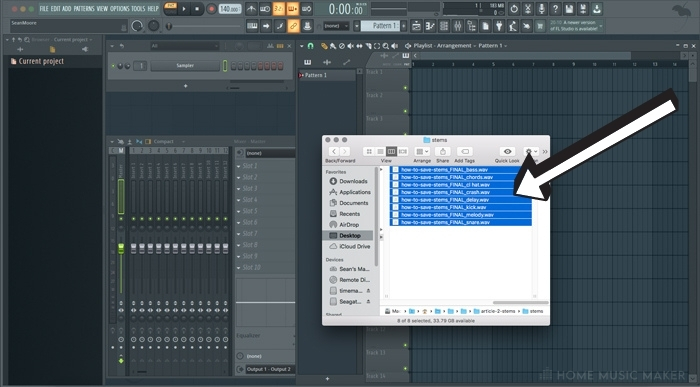
When you’re asked for a name by the Operating System window, this time, be sure to select a folder to export all of the stem files to.
This is more important than the word you enter for a name here.
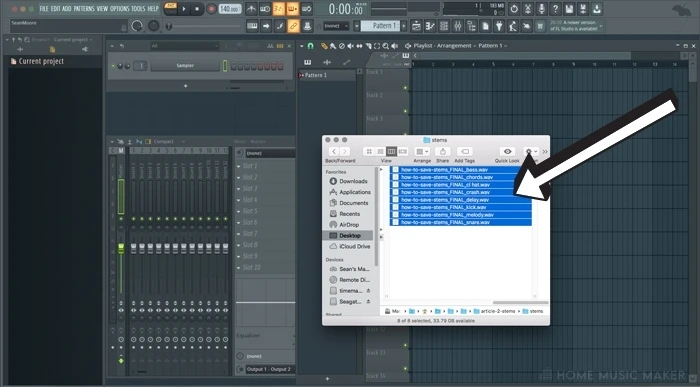
I usually create a new folder within the main folder for the project I’m working on. I call this new folder “stems.”
Once this folder has been selected, you’ll be prompted with the same window as seen when exporting a single stem.
This time make sure the Split mixer tracks setting is checked. Just click it once, and a highlighted color will appear to indicate you’re exporting all of the mixer tracks for the entire project.

Stem File Size, And How Long They Take To Export
When exporting all the stems for an entire project, you should expect a wait. Depending on the size and complexity of the project, it could take anywhere from one to ten minutes or more.
Another thing to keep in mind is the size of the files being exported.
Each one is a .wav file and can be anywhere from 10MB and upward each. This size can add up, so it’s just something to keep in mind.
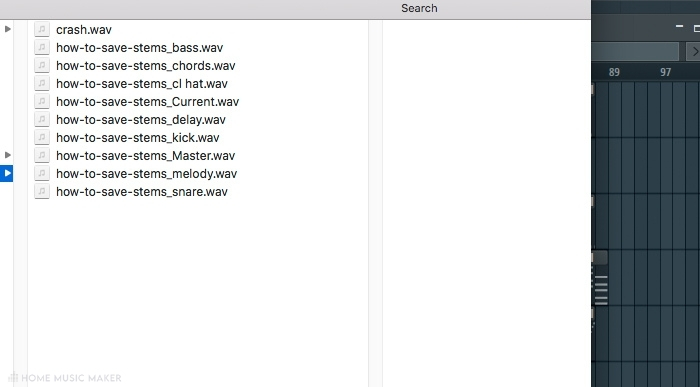
When all of the stems have finished exporting, you’ll hear a chime or a ding. This means all of the stems have completed rendering to the directory you selected.
You should see files with names something like these for your project.
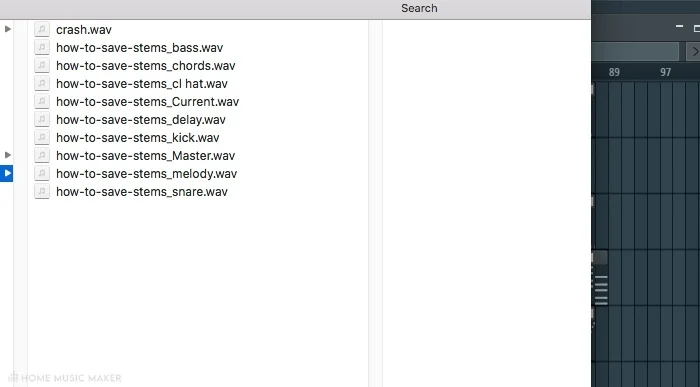
Congratulations! You just saved stems for your song.
The Current and Master stem files are all of the stems combined into one audio stem. They represent the song itself as a whole and are the industry standard for sharing songs.
You’re ready to begin collaborating with other producers, musicians, and engineers at the pro level.
Step 5 – Bonus Tip: Reassemble The Song (Great For Mixing!)
Let’s look at how we can import stems and assemble them by someone else, or ourselves, to create the song.
This process applies to most DAWs. We’re simply using the same one that created the stems. It could be Logic, Ableton, Audacity, Pro Tools, or any other multi-track DAW.
You could even use these stems on analog gear if you wanted to. That opens up a vast world of possibilities for collaborating with other artists.
Create a new empty FL Studio project.
Open an Operating System file explorer window and navigate to the folder you exported the stems.
If you received stems from another producer, you’d navigate to the folder you saved their stems too.
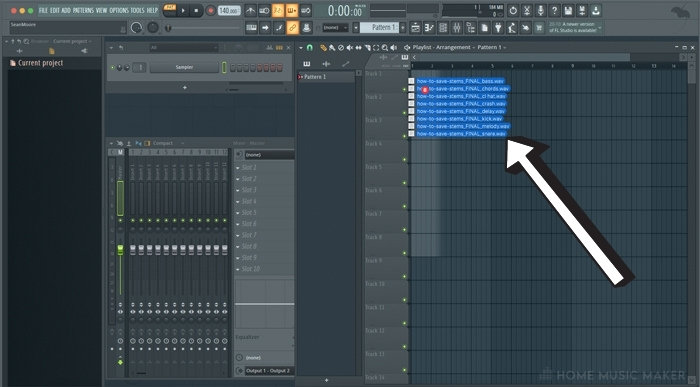
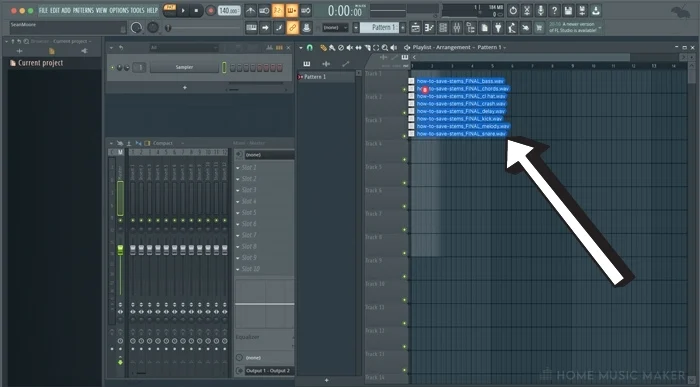
With FL Studio in the background and the file explorer in the foreground, select all stem files for the song.
Drag them all into the new, empty FL Studio project. Try to get them all lined up as best as possible to the far left of the Playlist. This prevents the need to move them around in the new project.
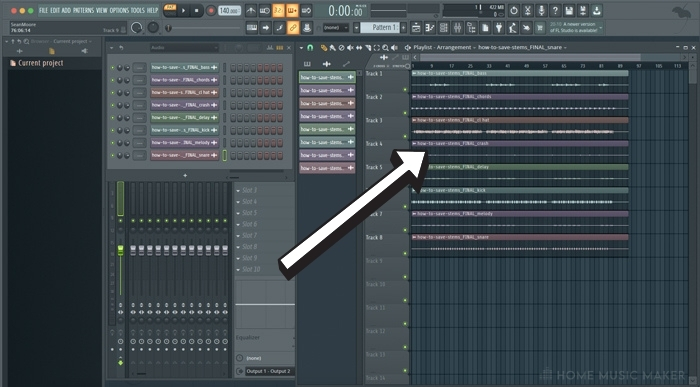
Once the stems have been imported into the new project, you should see an organized wave representation of the whole song.
And that’s it!
Related Questions
Can I export more than one stem at a time with FL Studio?
Yes, you can export all of the mixer tracks for an FL Studio project by ensuring the Split mixer tracks option is selected.
Each stem will be exported to a folder you choose with a name matching the mixer track.
Can I export one stem at a time?
Yes, mute all the tracks in the Playlist or Mixer that you don’t want in the stem and then use the File menu to Export wave.
What are stems used for?
Stems are used for sharing songs between producers. Stems help with the portability of a song.
Stems are used by mixing and mastering engineers to create the final version of a song for distribution.
Can I save my stems as MP3?
Technically you can save stems as an MP3 file. This isn’t the best idea, though.
Use the industry-standard .wav format unless you have an engineer asking for something else.
What is the stem with Master in its name?
This is the full song combined into the complete work. It’s the song itself. It helps to send it along with the single instrument stems as a reference for the entire song.
Final Words
I hope you can see the power of portability across DAWs.
This also accounts for plug-ins that one producer might have that another doesn’t. This is key to collaboration and remix work.
Providing a mastering and mix engineer with these files in this format is crucial for getting the maximum quality sounding material possible.
You can also use this to mix your own songs. This is how I approach mixing my tracks. It helps me step away from the complexities of the elements of the song and the urge to continue changing and refining them.
It prevents me from changing the melodies and keeps me focused on mixing the separate elements of the track.
It has helped me as a producer in this manner. It’s also assisted in providing a professional way for me to collab with others, including my mastering engineer.


Fancy making FL Studio look a little different? Check out our guide on FL Studio Skins.