Crossfading in FL Studio can be achieved in two different ways. You can either create a fade using the crossfade declicking mode in the sampler window. Alternatively, you can create volume automation of both sounds and make your crossfades manually.
Using Crossfades In FL Studio
Creating crossfades can be a great way of seamlessly moving from one sample to another and is a good way to ensure no pops or clicks when a new sample comes in.
Crossfades are used in many modern productions and are essential for any music producer.
In this FL Studio tutorial, we will look at the two main ways you can create crossfades.
Firstly we will look at how you can use the crossfade declicking mode to create crossfades automatically. After that, we will look at creating fades using volume automation clips.
Using Declicking Mode
When wanting to crossfade between two different audio clips in FL Studio, you can use the Declicking mode feature in the sampler window.
To open the sampler window, simply click on the small waveform icon at the top left of the audio clip in the playlist view. Within the sampler window, you will see a section titled ‘Content,’ and within this section, you will see an option called ‘Declicking mode.’
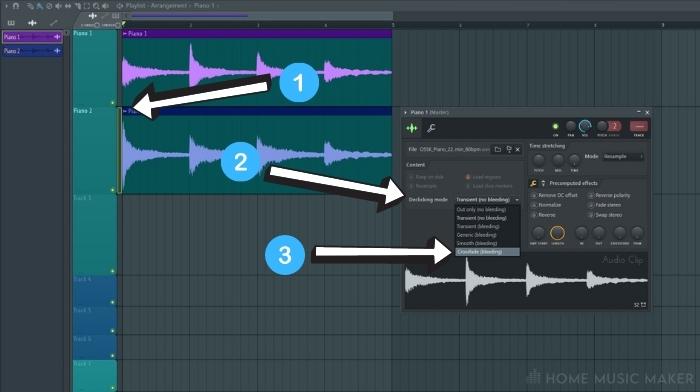
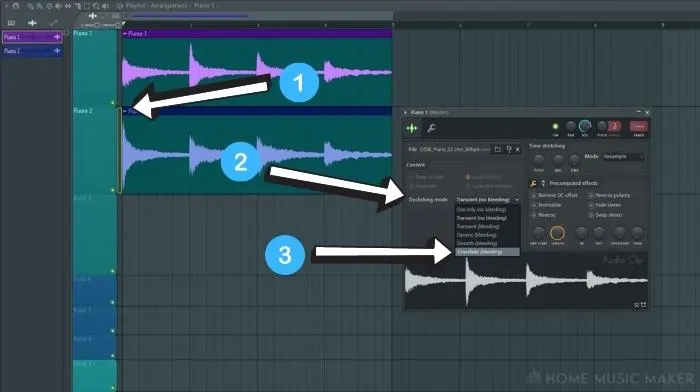
When you click on the drop-down menu to the left, you will see that you have a range of different options. At the bottom of this list, you will see a crossfade option.
Once you have selected the crossfade option, anytime you cut the sample, the volume will automatically fade out or in depending on where the cut is.
Apply this crossfade mode to both samples you are looking to crossfade between. When you put them together, you will hear that they seamlessly blend into each other.
Using Volume Automation
We will now look at a method that allows you to have more control over the cross fade parameters, but that takes slightly longer to set up.
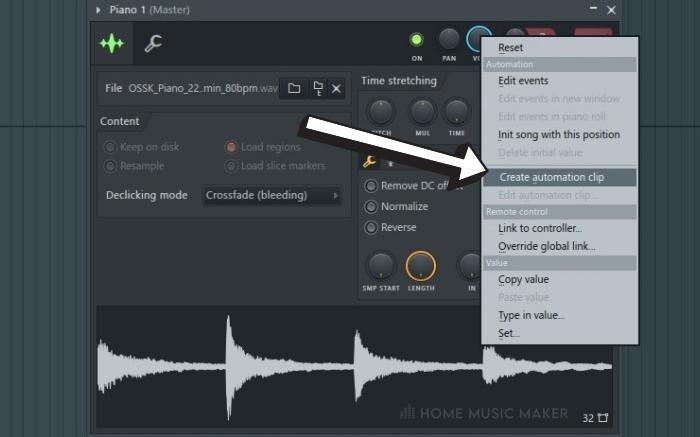
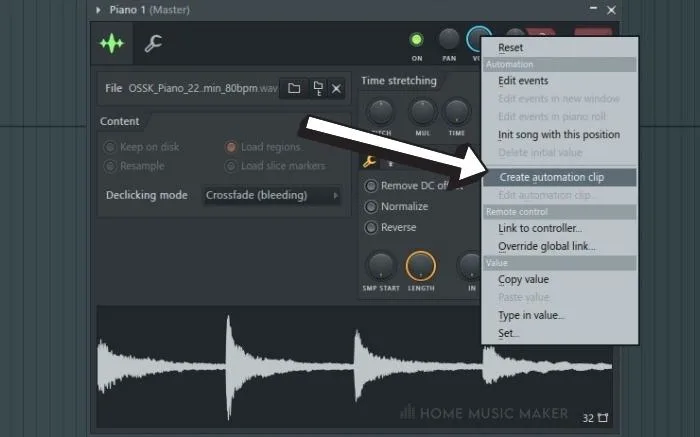
To begin with, you will want to create a volume automation clip of the two samples you want to crossfade between. You can do this with either the volume knob in the sampler or with the mixer track fader.
Right-click on the volume parameter of choice and select the ‘Create automation clip’ option. You will notice that this creates a new automation clip of that parameter in the playlist view.
Now that you have a volume automation clip of each, you can create the volume curves for each one so that they switch over simultaneously. Right-click to create new points in the automation and left-click drag to move their location.
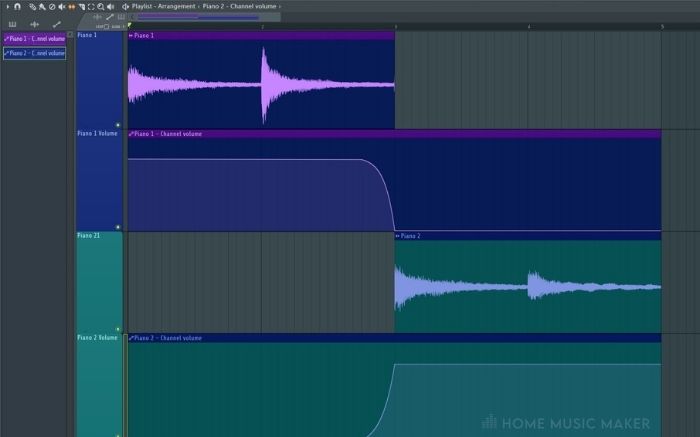
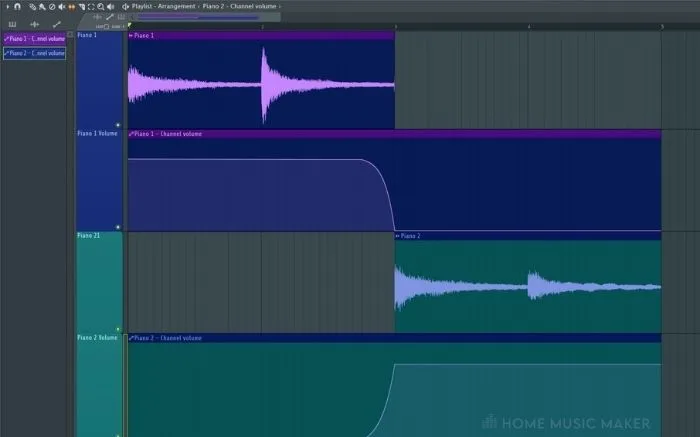
Unlike the previous method, you can change how long the crossfade lasts with more control using this technique.
Related Questions
Why Is Crossfading so Important?
Crossfading is a great way to bring in new elements to a song or to create a smooth transition from one to another seamlessly. If you were not to use crossfading, some aspects of your music production might appear too suddenly.
Why Are There Different Declicking Modes?
In FL Studio, the declicking modes refer to different use cases. For example, the crossfade mode is designed to be used primarily as a long fade to allow elements to come in slowly.
Transient mode is suitable if you are using a drum sample or something with a lot of transient attack at the start. This ensures this stays intact at the beginning of the sample.
Should I Always Use Crossfading?
There are times when you may not feel like you need to use crossfading, and this is completely fine. Some elements may not need to come in gently, and some may benefit from coming in suddenly rather than slowly.
It is best to experiment with different effects to begin with, and after a while, you will know which sounds might require a crossfade and which will sound fine without one.
Are There Any Downsides to Crossfading Using Declicking Mode?
You may find that using crossfades takes away some energy from a sample if it comes in quickly. You may even find that the crossfade declicking mode is too short for what you are looking for.
In this case, I would recommend using the volume automation method to achieve your crossfade instead. Using this method allows you to control how long the crossfade takes.
Why Does My Crossfade Not Sound Right?
You may have issues with the crossfade if you have not got the correct duration, as this will either mean that your sound takes too long to come in or come in too quickly.
To remedy this, you either try using the volume automation technique or a different parameter for the automation, such as a filter sweep or reverb effect wet/dry.
Should You Fade Your Entire Song at The Start and End?
Fading a song in and out at the start is usually a good idea, as it ensures that there are no pops or clicks, which can appear as an artifact in some exports.
It is best practice to do this at the very end of your song’s production cycle, once you have mixed and mastered it.
Why Should I Use the Automation Clip Technique to Crossfade?
Using the automation clip technique is a great way to have the most control over how your fade sounds.
With automation clips, you can choose how long it lasts and the intensity at any given point, allowing users to create their volume curves.
Final Words
You now know how to create crossfades with two different methods in Fruity Loops Studio. Knowing how to do this is a great way to give your productions a more polished sound. It will eliminate unwanted clips and pops and create nicer transitions when bringing in a new audio file.
Using the automation clip method, you can also get creative with the parameter you choose to crossfade with. For example, you could try filter sweeps or reverb wet/dry for some more interesting results!