You can loop in Ableton Live using the Session View to load audio files into the Clip Slots located on a track. You can also set the Loop Start and End Points in Arrangement View to a specific section and activate the loop Switch to loop a set number of bars.
If you are unable to Loop in Ableton Live, the following article will give you step-by-step instructions, plus more!
What You Will Need
- Ableton Live Installed
- Monitors/Headphones

Simple Looping In Ableton’s Arrangment View
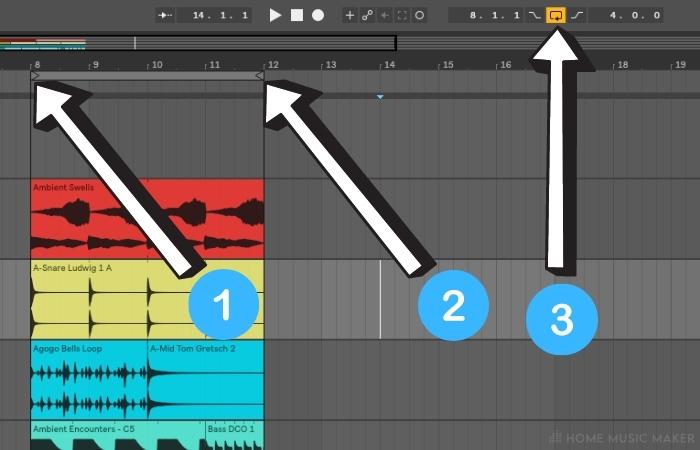
To loop a section of a track or even an individual sample, you need to set the Loop Start (1) and End Points (2). These markers can be dragged as long or as short as you want the loop to last.
Once the loop points are set, select the Loop Switch (3) along the top menu bar.
Then, hit the play button. This will now loop every channel within the loop markers.
If you’d just like to hear a single channel, simply Solo that channel, or mute the channels you don’t want to hear.

Looping In The Session View
Step 1 – Choose Session View
Open a new live set in the Session View by clicking the button that has three vertical Lines located in the top right-hand corner.

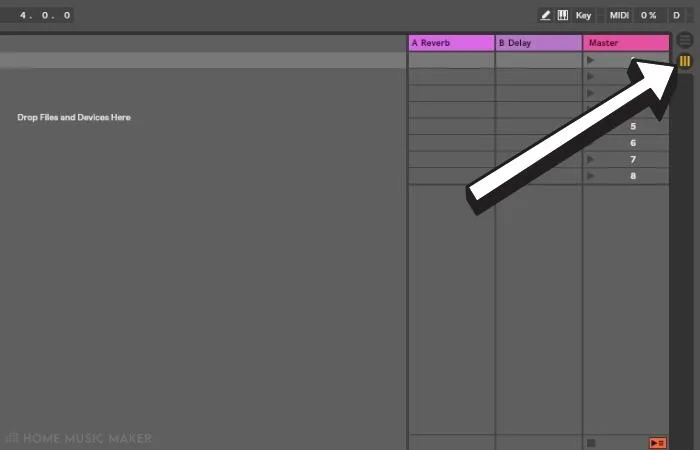
Once the Session View is open, Clip Slots will be accessible to which you can add samples.
Step 2 – Create An Audio Track
Create an audio track by right-clicking the Mixer Drop Area (the area in the center of the arrangement view) and selecting Insert Audio Track from the drop-down menu.
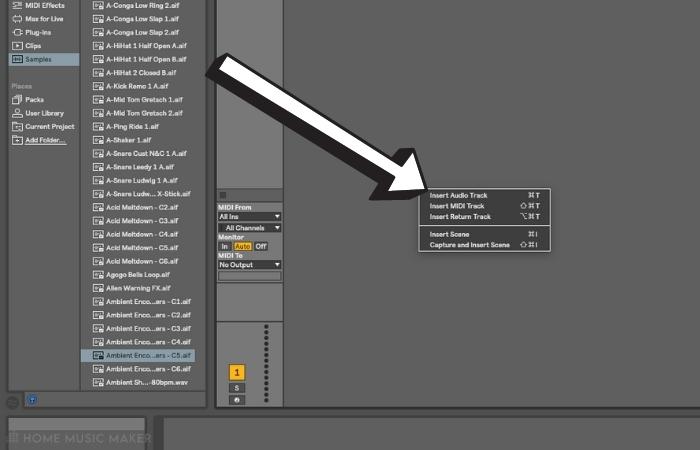
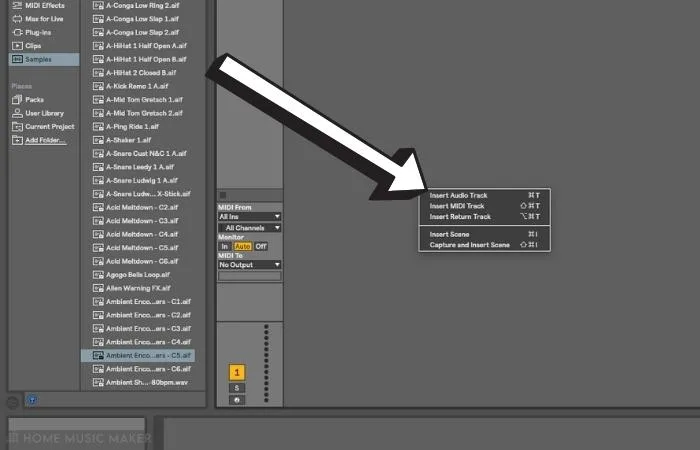
I would suggest creating four audio tracks for this tutorial to demonstrate the functions of the Clip Slots. However, you can create as many as you wish.
Step 3 – Loading Samples Into Clip Slots For Looping
You can add the files you want to the clip slots, as mentioned above, but you can also access samples from the Browser Sidebar to the left of the window.

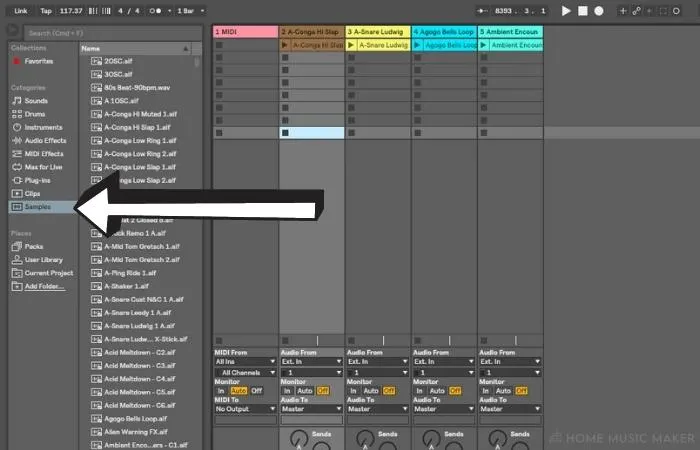
You can load these samples into each Clip Slot located on every track.
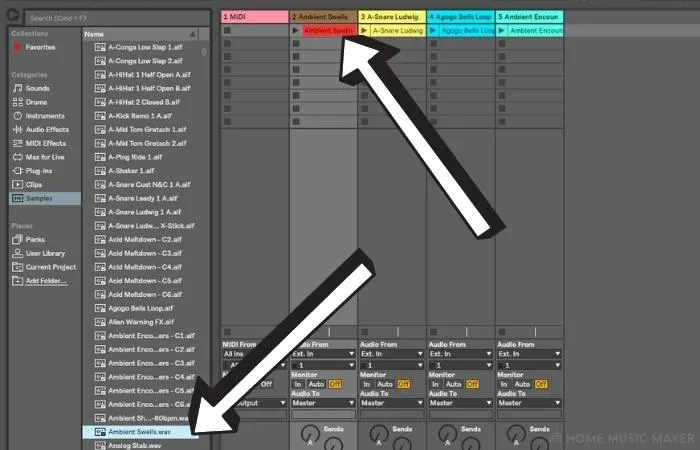
Clips can be added to audio tracks as well as midi tracks. Though, adding samples to a midi track applies a different function (a particular sound triggered by midi from a piano roll).
Audio track clips are solely audio files that are looped to create an arrangement.
You can audition the samples by clicking each sample once. Once you have found a sample you like, you can drag the file to an audio track into the desired Clip Slot. The clip can be triggered by the play button to the left of the Clip Slot.

Step 5 – Using Ableton Clip View
You can add numerous samples to these slots. They will be warped to the grid to have matching tempos and looped. The Warp (1) and loop (2) options need to be selected in the Clip View of each clip (this should be chosen automatically in most cases).
You can access the Clip View by double-clicking the clip itself (3). After doing so, the Clip view will appear below.
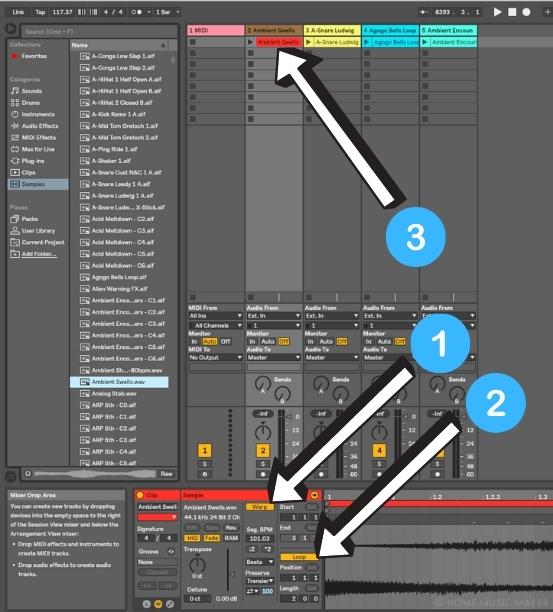

You can also edit the loop length in the Clip View by adjusting the markers on the left and right of the waveform. This can allow you to create something original and more cohesive out of your chosen clips and adjust the length of each of them appropriately.


Step 6 – Arranging Clips In Session View
You can add and combine as many samples as you wish, adjust the length, and start and stop the clips at any time.
This will allow you to develop the structure of a song to your liking to create something original from the source material.
Suppose you find two samples in a different key. In that case, you can transpose the samples to match the key. This is done by transposing the clip by adjusting the Transpose option in the clip view.

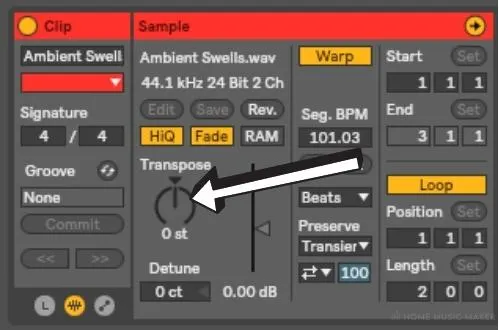
This will change the pitch of the clip by semitones.
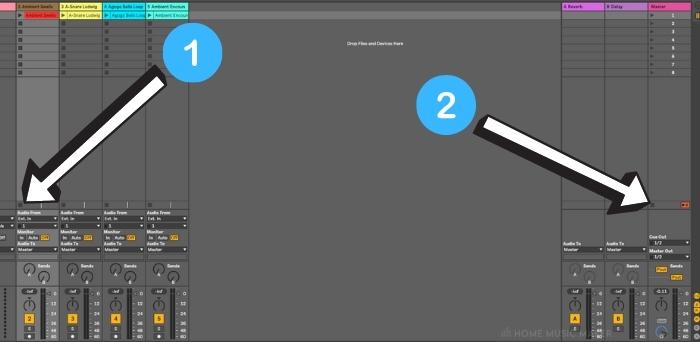
To stop each clip, click the square below the Clip Slots, just above the channel input (1). To stop ALL the clips from playing, click the box to the bottom right of the columns below the Clip Slots (2) and just above the Master Channel’s input.

Step 7 – Clip Order
The clips are organized so each will play simultaneously when on different tracks.
However, clips on the same track can only be played one at a time.
You can trigger one row of clips called a scene.
Activating a Scene will trigger however many clips you have loaded into each Clip Slot within a row.


You can trigger and stop whatever tracks you wish to create the structure and arrangement you’re looking for within these parameters.
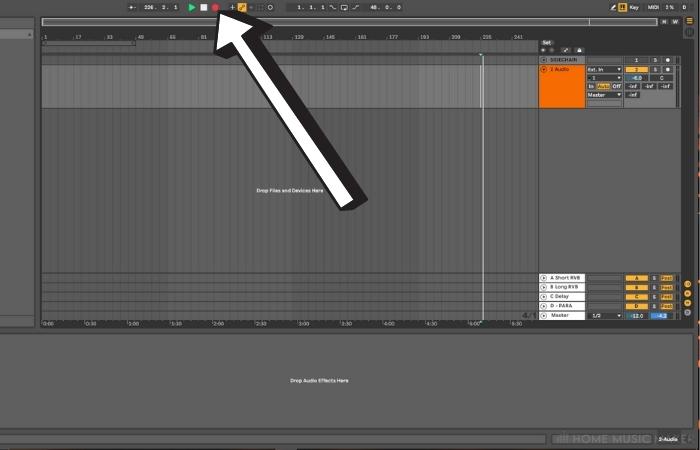
Step 8 – Recording Loop To Arrangement View
Once you’ve found your preferred clips, determined when to trigger them, and organized a basis for a song. You can arm record each track and click the Arrangement Record Button.
It will record the performance you’ve created out of the clips triggered from the Clip Slots on each track.
Record arm each track by pressing the lowest button on the track (hold command/Ctrl for each one you click to select record arm for multiple tracks).
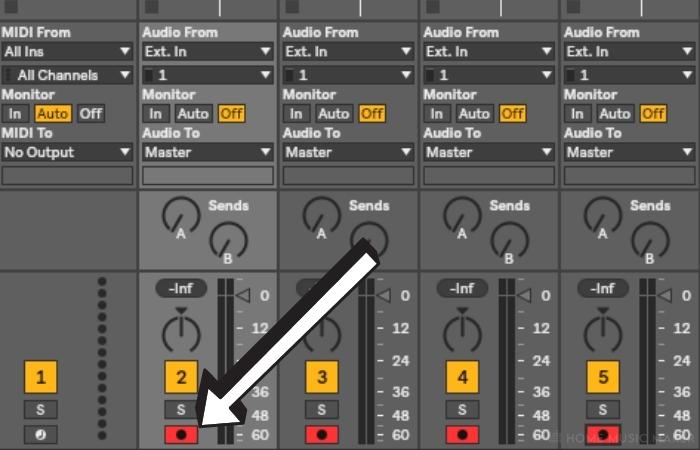
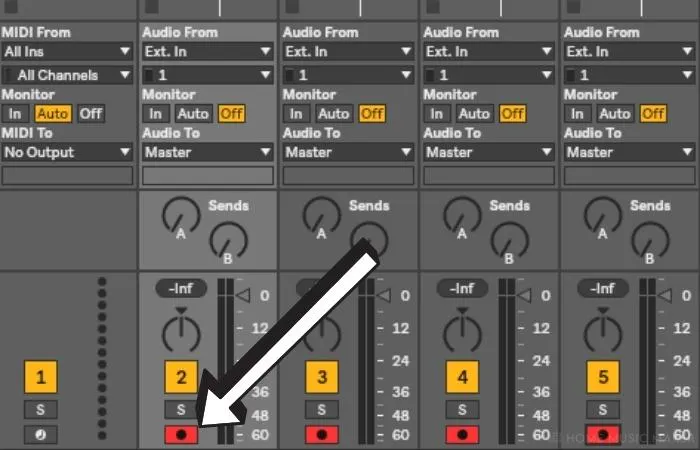
Press the Arrangement View Record Button to record your performance to the Arrangement View.
Once complete, you can follow the Looping in Arrangment View instructions above to loop that recording.

Related Questions
What can Ableton Looper be used for?
Live’s Looper can be added to any track in Ableton Live as an Audio Effect. The Looper can be found in the Audio Effects category in the Browser Sidebar and will record a loop from the audio from that track when the record button is activated.
Can I loop an external instrument in Ableton Live?
You can loop an external instrument by enabling the record button on a particular track and selecting the circle to the left of any Clip Slot on that track to record. You can end the recording by pressing the Clip Stop Button. This will create a loop in that Clip Slot.
How do I make a MIDI loop in Ableton?
You can create a MIDI loop in Ableton by adding an instrument to a MIDI channel. Enable the record button on the track and press the circle record button to the left of a Clip Slot. You can then trigger the instrument with a midi controller and record the performance. You can then end the recording by selecting the clip’s play button or the Clip Stop Button. This will create a MIDI clip on the selected Clip Slot.
What is fixed length recording?
Fixed length recording can be applied with Ableton Push to set a select number of bars while recording a loop on a Clip Slot. This can also be applied using the Looper and setting the number of bars before activating the record button on the Looper. The record length is available as a drop-down menu on the Looper audio effect, where you can select the number of bars.