Snapping to grid is a super handy tool for your workflow in that it allows you to swap grid sizes when working in different beat/time signatures. To change your grid window selection, look for the drop-down arrow usually labeled “none” in your top toolbar.
Time Is Like A River…
It ebbs and flows, just like your creative brain. In FL Studio, you have total control over your track’s timing, individual notes, and creative vision, which is further assisted by editing your grid.
In the past, I’ve worked on a track and have become frustrated by the lack of space to put my selected notes or samples in and keep them in time.
Perhaps you’ve experienced something similar or tried to insert a pattern, and it keeps staying out of time?
Understanding the snap-to-grid tool is a necessity to address this.
Read on for your complete guide.
How To Snap MIDI Notes To Grid In FL Studio
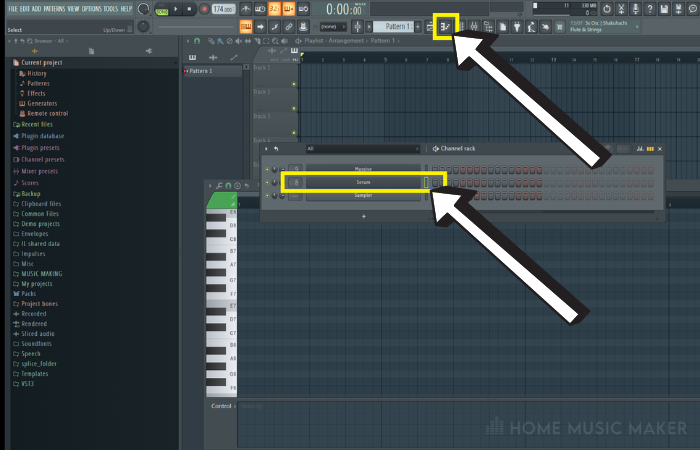
Step 1 – Piano Roll
First, select a suitable VST pattern that you will put notes into. Ensure the desired VST is clicked and showing green as shown below in the step sequencer view.
Locate the above icon on your toolbar and left-click to open (Hotkey shortcut F7).

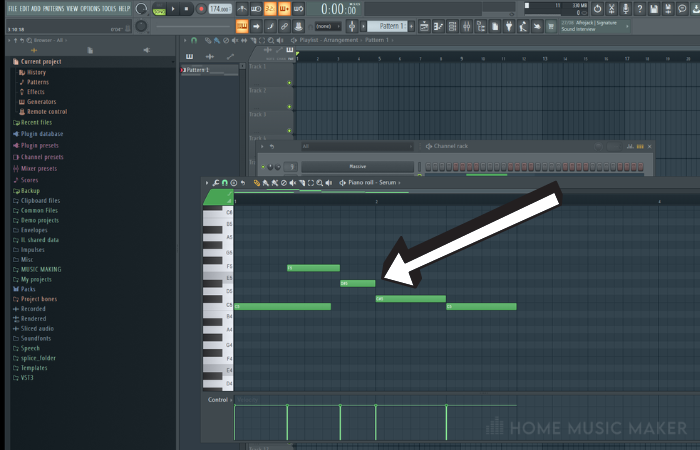
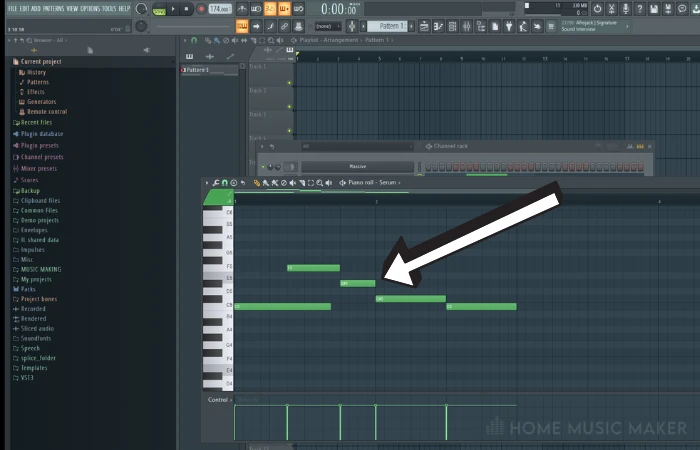
Step 2 – Notes
Input some notes into your piano roll that are aligned with the current grid lines displayed.
Step 3 – Grid change
While still in the piano roll, look for the upside-down magnet (or horseshoe-shaped) icon. This is your snap function button.
Left-click it to display a drop-down of your notes’ different time and step settings.
Notice how after changing the option to bar, the gridlines behind my notes are no longer there.
See what happens when I change to ⅓ beat…
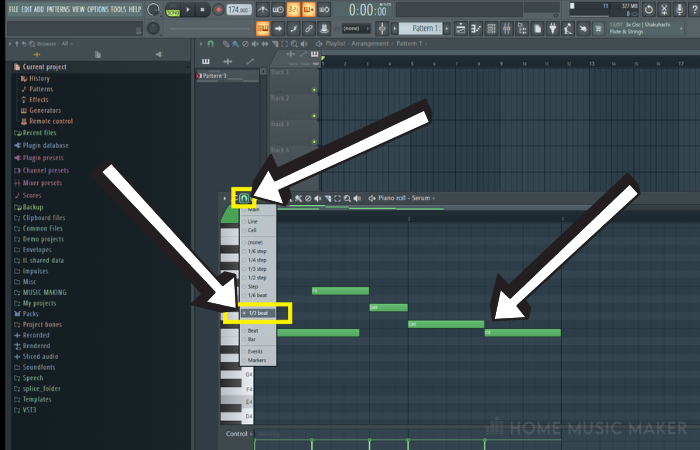
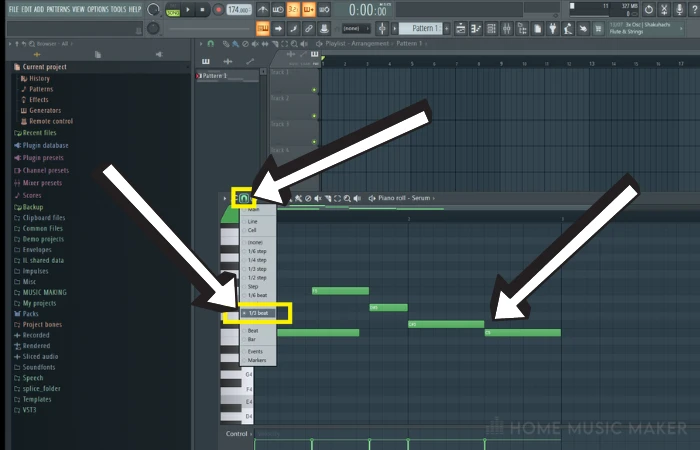
What we are adjusting is the display of time signatures between each beat or bar, giving us more depth to work with in terms of rhythm.
The initial notes I pasted appear out of place here because they were put in at different timing of ¼ beat.
Whatever snap setting you choose, the MIDI notes you insert will snap to each of the gridlines when you move them.
How Do I Turn On (And Off) Snap To Grid Tool In FL Studio?
The snap-to-grid function doesn’t just serve the MIDI notes in your piano roll.
It is also used in your main playlist, as shown below, allowing you even more freedom of choice and movement for all of your audio.
When you select none, note how it’s displayed in the top toolbar for you too. None will still show gridlines at ¼ beat by default, but remember, none means off in this case, as there is now no snap time setting applied.
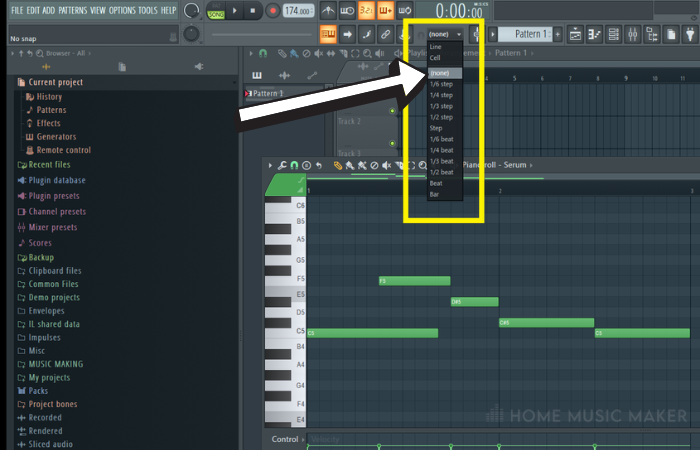
All sounds can shift around freely, whether keys, a selected pattern, automation clip, loop, or audio clips. :
Related Questions
Can You Quantize Notes In FL Studio?
There is a nifty quantize tool in FL Studio. In your piano roll, highlight your chosen notes and hit ALT + Q (Windows) OPTIONS + Q (Mac) on your keyboard. This will bring up the quantize window where in my experience, the only thing to adjust would be the start time knob. Turning this up to 100% will sync the start of each note up to the grid. This is especially helpful if you’ve played a MIDI keyboard and recorded notes!
How Do You Change Grid Colour In FL Studio 20?
In your playlist/main window, locate the drop-down arrow at the top left of its screen. Left-click > View > Grid Colour. Even easier, you can hit CTRL + ALT + G (Windows) CMD + OPTION + G (Mac). You now have a whole selection wheel of color palettes to choose from and spice up your DAW!
FL Studio Shortcuts – Some Hotkeys You Probably Didn’t know
Export MP3 File:
CTRL + SHIFT + R (Windows) CMD + SHIFT + R (Mac)
Save New Version:
CTRL + SHIFT + S (Windows) CMD + SHIFT + S (Mac)
Close All Windows
F12
Next Empty Nameable Pattern
F4
Select Individual Clips
CTRL + Left-click (Windows) CMD + Left-click (Mac)
Link Selected Channels To Selected MixerTrack
CTRL + L (Windows) CMD + L (Mac)
For more guides, check out this next article on how to quantize in FL Studio in 4 simple steps.