FL Studio has the ability to use your computer keyboard as a piano, and it acts similarly to a MIDI keyboard. If you try to play a note on your keyboard and it isn’t working, the piano typing keyboard function can be enabled by pressing CTRL+T (CMD+T on Mac).
Same, But Different…
If you haven’t yet splashed out and bought a MIDI keyboard for your DAW (Digital Audio Workstation), your computer keyboard will suffice in the meantime.
I began using only what I had, so there’s no reason you can’t do the same!
It can be calibrated to suit your needs, with the benefit of having hotkeys at your fingertips, not to mention saving space on your desk.
If you have trouble with your keyboard not working or triggering sound, read on, and I’ll explain why this happens and how you can fix it.
How Do You Turn On The Keyboard Piano In FL Studio?
Method 1
On your computer keyboard, hit CTRL+T (CMD+T on Mac) to enable the piano keyboard function.
Method 2
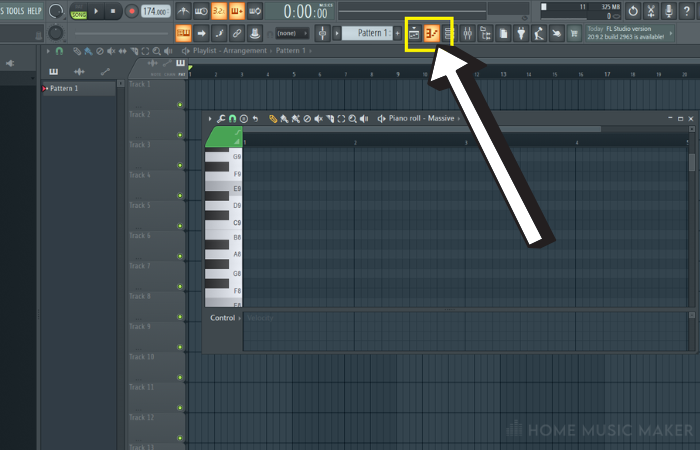
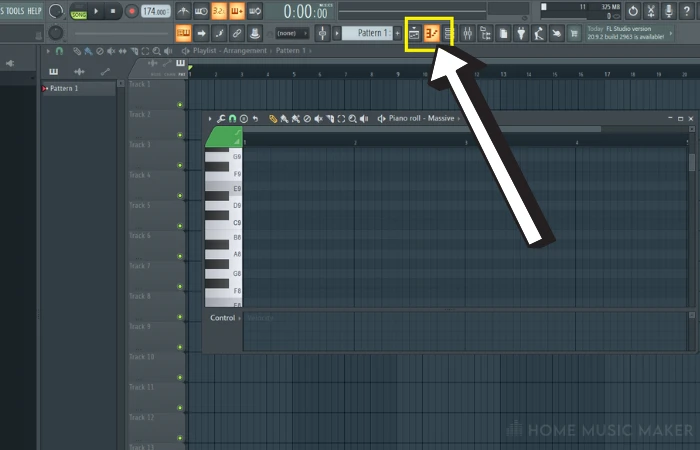
Look for the below icon and click it, so it lights up orange. You will see it displayed in your hint bar at the top left (Typing keyboard to piano keyboard).
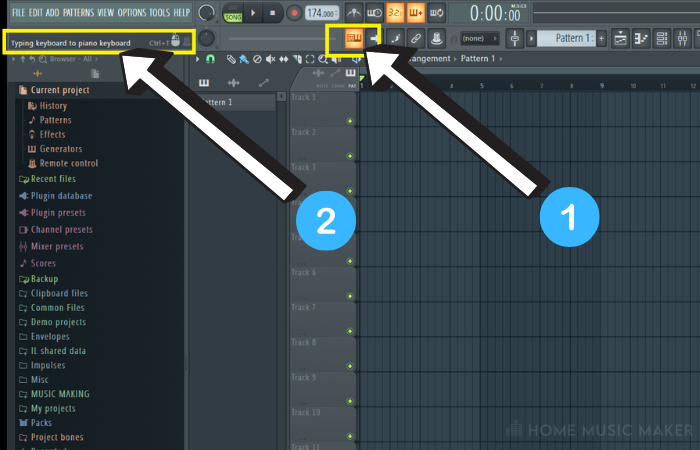

Once it is turned on, you can use your keyboard much the same way as if it were a MIDI keyboard.
As you hit different keys, it should light up the notes on the left side in the Piano roll view.
Note: Enabling this function may reduce some of your hotkey options, but in my experience, it has not left me missing any of these, so mine is left on.
Why Is My Keyboard Piano Not Working?
Computers are like brilliant children; they can do the thing, but sometimes the process gets muddled.
Here are some options to try if your keyboard piano doesn’t register:
Method 1 – Typing Keyboard Priority
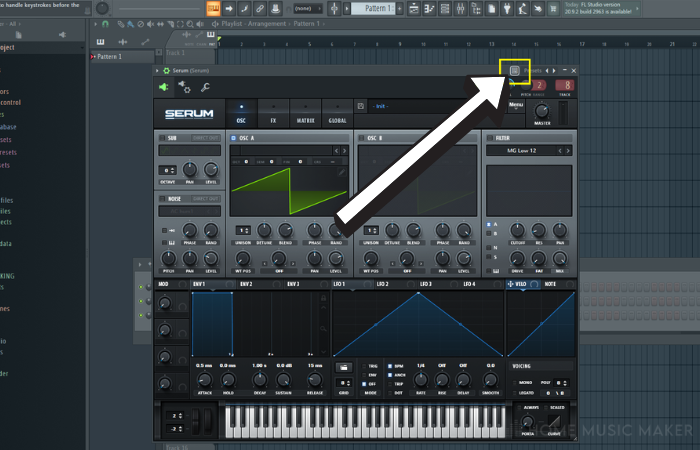
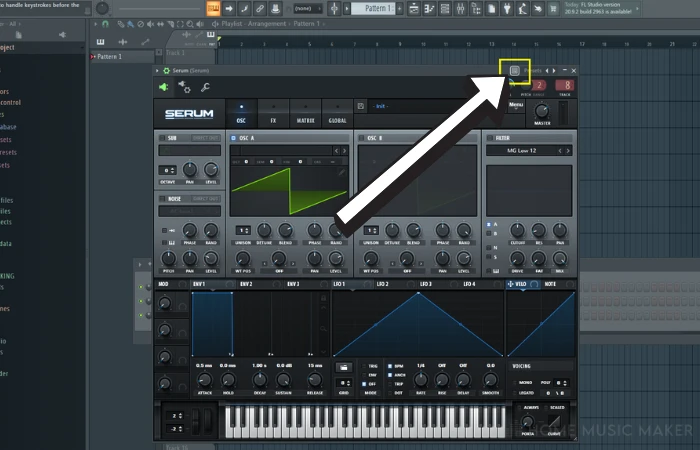
This function determines whether the shortcuts on your keyboard prioritize over playing notes when a plugin is used.
If enabled (lit up orange), the plugin will take the focus first, and your keyboard should work. Deselected will be the opposite.
Method 2 – Wrapper Keep Focus
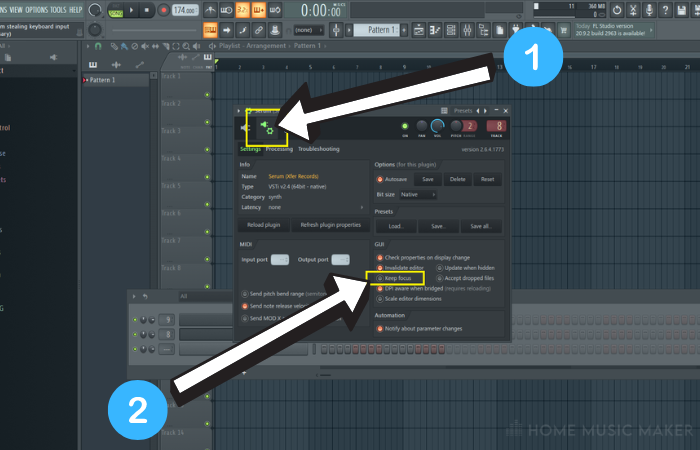
In your VST/Plugin, go to the setting pictured below and check ‘Keep Focus.’
As the name suggests, this will tell the plugin to override other settings and focus the keyboard strokes to it.

Other Reasons You Might Have Trouble:
- Bridged Plugins – If you run 32bit versions of a plugin and have a 64bit version of FL Studio, this can sometimes affect the keyboard.
- Plugin Specific – Certain 3rd plugins may have a bug/error where they simply don’t link to your computer keyboard.
- Detached – This can sometimes confuse the FL Studio to keyboard relationship – try reattaching your plugin.
How Do I Turn My Keyboard Into A Piano?
This may take a while to get used to, but your keyboard is laid out to cover two whole octaves (including sharp notes) and can be used to create chord progressions.
Step 1 – Open Up Piano Roll
Select the Piano roll icon or hit F7.
Step 2 – Create A Progression
In this example, I play triads in the key of C, using the computer keyboard buttons Z, C, and B to make up my first chord.
Then so on, moving up the key.
This can be applied to any keys over all the letters + numbers on your keyboard and then either drawn into your piano roll or recorded into MIDI.

Try it out!
Step 3 – Record
To get your keyboard chords recorded, right-click the record button and ensure Notes is ticked.
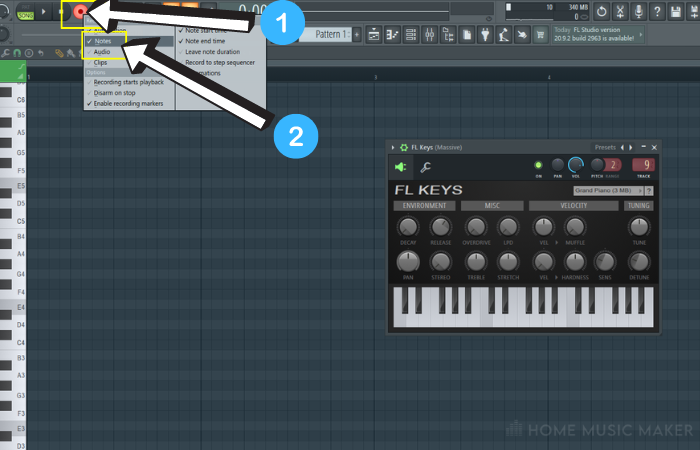
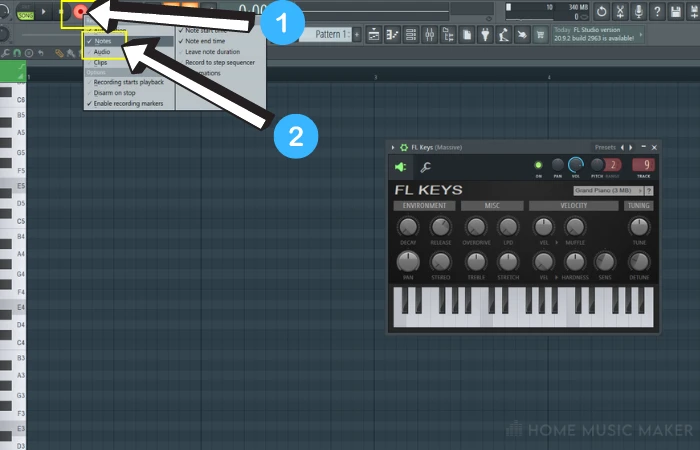
Then simply hit the red record button, press the spacebar for the count down and begin playing your notes.
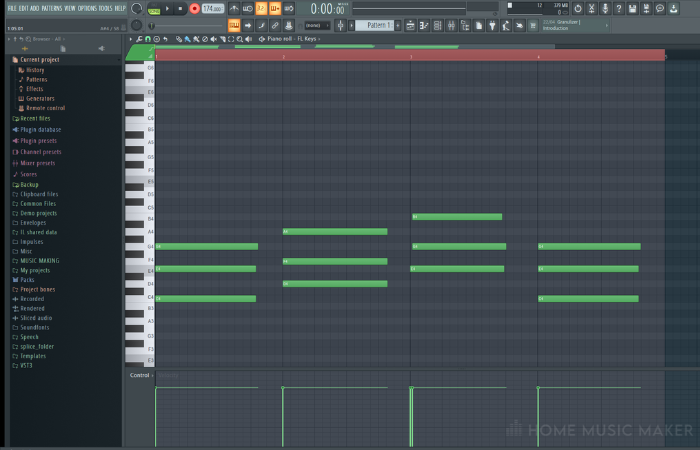
Once you’re done, your MIDI notes will be displayed on the piano roll.
From here, you can edit manually or delete and re-record as you like.
How Can I Use FL Studio Without A Keyboard?
Aside from turning your computer keyboard into a digital piano, there are other ways to use on-screen tools to create MIDI notes and chords in your project.
You can use either the Pencil Tool or Brush tool to draw your MIDI notes directly into the Piano roll manually.
Secondly, there’s a neat trick to paste full chords directly using the Stamp function.
Method 1 – Pencil Tool
Step 1 – Insert Plugin And Open Piano roll
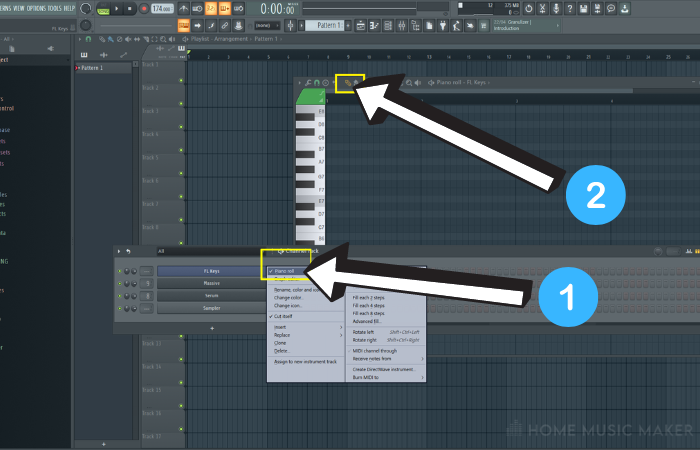
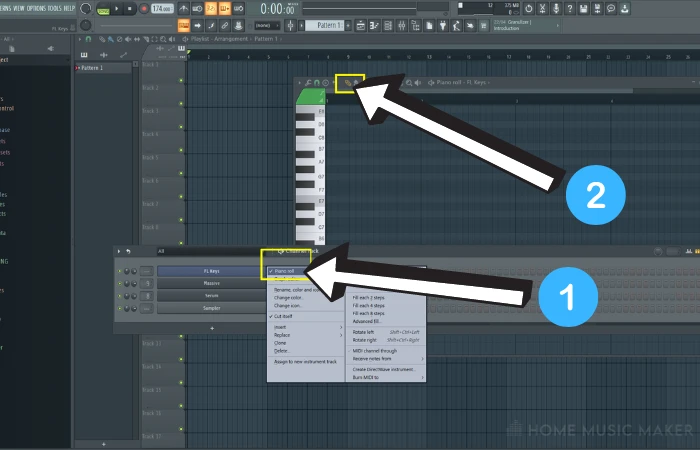
Firstly, insert a plugin such as FL Keys into your channel rack. Right-click it and select its Piano Roll.
Along the piano roll toolbar, make sure the Pencil Tool icon is highlighted (this is usually the default selection).
Step 2 – Place Notes Manually
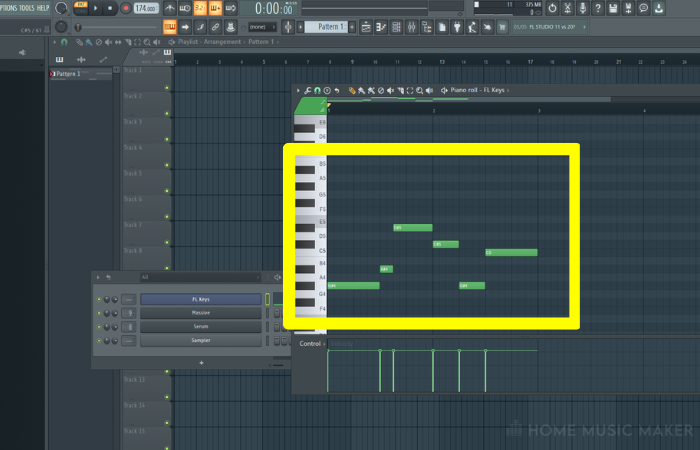
Left-click to place single MIDI notes anywhere in the piano roll.
With the pencil tool, each green MIDI note can be shortened or lengthened to your liking. Just hover your mouse cursor over each end, and a drag arrow will appear.
To remove or delete them, simply right-click and drag over each one.

Note: If you left-click hold + drag, it will move your MIDI note around the piano roll while remaining at the size/length you set.
Method 2 – Paint Brush Tool
Repeat Step 1 above this time; ensure the Paint Brush Tool icon (next to the pencil) is highlighted.
The brush tool is similar to a paintbrush. Once selected, you can left-click and drag to paint your notes across and up and down – this can be handy if you want to repeat multiple notes.
Remember, like the pencil tool, it will place MIDI notes at the same size each time, so you may need to set this first.
Method 3 – Stamp Tool
Step 1 – Stamp Selection
Navigate to the drop-down arrow in the piano roll window.
From here, hover over the stamp to access the various melodic chords or even melodic scales.

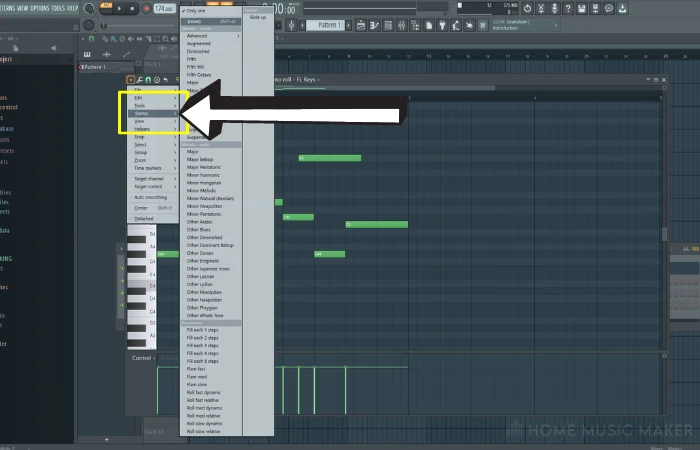
Step – 2 Paste Your Chords
Pick a chord. I’ve gone with Major in this case.
Once selected, you can click a base note, which will paste the full chord into MIDI!
Note: to paste the same way again. You can either re-select the melodic chord or copy the notes by pressing Shift+E, then left-click dragging over the notes, followed by CTRL+C (CMD+D on Mac) to copy them and CTRL+V (CMD+V on Mac) to paste.
It seems lengthy, but learning little keyboard tricks like this will speed up your workflow immensely.
Step 3 – Try Them Out!
Hit the spacebar to see what you’ve created.
You can remove unwanted MIDI notes to play a part of a chord or choose a new one at any time.
Related Questions
My MIDI Keyboard Isn’t Working?
Firstly, unplug and re-plug your MIDI keyboard. Then go to Options > MIDI Settings > Enable Send Master Sync and double click your MIDI device in the Input section.
How Come Things Aren’t Working With Bridged Plugins?
This is due to compatibility with newer versions of FL Studio (10.1 and above). This is rarely a problem as the developers have updated the software, but you may find issues with older versions.
What Should You Do If A Connected Device Isn’t Working?
Your first step should always be to disconnect and reconnect the device. Failing that, you can try closing FL Studio and opening again, switching USB ports, or a complete system restart.
Where Can I Find A List Of Keyboard Shortcuts For FL Studio?
Go to Help > Help Index. This will take you to the Image-Line website, where you can view every hotkey!
Check out the following article if you have MIDI recording problems in FL Studio.